Your Cart is Empty


The sewn tubular bind-off is a beautiful way to finish the ribbing on toe-up socks, top-down hats and ribbed sweater neckbands. Although it's worked differently the end result is a perfect match for a tubular cast-on. Just like the cast-on the tubular bind-off is stretchy, polished and gives the effect of ribbing running seamless around the edge of your piece.
It's the perfect bind-off method for 1x1 rib, and can also be used for 2x2 rib and to finish brioche stitch projects.
The tubular bind-off begins with set-up rows worked in double knitting, which separates the knit and purl stitches into two layers. These layers are then grafted together to complete the bind-off.

Blunt darning needle
Spare needle(s) in the same size or a slightly smaller size than the working needle.
If your project is worked in the round you'll need 1 spare circular needle.
If your project is worked flat you'll need either 2 spare dpns, or 2 spare circular needles (depending on the width of your piece).
2 or 4 set up rows can be worked. These set-up rows will create both sides of a tube at once using the double knitting technique. Each set-up row is the equivalent of half a row of regular ribbing.
How many set up rows to work is personal preference. 2 rows will be more subtle, while 4 creates a bouncier, more rounded edge. You might want to match the number of set up rows you worked on the cast-on.
Compensate for the length taken up by the set-up rounds and bind-off: Begin working the bind-off when there are 1 or 2 rows / rounds left in the pattern, so that your ribbing doesn't come out longer than the desired length.
Knitting flat
Work 2 or 4 rows as follows: knit the knit stitches and slip the purl stitches with the yarn in front.


Knitting in the round
Round 1: knit the knit stitches and slip the purl stitches with the yarn in front.


Round 2: slip the knit stitches with the yarn in back and purl the purl stitches.
Optional: repeat last 2 rounds.
The sewn tubular bind-off is completed by grafting the two sides of the tube, created by the set-up rows, together. If you have plenty of experience with basic grafting it is possible to do this without first re-arranging the stitches.
Don't worry if that sounds too challenging! The method shown in this tutorial makes the grafting much simpler by first rearranging the stitches so that all of the knit stitches (the front layer of the tube) are on one needle, and all of the purl stitches (the back layer) are on a second needle.
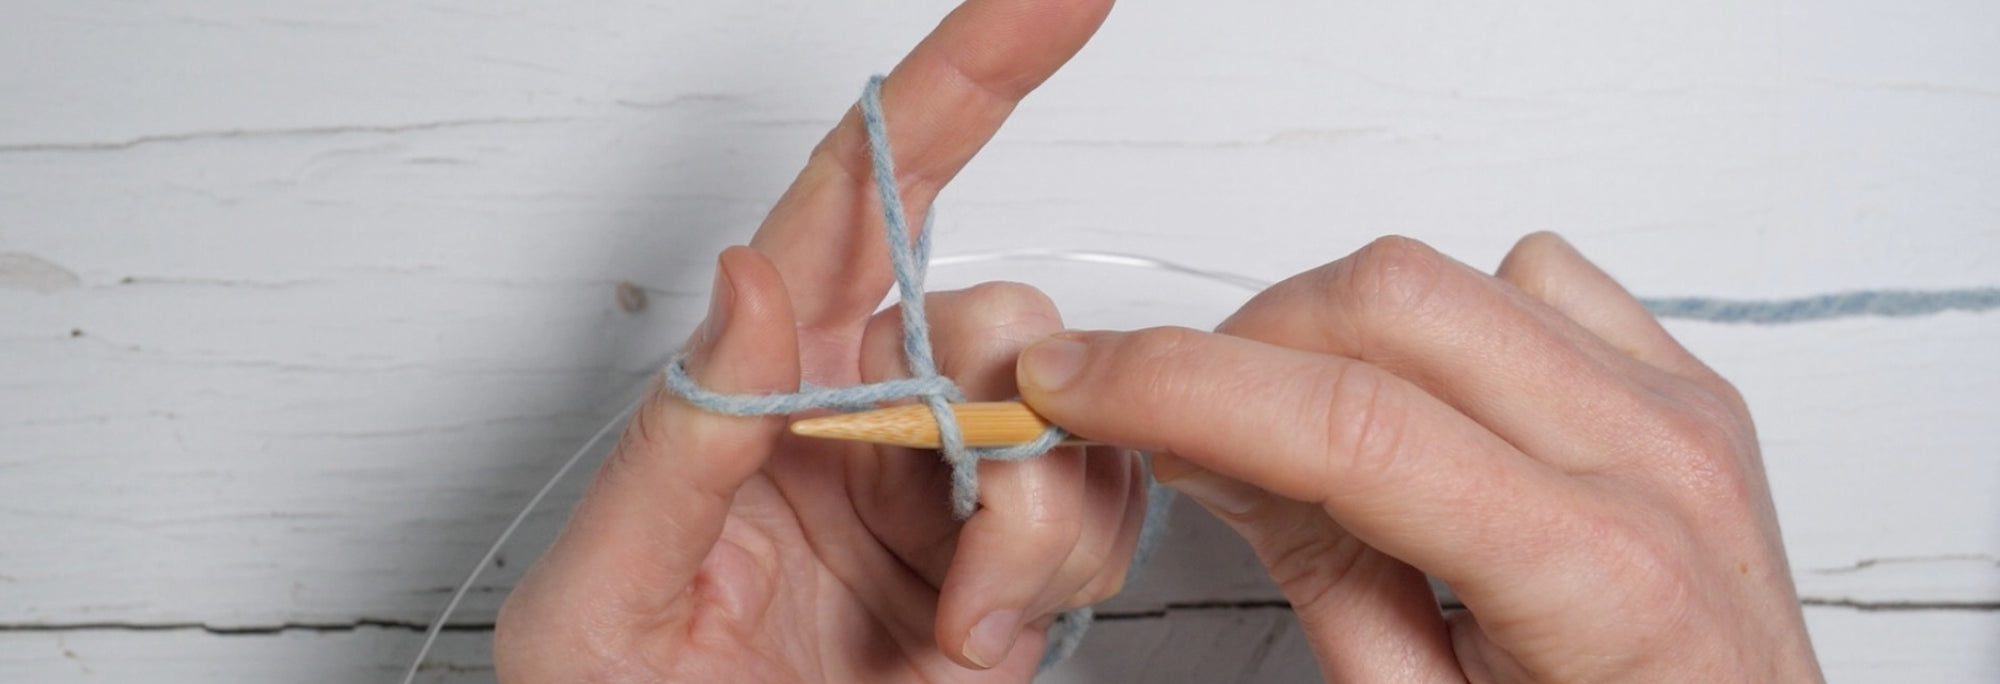
Slip the first stitch onto a spare needle. If you're working in the round this can be the other end of your working needle. 
Then slip the second stitch onto a different spare needle.

Hold the two needles in the right hand parallel. Continue to work your way across all of the stitches, slipping the knit stitches onto the front needle and the purl stitches onto the back. Slip all stitches purlwise.


Slide the stitches to the opposite ends of the needles, so that the live yarn is close to the needle tip.

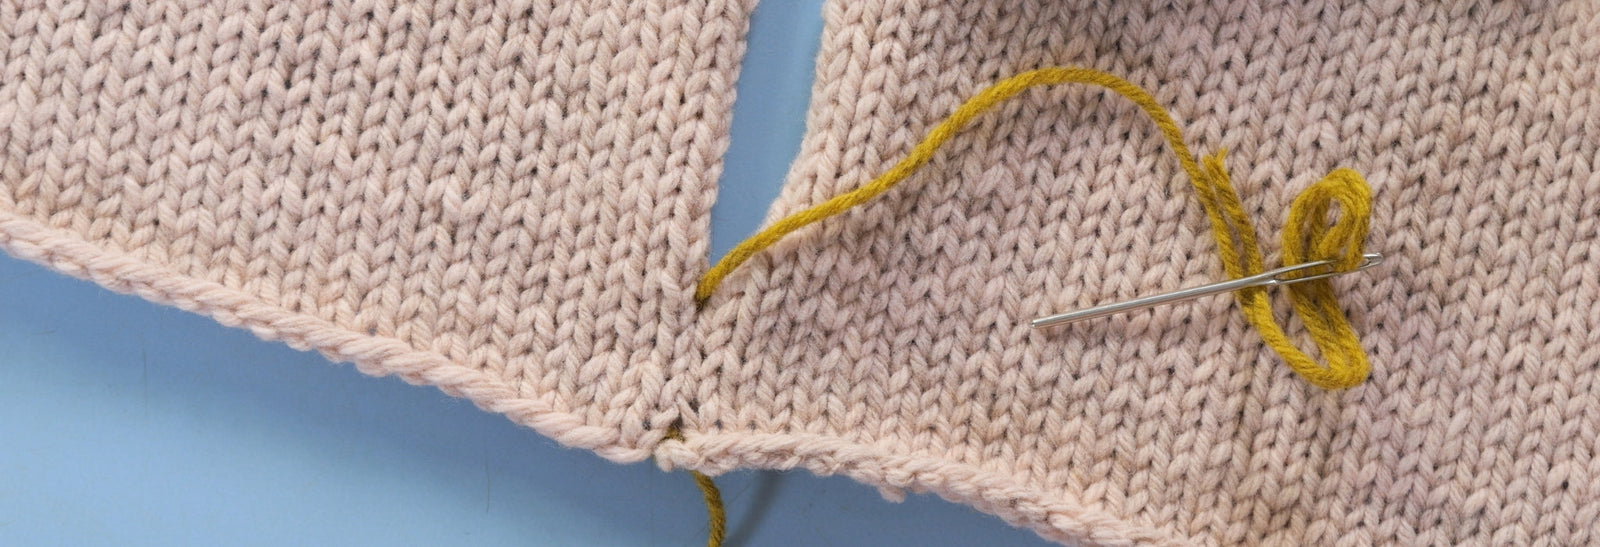
Cut the yarn leaving a tail about three times as long as the edge. Complete the bind-off by grafting the two sets of stitches together.

Thread a tapestry needle with the yarn and hold both needles in the left hand, with the needles parallel.

Step 1: Insert the tapestry needle through the first stitch on the front needle as if to purl. Pull the yarn through without removing the stitch from the front needle.


Step 2: Insert the tapestry needle through the first stitch on the back needle as if to knit. Pull the yarn through without removing the stitch from the front needle.


Step 3: Insert the tapestry needle through the first stitch on the front needle as if to knit. Remove this stitch from the front needle and pull the yarn through.


Step 4: Insert the tapestry needle through the first stitch on the front needle as if to purl. Pull the yarn through without removing the stitch from the front needle.


Step 5: Insert the tapestry needle through the first stitch on the back needle as if to purl. Remove this stitch from the back needle and pull the yarn through.


Step 6: Insert the tapestry needle through the first stitch on the back needle as if to knit. Pull the yarn through without removing the stitch from the front needle.


Repeat steps 3-6 until all stitches have been joined.
Tip: adjust the tension after every few stitches. The grafting effectively adds a row of stitches so aim to match the tension of the surrounding stitches rather than pulling them tightly together.
For 2×2 rib the stitches can be rearranged into 1×1 rib before working the set up rows. If you’ve already worked the tubular cast-on for 2×2 rib the process of rearranging the stitches is essentially the same.
Work the following row to rearrange the stitches and then continue to follow the set-up row instructions above:
*knit 1, slip the next stitch off the needle, purl into the next stitch making sure that the loose stitch is at the front, put the loose stitch back on the needle and knit it, purl 1, repeat from * to end.