Your Cart is Empty


Double pointed needles can be intimidating - how do you knit with so many needles? Knitting in the round on double pointed needles creates a seamless tube of fabric, and allows you to work small circumferences such as socks and mitts that don't have enough stitches to fit around a circular needle.

Working in the round on DPNs is similar to working on a circular needle, except that the stitches are distributed over 3 or 4 rigid needles rather than one flexible cable. You are still knitting with just two needles at a time - the other needles are simply holders for the stitches you haven’t worked yet.
Although your first time with double pointed needles (DPNs) might feel a bit like wrestling a porcupine, with a little practice you will be sailing along and impressing everyone with your skills. You might also find that, like many knitters, you prefer to work small circumferences using the magic loop technique.

Double pointed needles, as the name suggests, have points on both ends of the needle (rather than one, as for straight needles), and come in sets of 4 or 5. One needle is always empty as your right-hand needle, and the remaining 3 or 4 needles hold the worked stitches.

DPNs come in all sizes and materials, including wood, metal, plastic, and bamboo. They also come in a few different lengths. Short DPNs are 4–5” long, and won’t hold very many stitches each, so are best suited for small projects with few stitches. Medium length DPNs are 6–7” long, and are useful for most projects, including sleeves and slippers.

Long DPNs also exist, and are sometimes used for knitting whole colourwork sweaters without circular needles!
The steps are similar to knitting in the round on one circular.
Cast on all the stitches
Use your favourite cast on method to cast on all the stitches to one needle.


Distribute stitches
Working from the first cast-on stitch, slip about 1/3 or 1/4 of the stitches to one double pointed needle, being careful not to drop or twist the stitches.


Then take up another needle and slip more stitches to this second needle. Repeat for a third needle if necessary. Then leave the last 1/3 or 1/4 of the stitches on the cast on needle.


Some patterns include directions for how many stitches to arrange on each needle. For example, many sock patterns will distribute the heel stitches on one needle.
Whether you distribute your stitches over 3 or 4 stitches is personal preference. You might prefer to use 3 needles for smaller projects, and 4 for larger.
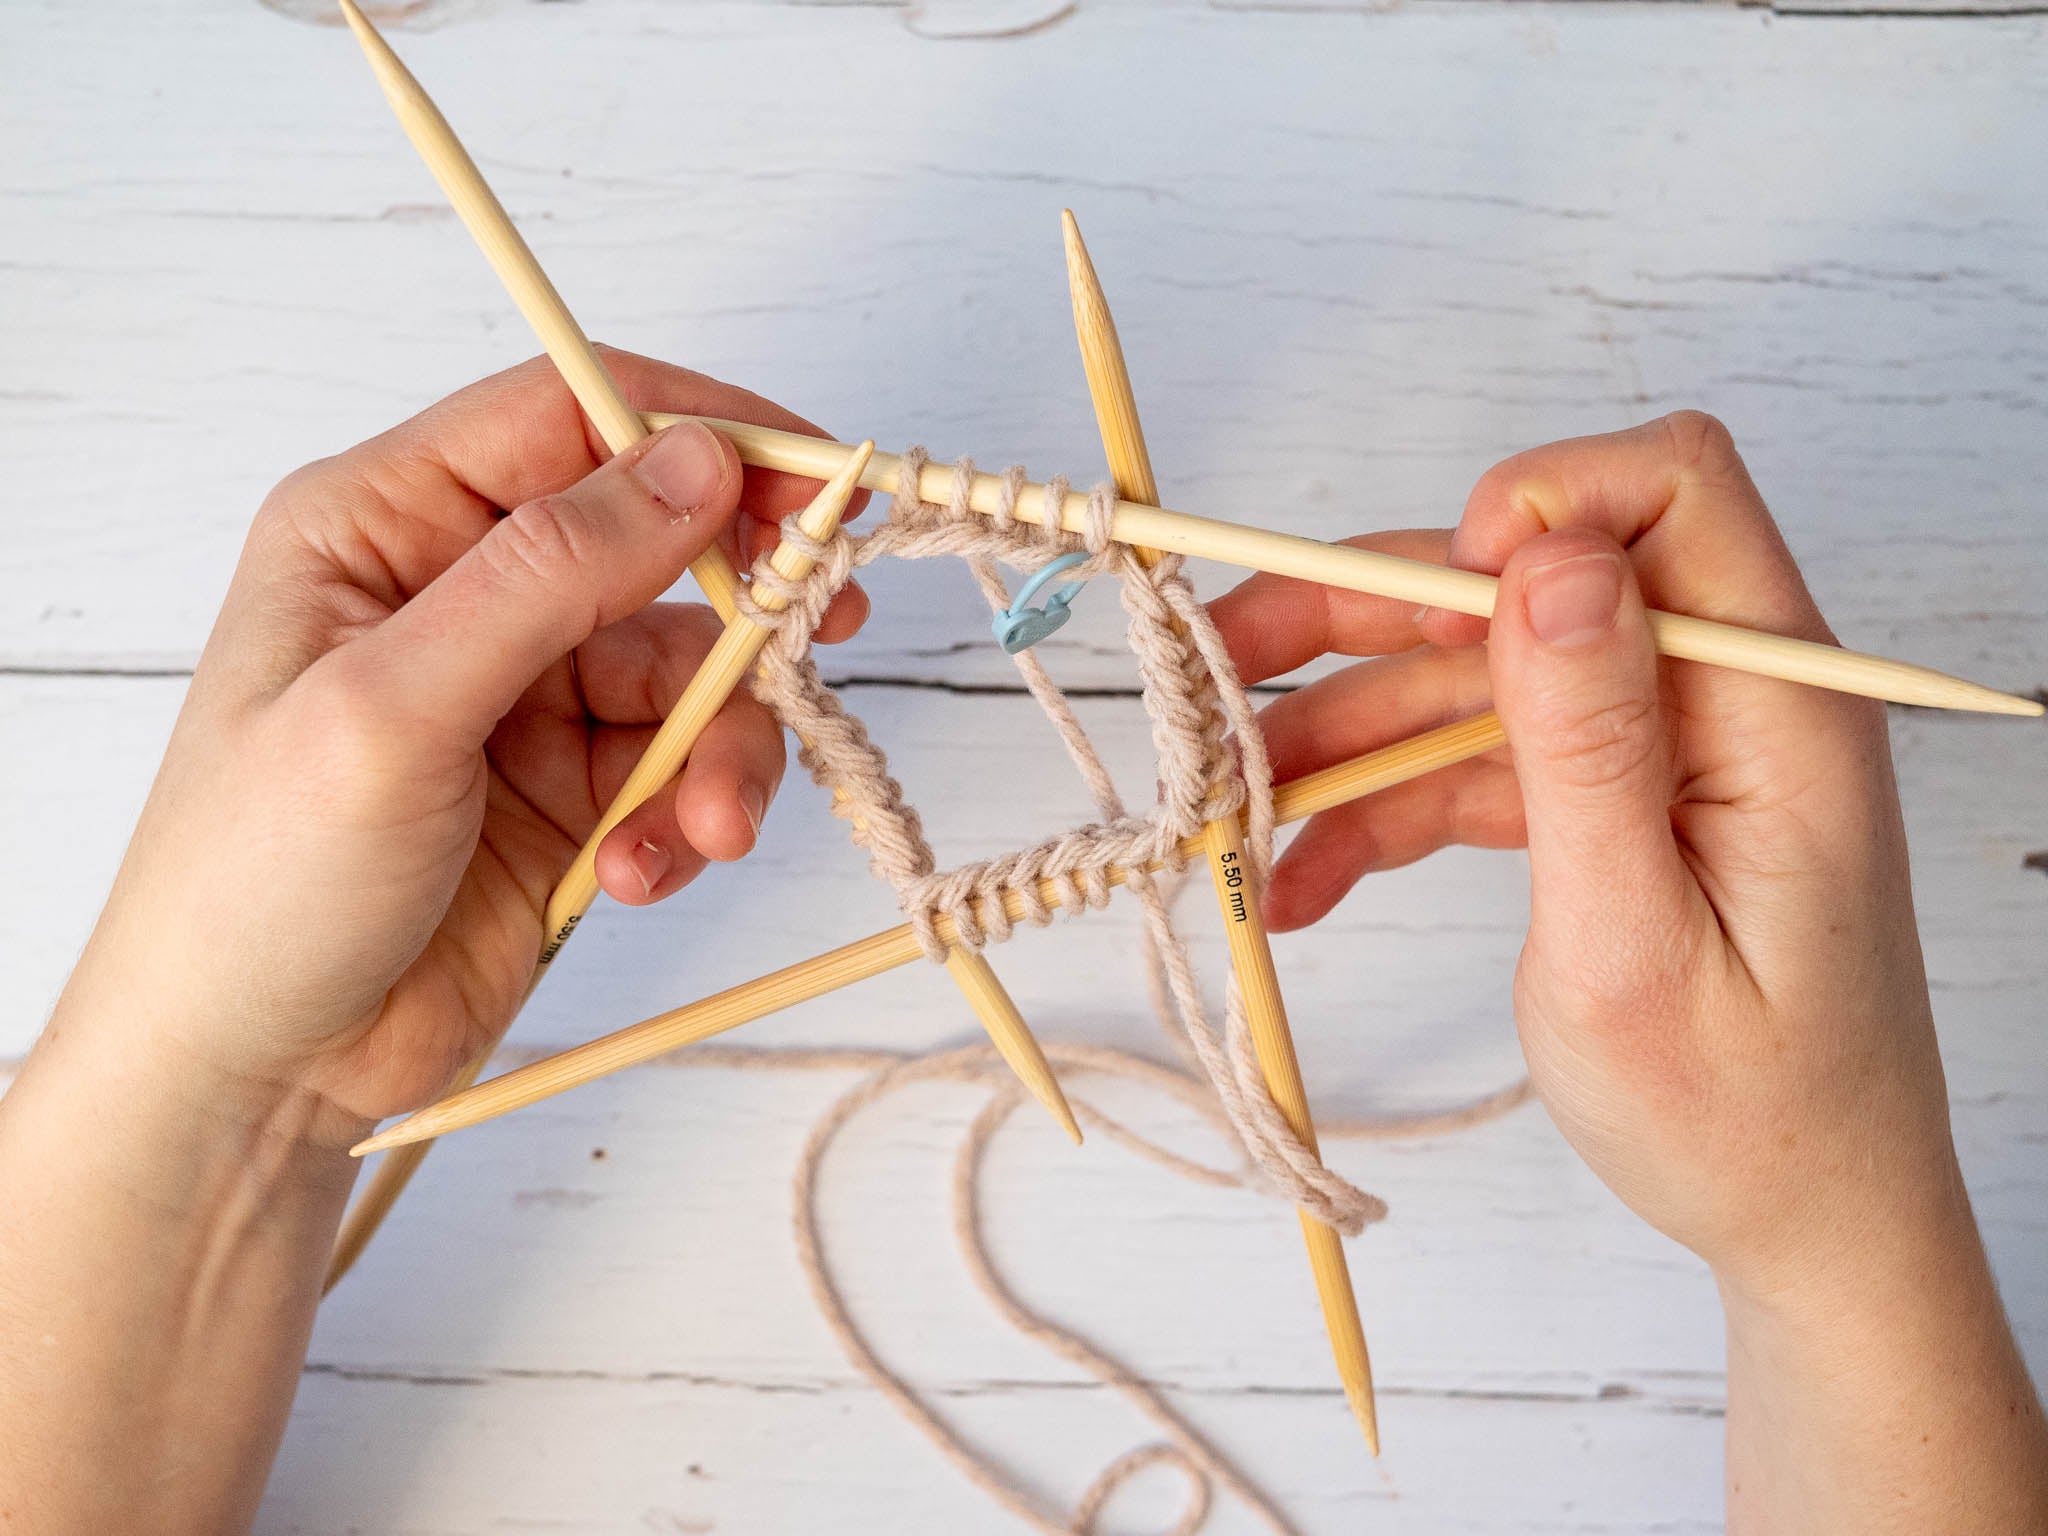
Join, being careful not to twist


Arrange your 3 or 4 needles with stitches on them into a triangle or square - this is the outline of your knitted tube. Work your way around the stitches and make sure that none of them are twisted around the needle, or twisted between the needles. The working yarn should be attached to the last cast-on stitch, and this needle should be on the right-hand side of the triangle or square.

The one empty DPN is your right needle. Insert it into the first cast-on stitch, then wrap the working yarn around it to complete the stitch. Your work should now be joined into a tube.

Mark the beginning of the round between two needles by inserting a locking stitch marker into the edge of the fabric.
Knit in the round
Continue to work across the stitches on the first needle.

When you reach the end of the first DPN, you will have a new empty needle to use as your right needle.

Rotate the work to the right by one needle. Now use the empty needle to knit across the second DPN. Rotate the work again and continue knitting across the third needle. Repeat for the fourth needle. You’ve completed one round!

As you finish each DPN, make sure to push the stitches to the centre of the needle so they don’t slip off the ends.

Continue in this manner, working each double pointed needle and then rotating to work the next one, around and around.

You may encounter patterns that are written specifically for double points, and use “needle 1” and “needle 2”, etc to provide pattern instructions.

Tips and Tricks
Looking for an alternative to double pointed needles? Learn to knit in the round on one circular or Magic Loopwith our other knitting in the round tutorials!