


Kits


New! Celebrate this chapter of Ysolda.com as it comes to an end with a special, personalised bundle of our best products, hand-picked by our team just for you.


gift 2019


Subscribe to our Colourwork Club for a gift that lasts well into the new year. Your recipient will receive a new colourwork kit in Janurary, February and March
Last minute shopping? Gift cards are delivered electronically - forward the email or print it for your recipient. A range of amounts are available and gift cards don't expire.

How To Darn with Arounna Khounnoraj of Bookhou
How To Darn with Arounna Khounnoraj of Bookhou

If you knit socks, then learning how to darn a sock is a vital skill! After all that hard work of hand knitting socks, knowing how to repair them and make them last longer is really worthwhile. Socks aren't the only knitted items to need a little fix-up, darning can be used to fix holes in sweaters too! Our free tutorial will teach you how to darn socks, sweaters, and any other knitwear that needs it.
But what is darning?
Darning is the simple process of weaving yarn in rows and columns to create a little patch of fabric to cover the hole or worn area.
We asked Arounna Khounnoraj of Bookhou to explain the process. Arounna is a fibre artist living in Toronto, and her studio focuses on screen printing in the making of a variety of goods including bags and home decor items using natural materials. She also works with her husband John Booth in designing and making wood furniture and accessories. She's also a darning expert, and recently published her new book Visible Mending.
This tutorial shows you how to create a weave mend using wool yarn and the Katrinkles Darning Loom.
Positioning the Loom

Let’s begin, when darning a hole in a garment it makes it easier to sew when you have a flat object underneath the hole. The wood base of the Katrinkles loom serves this purpose.

Take the wood base of the Katrinkles loom and place it centered under the hole that you want to mend, making sure to keep the flat edge of the loom at the top.


Take the heddle with its teeth pointing upright and press against the flat edge of the loom with the fabric sandwiched between.

Continuing to hold the heddle against the base, take the elastic provided and wrap around the perimeter so that it holds the fabric onto the base and the heddle to the flat side.

Once you put the elastic around the loom, adjust the heddle so that the teeth are just above the hole and protruding above the surface of the fabric.
Threading the Loom, Creating the warp

Take the tapestry needle provided and cut a piece of yarn the length of your arm from fingertips to your chin. Thread the needle so that one end is loose - you don’t need to tie a knot because the tails get woven into the back of mend.
Start at the bottom about ½ an inch below the hole, opposite the side with the heddle and to one side aligned with the first tooth on the heddle. Take the needle and go pick up some of the knitted area - about ⅛ of an inch.

Pulling the thread all the way through, leaving a tale about 3 inches long, start making the warp by taking the thread up and over the hole and wrap it around the first tooth on the heddle before coming back down over the hole and anchoring your needle into the knitted area.

Moving the needle to the side slightly, anchor the thread again, opposite the next tooth, and repeat step 8 until the area above the hole is covered with thread. Try to keep the threads evenly spaced and parallel to each other.
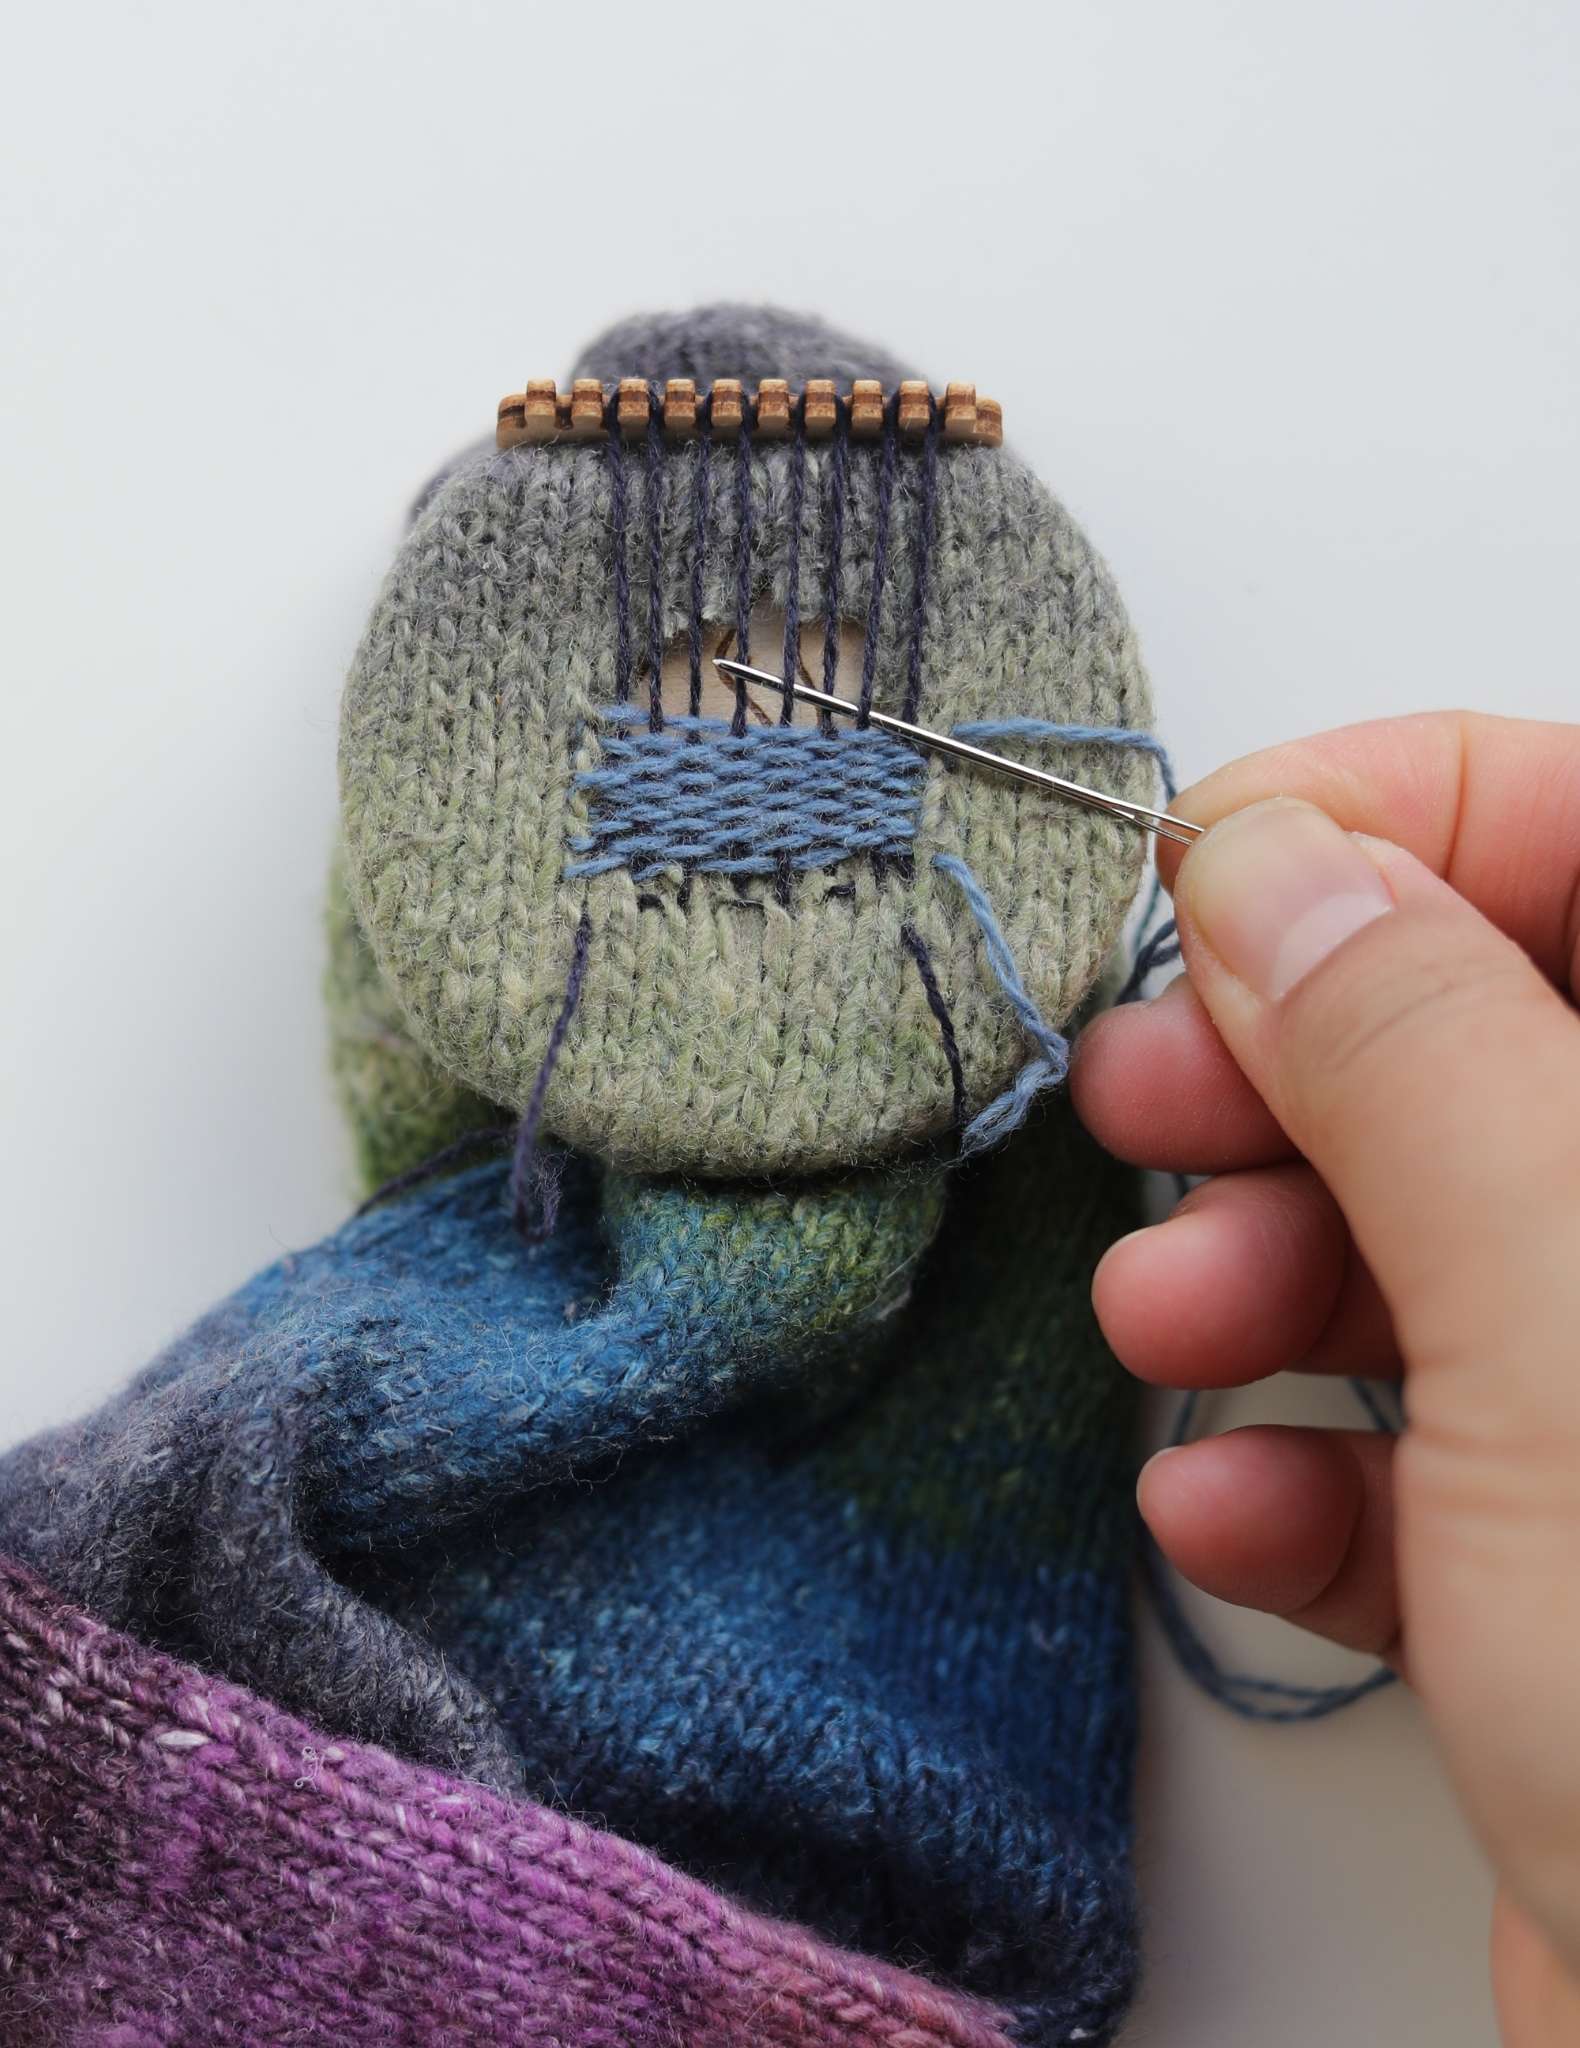
Creating the weft

Rethread your needle with a contrasting colour and start perpendicular to the threads you just finished to create the weft. To start, achore your needle into the knitted area just above where the warp threads start and about 1/8th of an inch to the side of the first warp thread.

As you reach the warp threads, slide your needle under and over each thread, repeating those steps untill you reach the other side of the mend where you will once again anchor the thread into the knitted area about 1/8th of an inch again. This will secure the mend along the edges and will not result in a gap.


Repeat step 11, moving back in the opposite direction but this time sliding the needle through the warp threads in an over and under, opposite to the previous thread. Anchor the threads into the knitted area on the sides and continue back and forth, under/over, then over/under untill the mend completely fills in over the hole.
Finishing

Once you complete your weave mend over the hole, remove the elastic band that is holding the heddle in place.

Carefully remove the heddle by lowering the teeth and releasing the top loops of your mend.

To tighten the top loops of warp thread, take the loose tail that is connected to the first loop and gently pull it down until the top loop disappears and the thread is tight. Move to the next thread, again gently pulling the thread tight and repeat until the entire mend is tight and there are no loose loops.

In order to finish the top edge, take your needle and thread and run a whip stitch along the edge to attach it to the knitted piece.

Flip over the knitted piece to reveal the back side of the mend and pull all your tails through from the front to back. Then take your needle and thread the tails using a running stitch to weave them into the knit. Any left over tails you can snip away.
Have you been inspired to give darning a go? Explore our range of darning products currently in stock in our online shop by visiting our mending collection.
Also in Journal


Ysolda’s size chart for knitwear designers
Inclusive size charts for sizes xxs to 7xl, created by a knitwear designer and featuring measurements that can be difficult to find. Newly updated with an extended size range with measurements for cup sizing and broad shoulders.
Read More


Deep Shadow Heel Tutorial
The Deep Shadow sock heel is a beginner friendly short row sock heel that provides a more anatomical fit like a heel flap and gusset.
Read More


20 Years of Ysolda Knitting Patterns: Part 2
June 2025 marks twenty years of designing knitting patterns for Ysolda. In this blog post she picks her favourite from each year for 2015 to 2025,
Read More
