0

Your Cart is Empty

March 29, 2023

There are usually two categories when it comes to knitters and seaming:


  • The first category know how to seam and can do it, but don't want to - they like knitting, not sewing.
  • The second category are nervous about seaming, and are worried it will turn out messy or not as polished as a seamless garment would.

But this doesn't have to be the case! So let's introduce our step-by-step mattress stitch tutorial, with some tips on how to make your seams look beautiful and how to prepare your knitting so that when you seam it, it will go... seamlessly!

Two stockinette stitch swatches in a light pink colour, a blunt darning needle and some yellow yarn sit against a blue background ready to be sewn together using mattress stitch.

What is Mattress Stitch?

Mattress stitch is used to join vertical edges together, while a variation can be used to join a vertical edge to a horizontal one (like a bind off) or two horizontal edges. The mattress stitch seam creates a ridge on the inside of your work which can give your garment more structure.


This step-by-step mattress stitch tutorial will be shown on two straight vertical edges, but the exact same technique can be used on two edges that have shaping (i.e. increases or decreases).


Seaming your knitting can be intimidating, and can put you off taking on projects and patterns that require it - binding off and being done and able to wear your new garment is usually much more preferable, however some patterns are too good not to be put off by - our Wardie cardigan for example! It also allows you to knit a bigger project like a jumper or cardigan in more portable pattern pieces which is very handy if you like to knit on the go!

What You Need for Mattress Stitch

  • your knitting project
  • the same yarn, in the same colour (we used a different colour here so it was visible for you)
  • blunt darning needle (the size varies based on the size of your yarn/stitches but you want to be able to easily thread the yarn through the eye of the needle, however the size isn't too important overall)

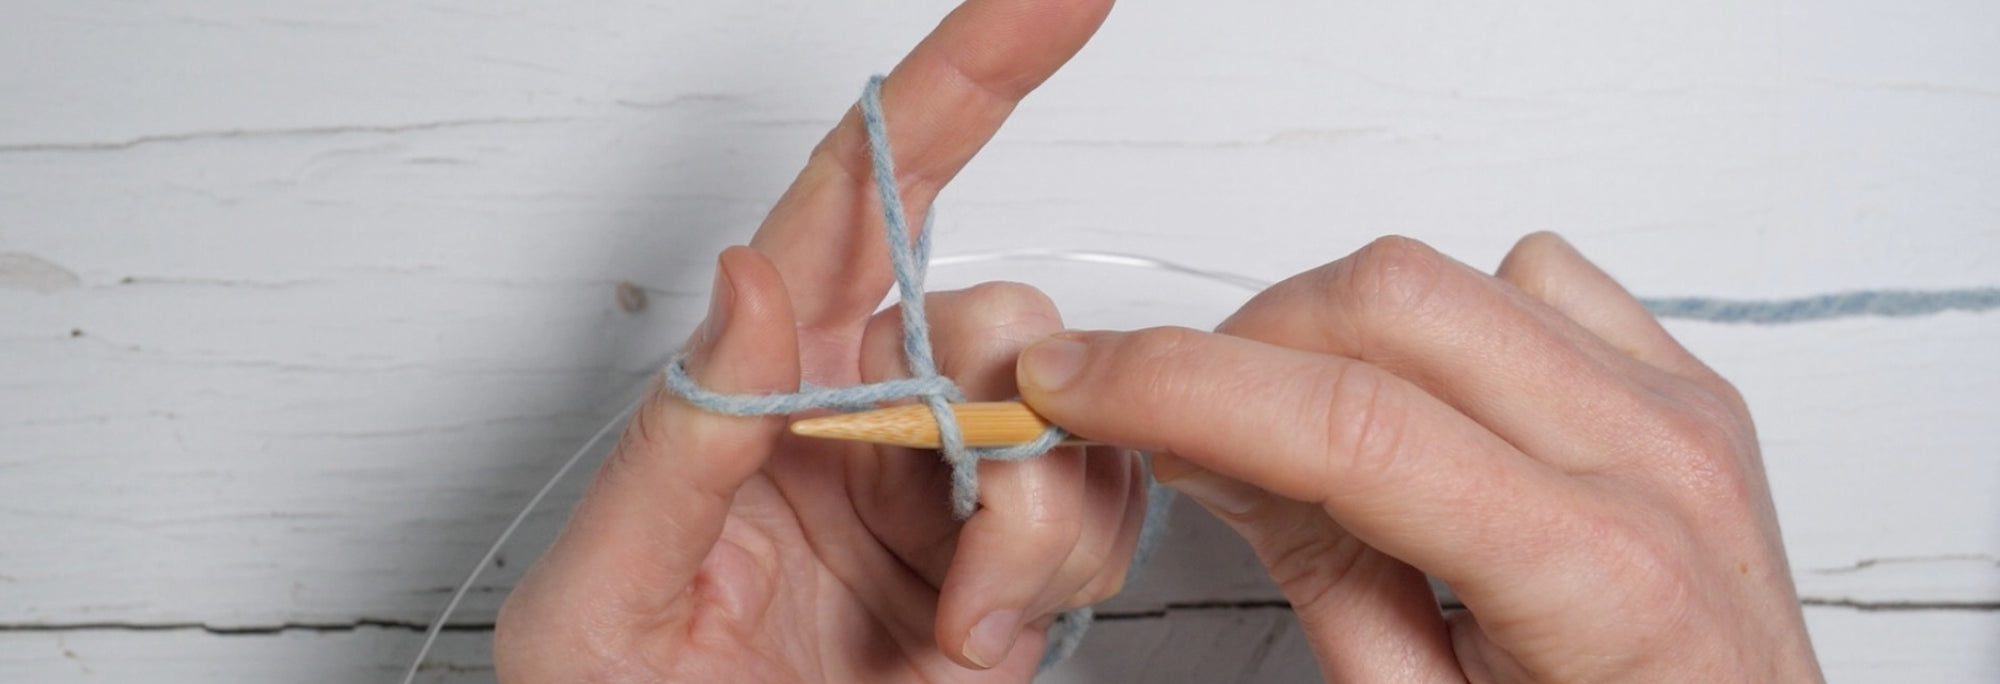
For mattress stitch, a good rule of thumb is for your yarn to be 1.5 times the length of your seam + 12"/30cm of yarn* for weaving in ends


* you can plan ahead for this with your cast on/bind off and leave a long tail of yarn at the corner of one of your pieces of work. This should be 1.5 x the length of your seam + 6"/15cm (as you won't need to leave the length for weaving in at one side, since it is already attached to the work).

How to: Mattress Stitch

If you follow along with tutorials best via video, we have a Youtube video below with step-by-step instructions, or if you prefer a step-by-step in still images just keep scrolling.

Beginning Mattress Stitch: figure of 8 stitch

To begin the mattress stitch, we are going to join the bottom edges together securely and neatly, and anchor the yarn if you're using a separate piece of yarn (like in this tutorial).


If you are using a separate piece of yarn for your mattress stitch, be sure to leave 6"/15cm at either end for weaving in once you have completed this stitch.


Knitting Tip: leave this loose until the end as you will be able to adjust your tension before weaving in the ends.

Mattress Stitch How To, two pieces of knitted fabric lay side by side, a blunt darning needle is coming up through the first stitch from the back
  • From the back of your piece of knitting, just above the cast on edge and in-between the first and second stitches insert your needle into your right hand side piece of fabric. Pull the yarn through until you have a 6"/15cm length of yarn left (if you are using a piece of yarn which is already attached then just pull this right through).
Mattress Stitch How To, two pieces of knitted fabric lay side by side, a blunt darning needle with thread attached is crossing from one piece of fabric to the other and coming up through the back inbetween the first and second stitch
  • next bring the needle through the same stitches on the left hand side piece of fabric, from back to front and pull right through.
Mattress Stitch How To, two pieces of knitted fabric lay side by side, a blunt darning needle is coming up through the first stitch again from the back
  • finally, bring the needle up through the same stitch as before on the right hand side fabric, and you can see that this is where the figure of 8 stitch gets its name.
Mattress Stitch How To, two pieces of knitted fabric lay side by side, a blunt darning needle is coming up through the first stitch from the back creating a figure of 8 with the yarn.

Mattress Stitch: The Repeat

So now you've got your two pieces of fabric joined together, we can move onto the 2 step repeat of mattress stitch.

Two pieces of knitted fabric lay flat side by side. A contrasting colour of yarn is being inserted with a needle underneath two bars of yarn.

Step 1: insert your needle between the first two stitches on one edge, from front to back. Bring the needle back up two bars higher.


Knitting Tip: if you gently pull the fabric, you'll see horizontal bars between the stitches (if you can't determine where they are, this is shown in our mattress stitch video)

Two pieces of knitted fabric lay flat side by side. A contrasting colour of yarn is being inserted with a needle underneath two bars of yarn.

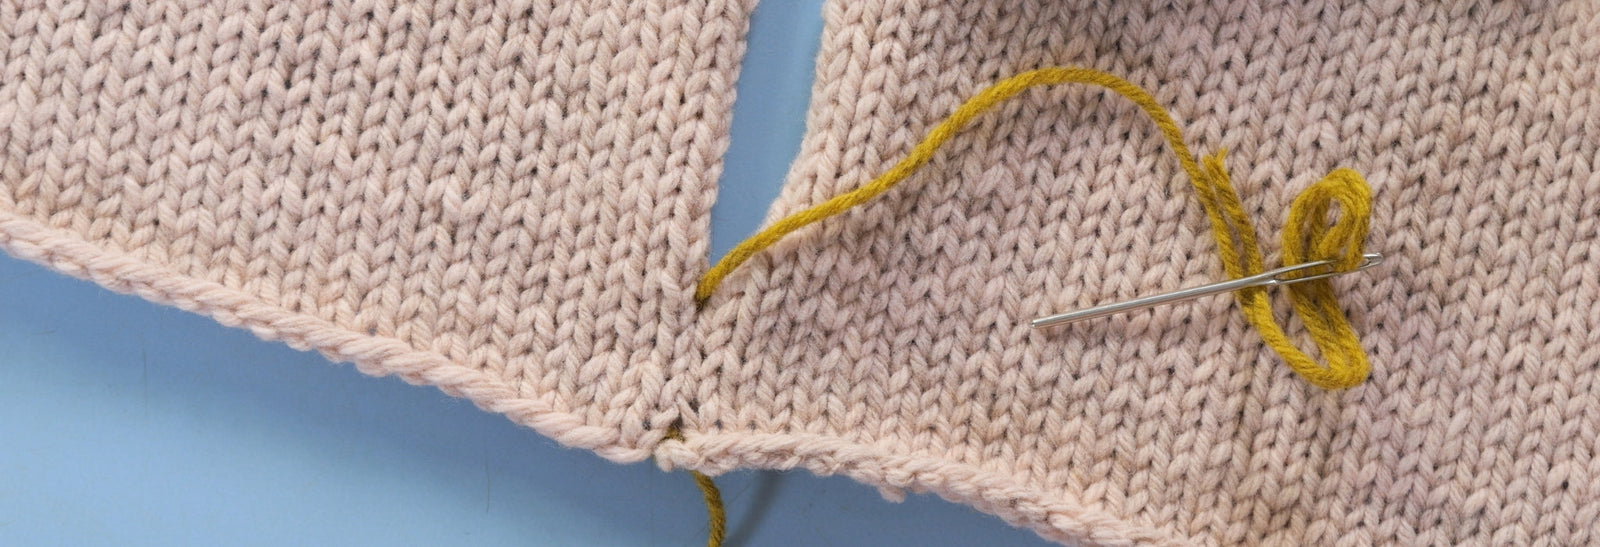
Step 2: bring the needle under the first two bars on the opposite edge the same way you did in step 1.


Repeat steps 1 and 2 to sew your seam.


After every few stitches it is good practice to pull your yarn just tight enough so the yarn disappears and the two edges draw together (shown in the images below).

Two knitted fabric pieces lay side by side and are joined by mattress stitch using a contrasting shade of yarn.
Two knitted fabric pieces lay side by side and are joined by mattress stitch which is being pulled together to make it invisible on the right side.

It’s important not to over-tighten the mattress stitch seam - you should keep it loose enough that the seam still stretches a little. If the seam is too tight the yarn could easily break when the project is stretched and put on. 

Finishing the Mattress Stitch

At this stage you may discover that you only have one stitch left, so just go ahead and do the mattress stitch repeat using just that one stitch.


Hopefully you've got the same amount of stitches on each piece of fabric so that your seam is nice and even.


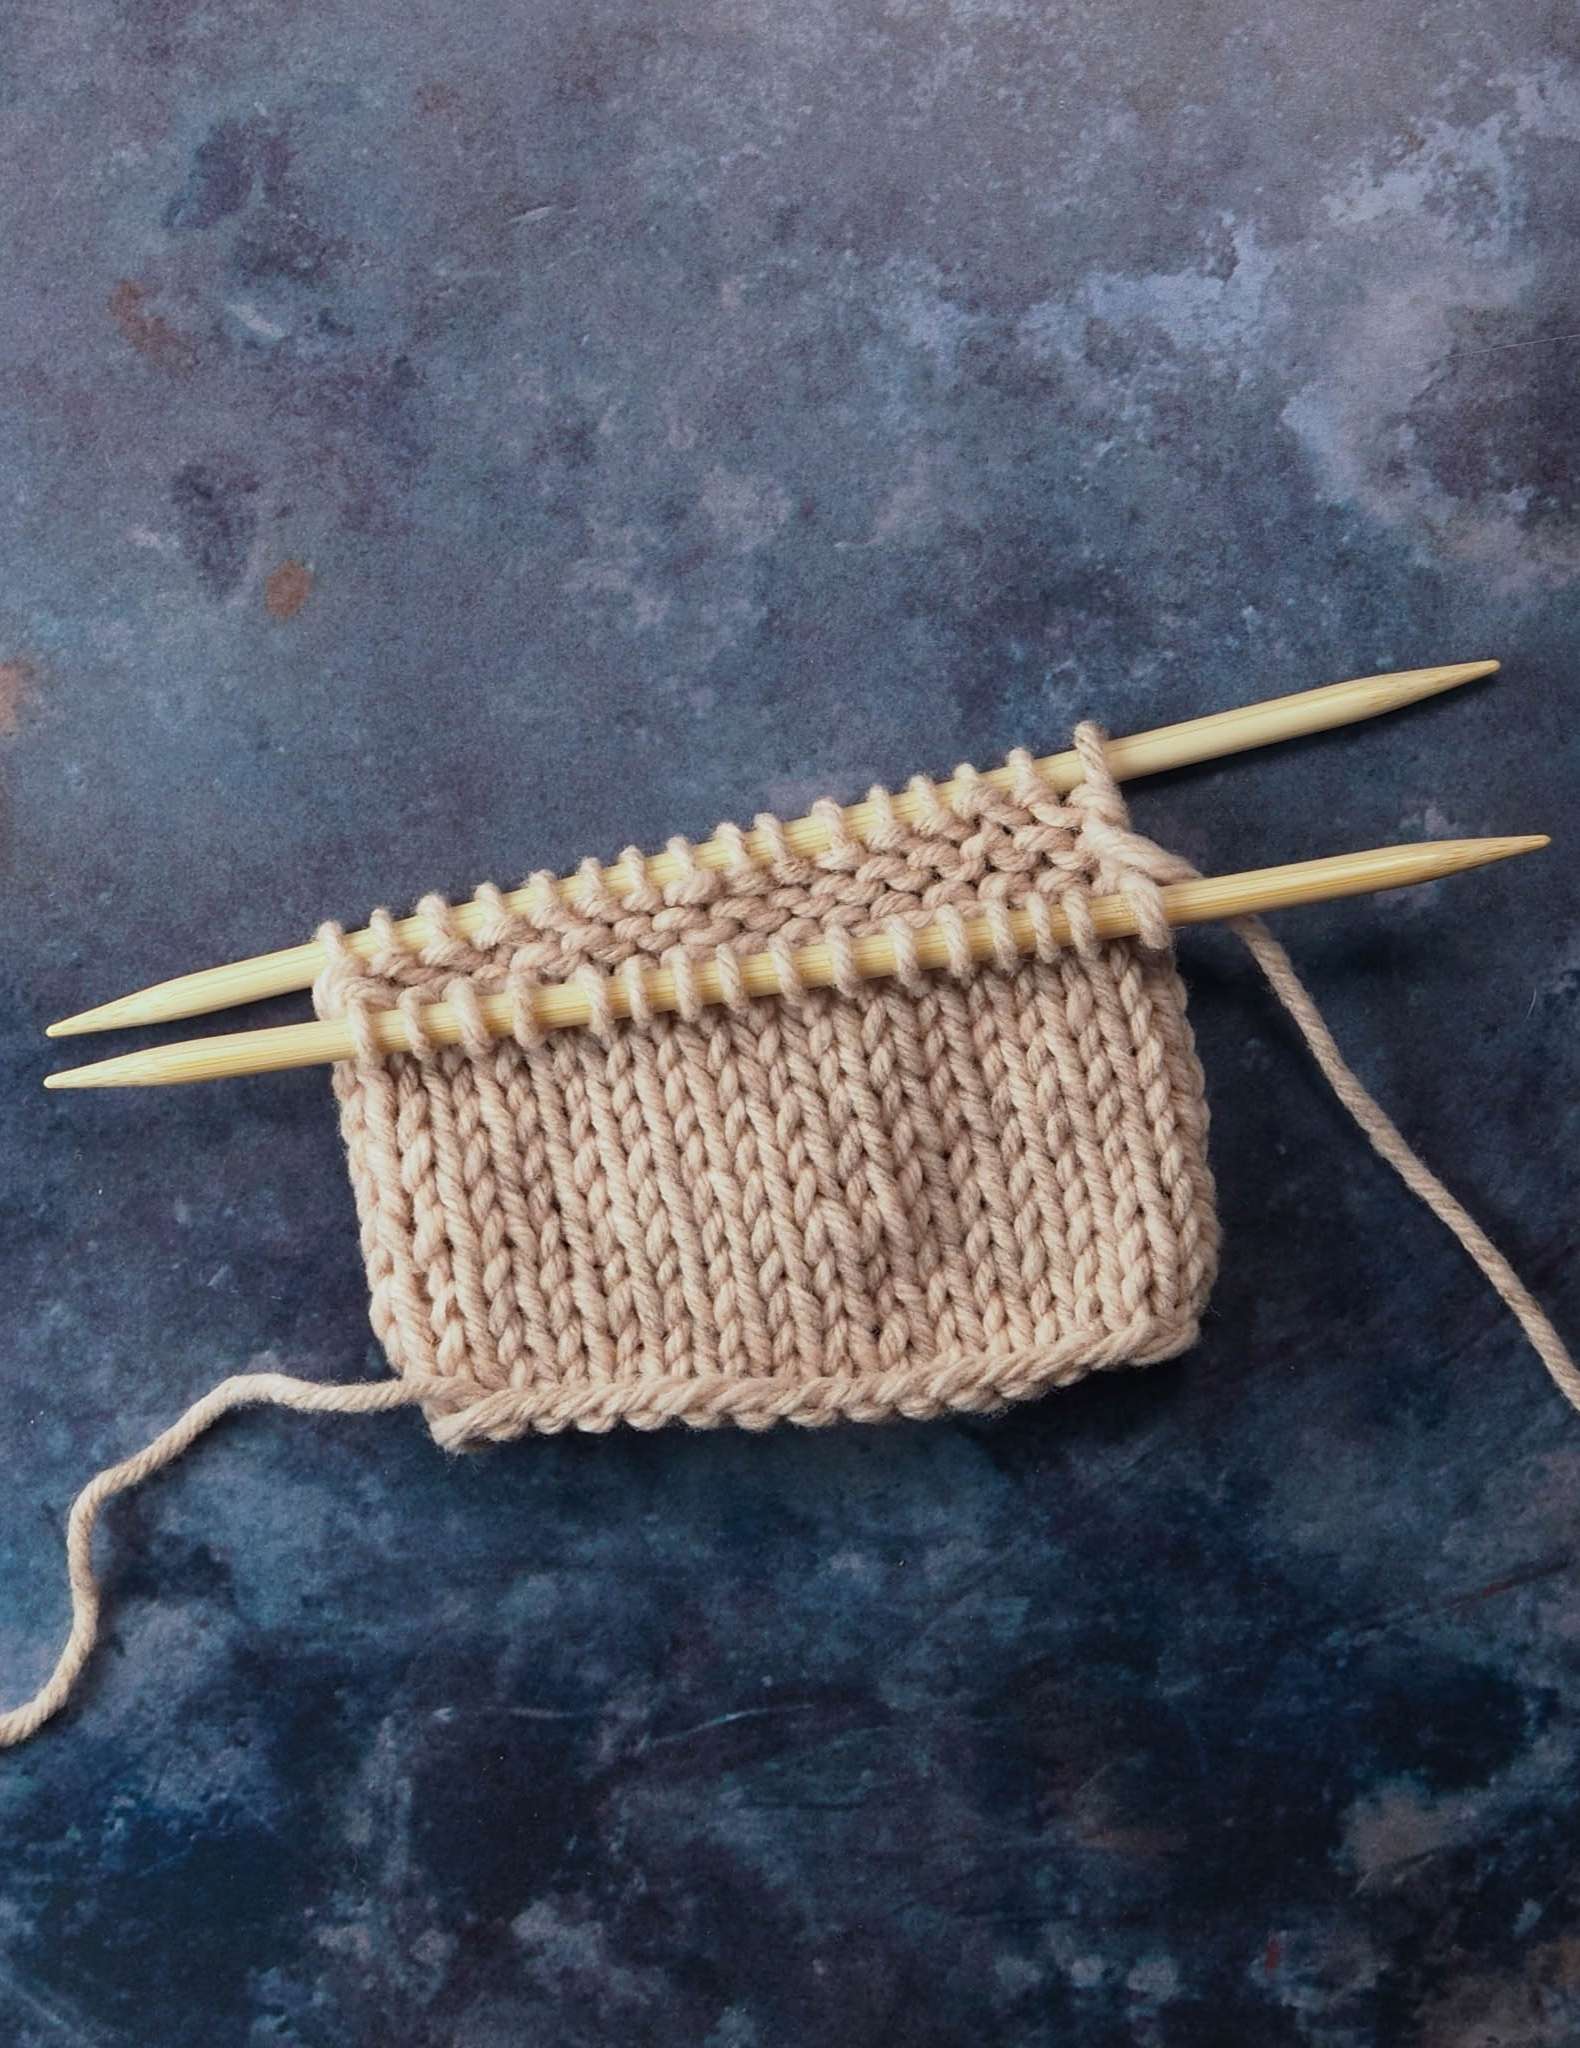
To finish off your mattress stitch seam, bring your needle up through the bind off edge on both sides and then pull those edges together. Go back into the wrong side edge the same way and leave your yarn there.

Finishing a mattress stitch in knitting by inserting the yarn into the bind off stitch

You are now left with two tails of yarn at each end of your mattress stitch seam to weave in.


However before weaving in your ends, it's a good idea to check your tension.

The wrong side of a mattress stitch. Both pieces of knitted fabric are now sewn together and two tails of yarn are left on either end.

You want to be able to comfortably stretch your seam, which ensures that any items which need to be stretched to put on a body, such as a hat or a jumper, will be able to stretch without putting stress onto the tension of the yarn causing it to snap and your seam to come undone.

Showing a stretch of the mattress stitch seam.

An example of tension that is too tight on a mattress stitch is below. Tension that is too tight is what causes seams to look messy and uneven.


You are more likely to make your mattress stitch seams too tight than too loose, however to fix this you can use your fingers to work the stitches up and down so that they look more even. This is also why it is a good idea to leave extra yarn on the ends of your work!


Knitting Tip: when pulling your seams together, as soon as the yarn disappears, that is probably tight enough.


You can now weave in your ends.

Mattress stitch tension that is too tight.
Mattress stitch seam wrong side

On the wrong side of your work, the mattress stitch seam creates a ridge which is created because you're turning one column of knit stitches on each side, under and to the wrong side.


The ridge provides structure to your garment and a stronger point in your fabric which helps to hold it in shape. There are times when you may want to reduce the bulk that the seam creates, which you can read about below.

Ysolda's Mattress Stitch Top Tips

  1. If your yarn is delicate, fluffy or breaks easily you can work the mattress stitch seam in a coordinating smooth, stronger yarn. Similarly, using a thinner yarn for seaming bulky projects can also help to reduce the bulk.
  2. In bulky projects try working the seam half a stitch in from the edge, rather than a whole stitch. 
  3. For a firmer, stronger mattress stitch seam, sew under only one bar on each side with every stitch.
The beginning of a mattress stitch seam, done in a contrasting yarn

Preparing Your Project for a Mattress Stitch Seam

  • Regardless of stitch pattern work a simple stockinette selvedge, that’s at least 1 stitch wide. Don’t slip the first or last stitch of rows that will be seamed!
  • Work increases or decreases at least one stitch in from the edge - often 2 or more stitches in from the edge looks better because it leaves a visible selvedge once the edge stitch has been hidden in the seam. 
  • When casting on or binding off leave a long enough tail for seaming so that you have fewer ends to weave in. You can wrap this tail into a little butterfly so that it doesn’t tangle (and so that you don’t accidentally start knitting with it!) 
  • Make sure that separate pieces - eg. the front and back of a sweater, have exactly the same number of rows. It’s possible to fudge a slight difference in rows by seaming under only one bar on the shorter piece for every two on the longer, but seaming will be easier if they match perfectly. 

And that's it! Mattress Stitch - completed!

Hopefully you've found our step-by-step tutorial for mattress stitch helpful, and it's opened up many more patterns for you to try!


For tips and knitting community goodness, don't forget to join The Knitwork - our community of likeminded knitters where you can ask questions, share projects and just have a nice time!


Also in Journal

A white woman sits on the edge of a pavement with a wall behind her, she is smiling and wearing a cream coloured handknit scarf.
How to Knit a Scarf: A Beginners Guide to Scarf Knitting

March 23, 2023

Want a quick and easy beginners tutorial on how to knit a scarf? This garter stitch scarf is easy to knit and requires just 3 skills; casting on, the knit stitch and casting off.
Read More
Learn to knit: the long tail cast-on

February 03, 2022

The long tail cast on is a great multi-purpose knitting cast on and the perfect place for beginner knitters to start. Learn how to work the long tail cast on and how to estimate the length of yarn needed with our clear step by step tutorial and video.
Read More
How to Kitchener Stitch

December 09, 2021

Kitchener stitch is a knitting technique used for grafting together two sets of live stitches, most often stockinette stitch. Instead of binding off and sewing two edges together, you can use a tapestry needle and yarn to join the stitches completely seamlessly.
Read More