


Kits


New! Celebrate this chapter of Ysolda.com as it comes to an end with a special, personalised bundle of our best products, hand-picked by our team just for you.


gift 2019


Subscribe to our Colourwork Club for a gift that lasts well into the new year. Your recipient will receive a new colourwork kit in Janurary, February and March
Last minute shopping? Gift cards are delivered electronically - forward the email or print it for your recipient. A range of amounts are available and gift cards don't expire.
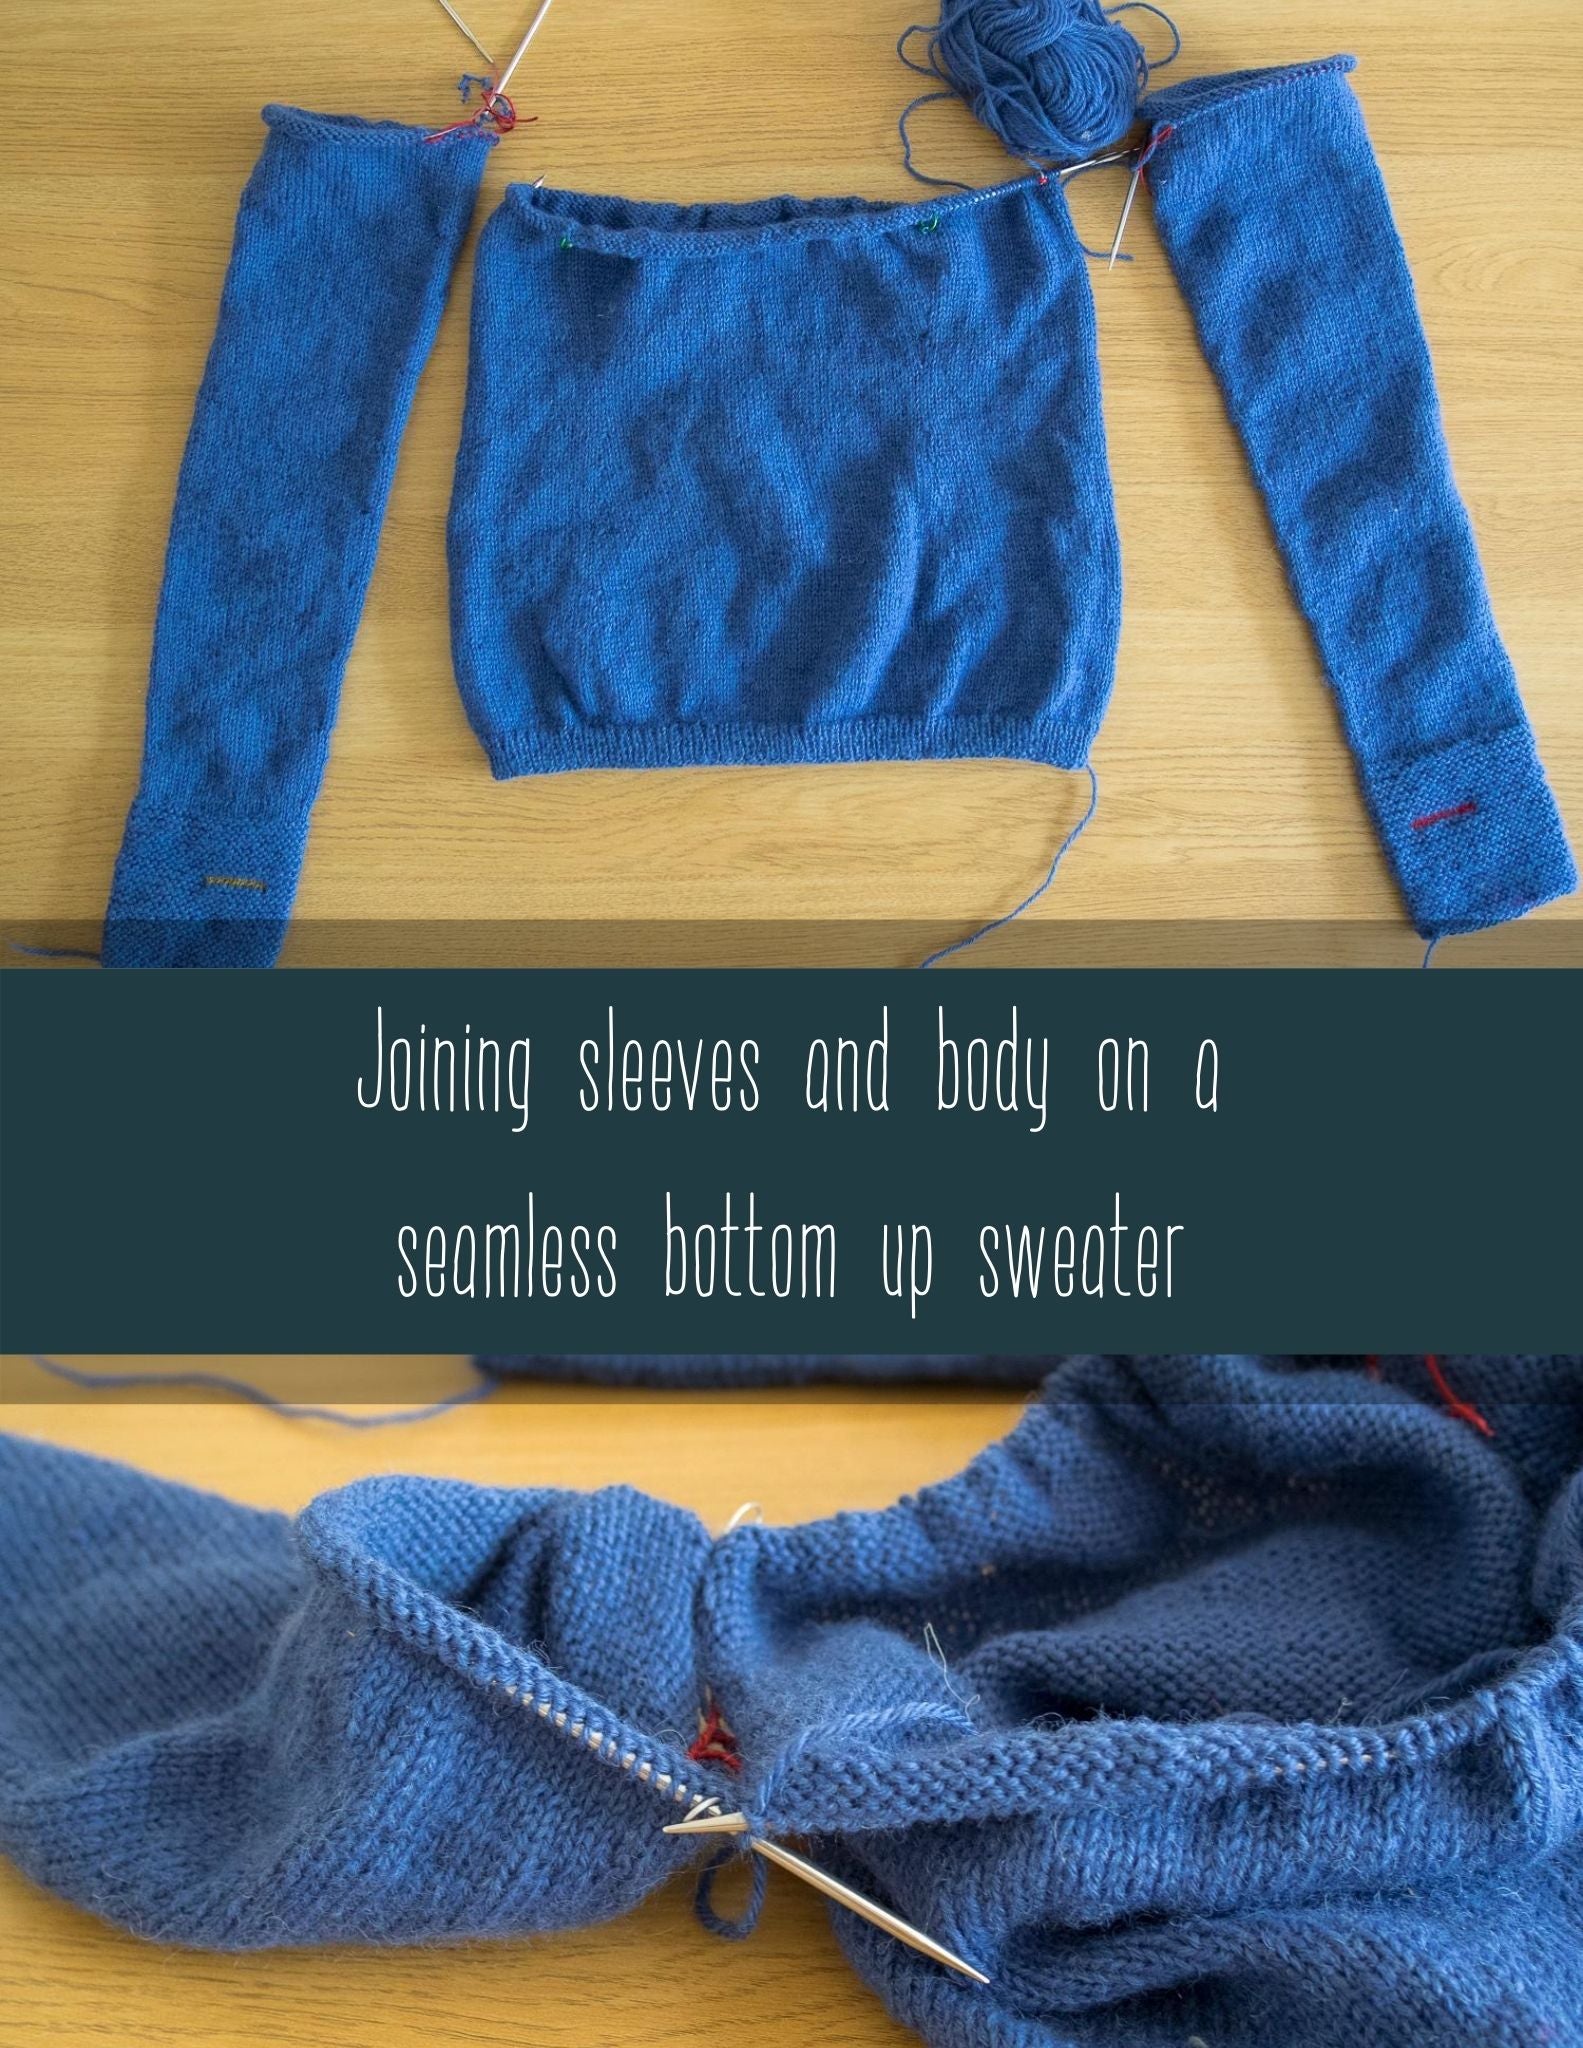
How to join the body and sleeves on a seamless sweater or cardigan

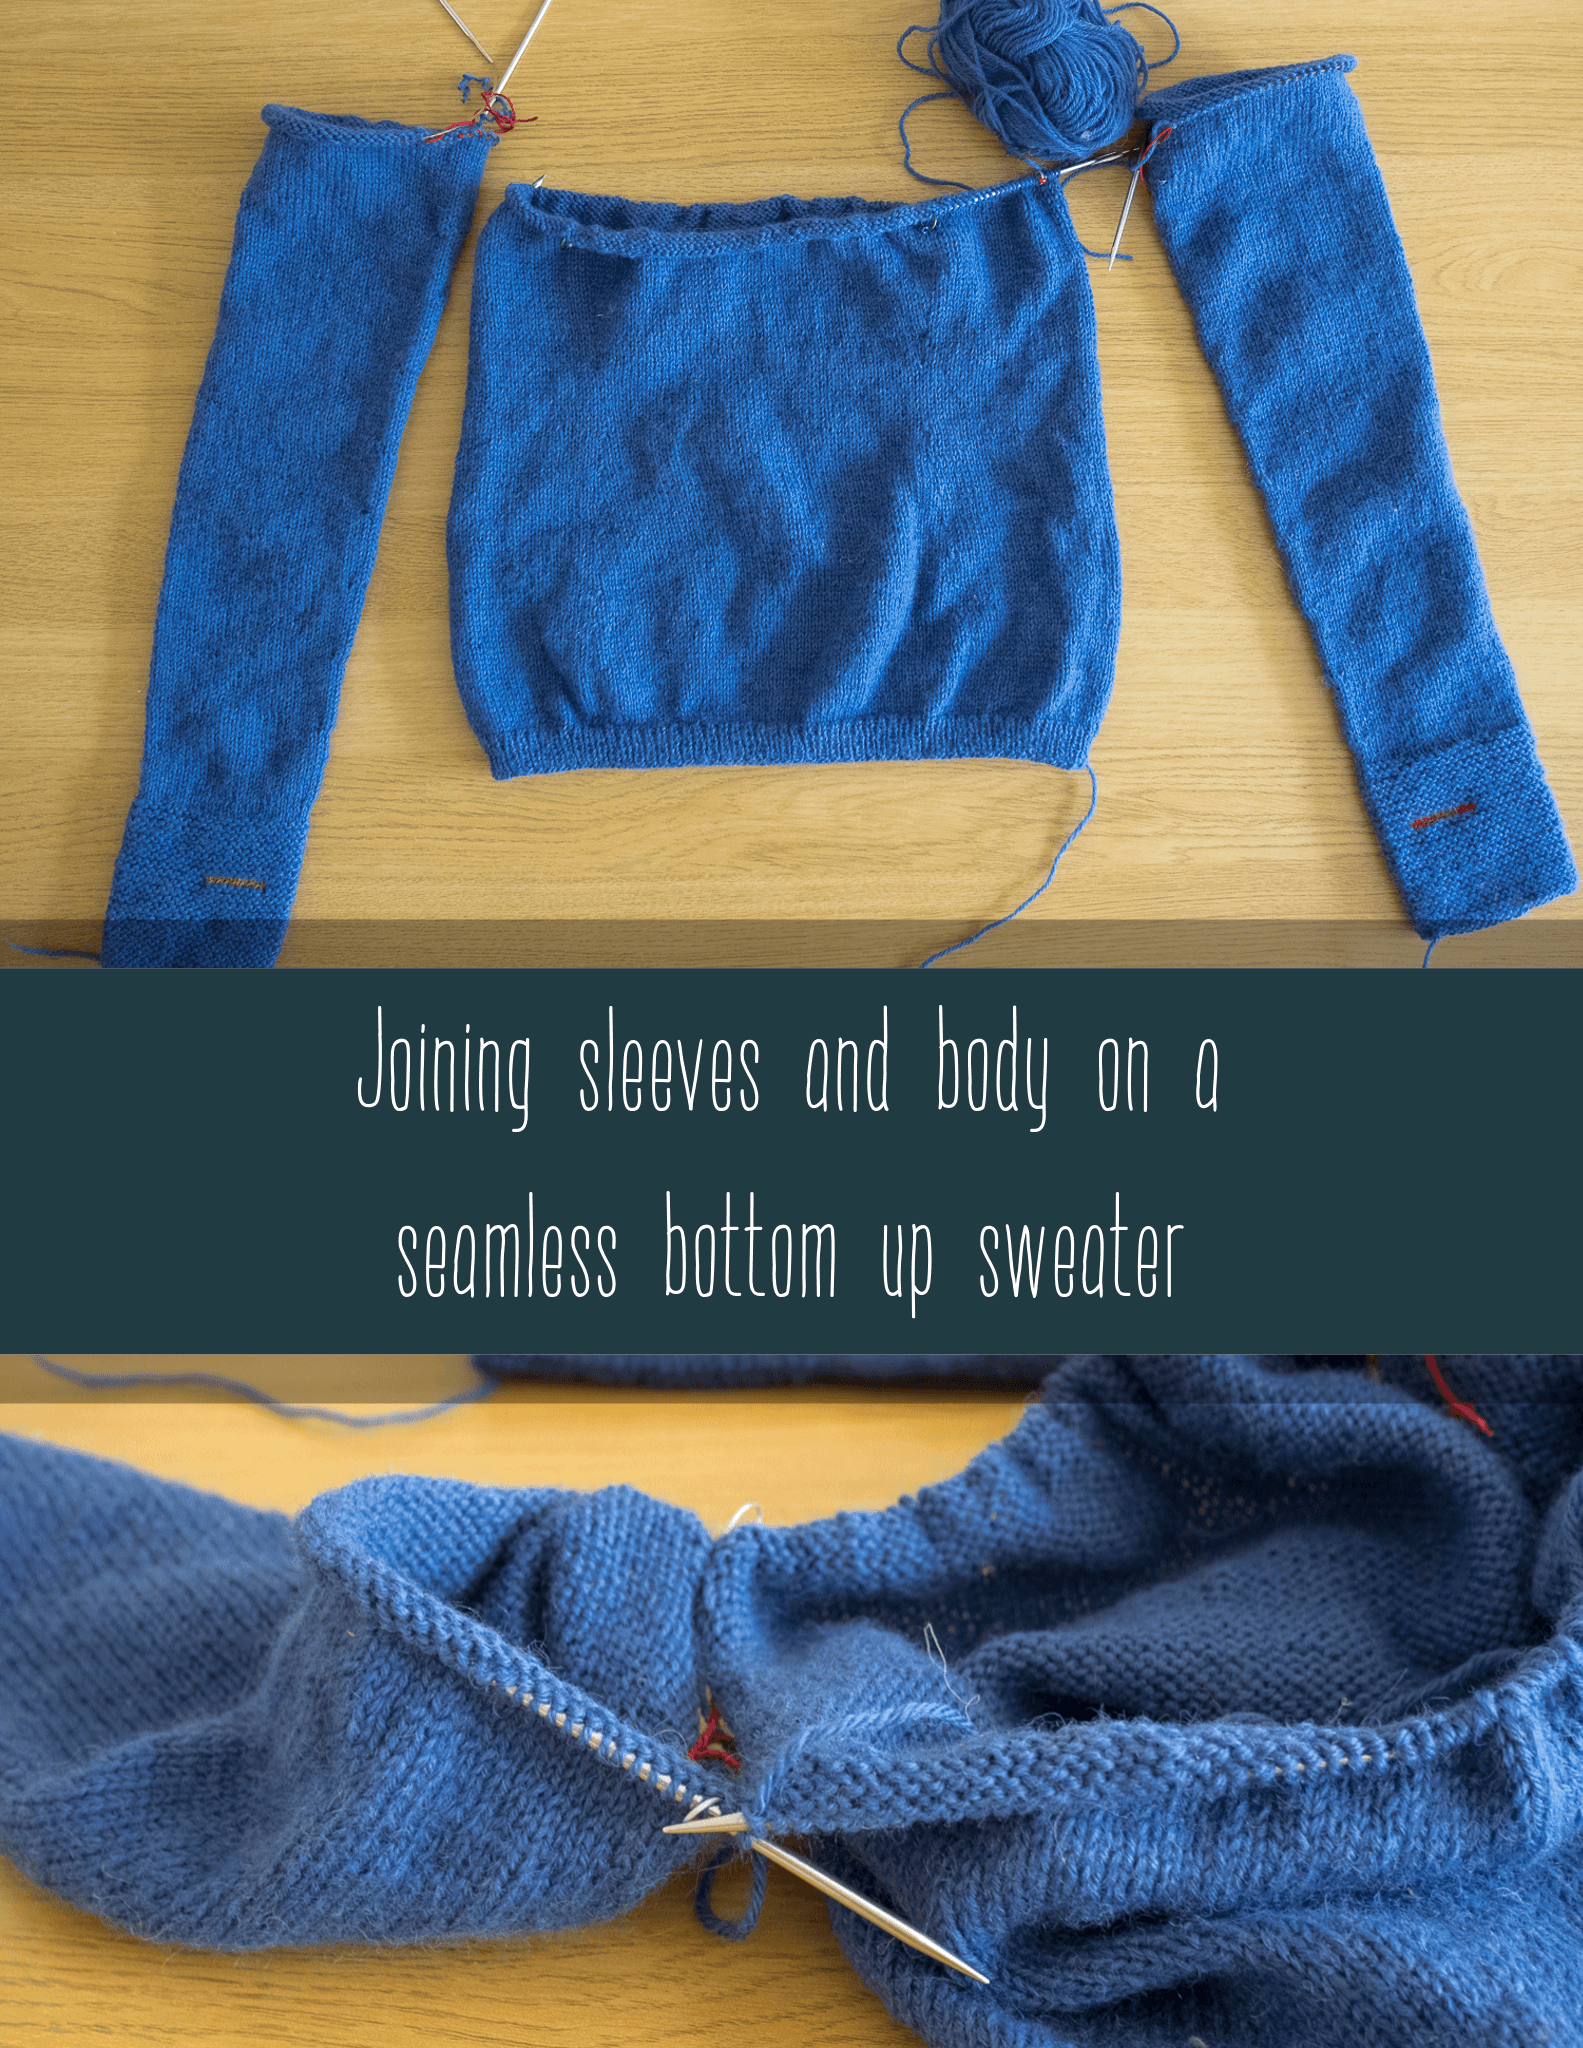

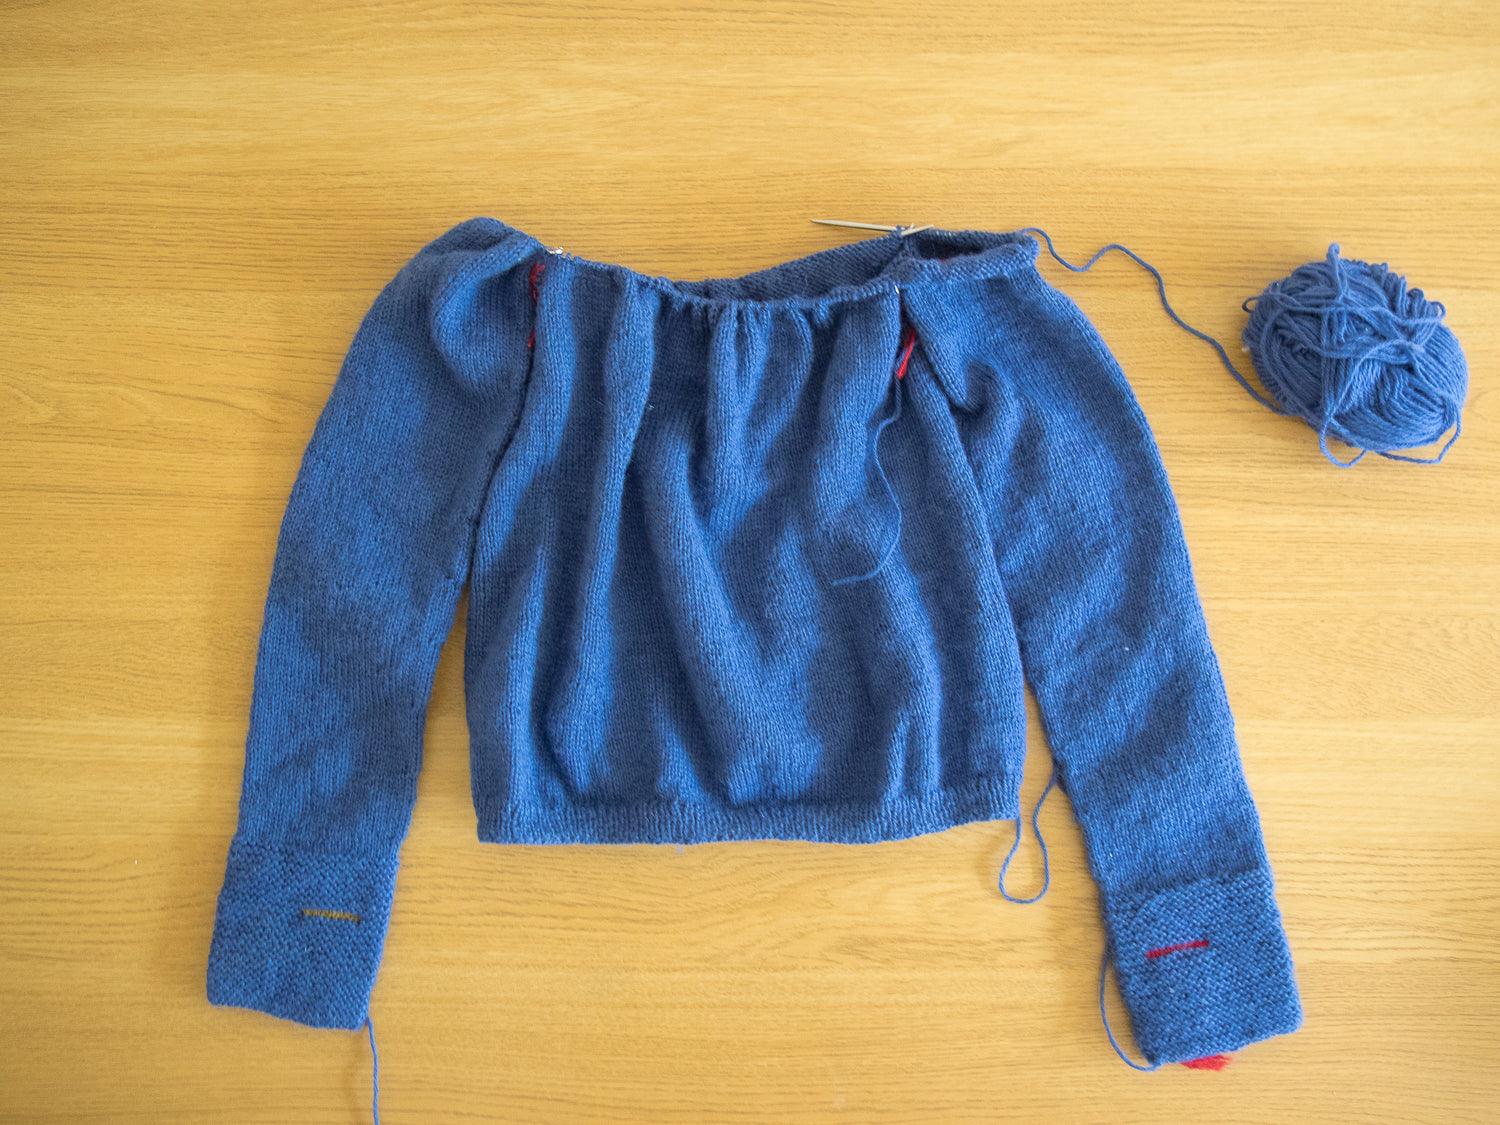
When you’re knitting a bottom up sweater and reach the directions for ‘joining the body and sleeves’ do you find it difficult to visualise how the pieces fit together? If you lay the two sleeves and body out like the photo above you may find it easier to picture where the knitting is going next. Each round of the yoke will be worked across the back of the body, around one sleeve, across the front and around the second sleeve. The stitches that are lying against each other at the underarms are put ‘on hold’. They’ll eventually be seamed or bound off together. Since you aren’t Flat Stanley this spans your underarm from front to back in a comfortable, anatomically correct way.
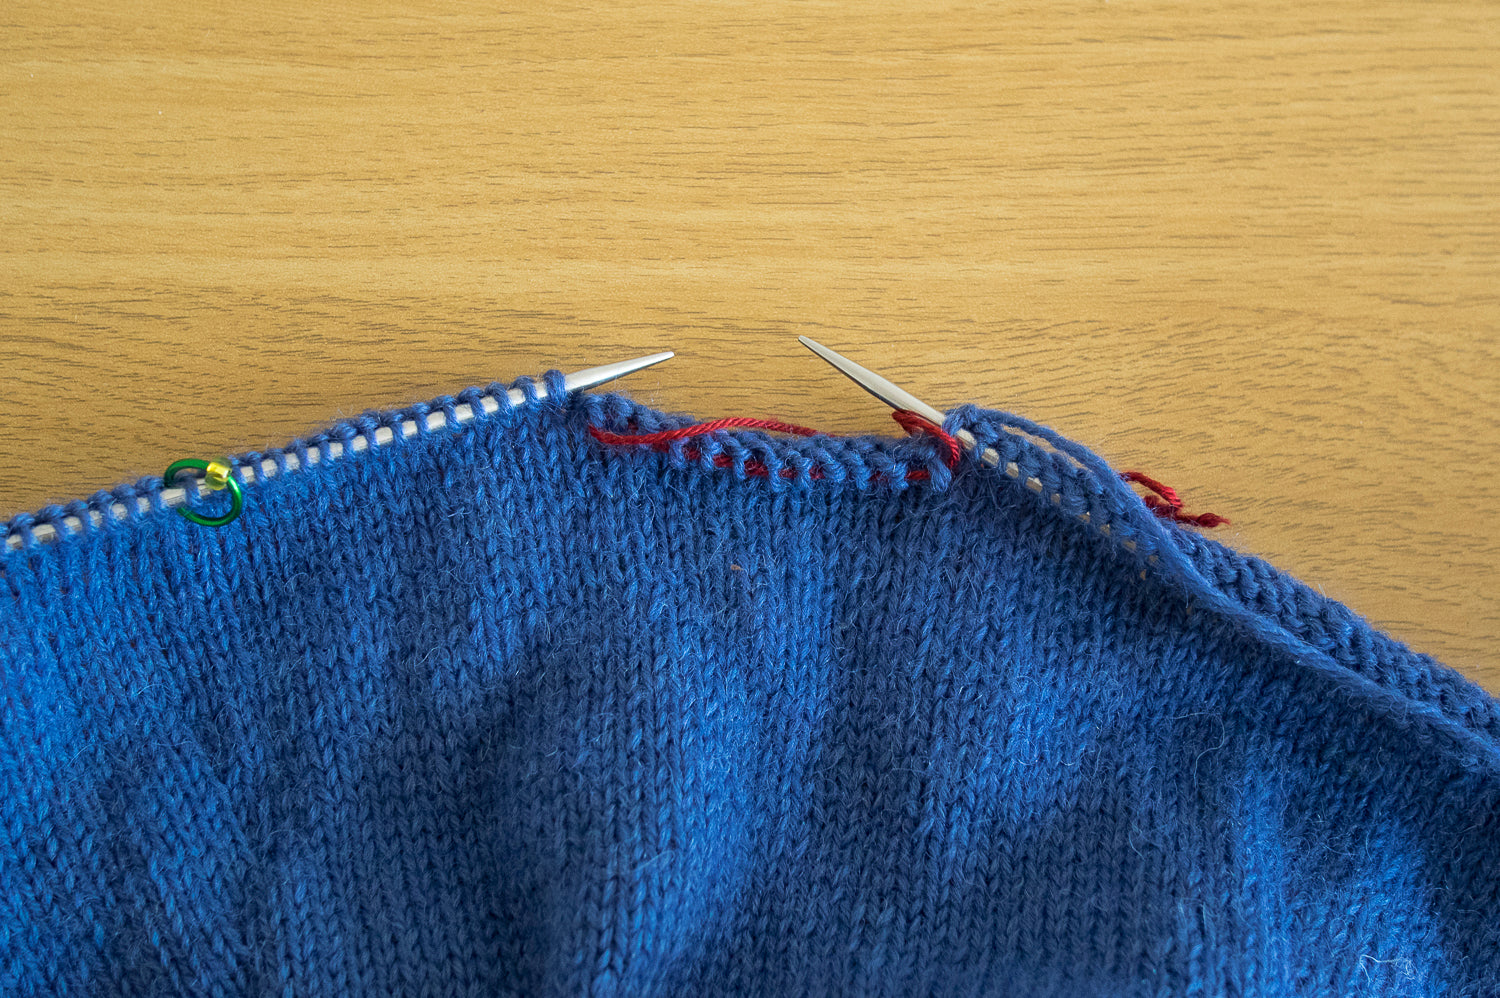
The photos above and below show the underarm stitches and are going to be ignored until the finishing steps of the sweater construction.
Some patterns will instruct you to put these stitches on hold before joining the three pieces together: usually as part of the body and sleeve directions. The photos in this tutorial show the underarm stitches already on hold, for clarity. Other patterns will instruct you to slip the underarm stitches to scrap yarn before working those stitches as you work the round joining the body and sleeves together. The end result of both options will be exactly the same.
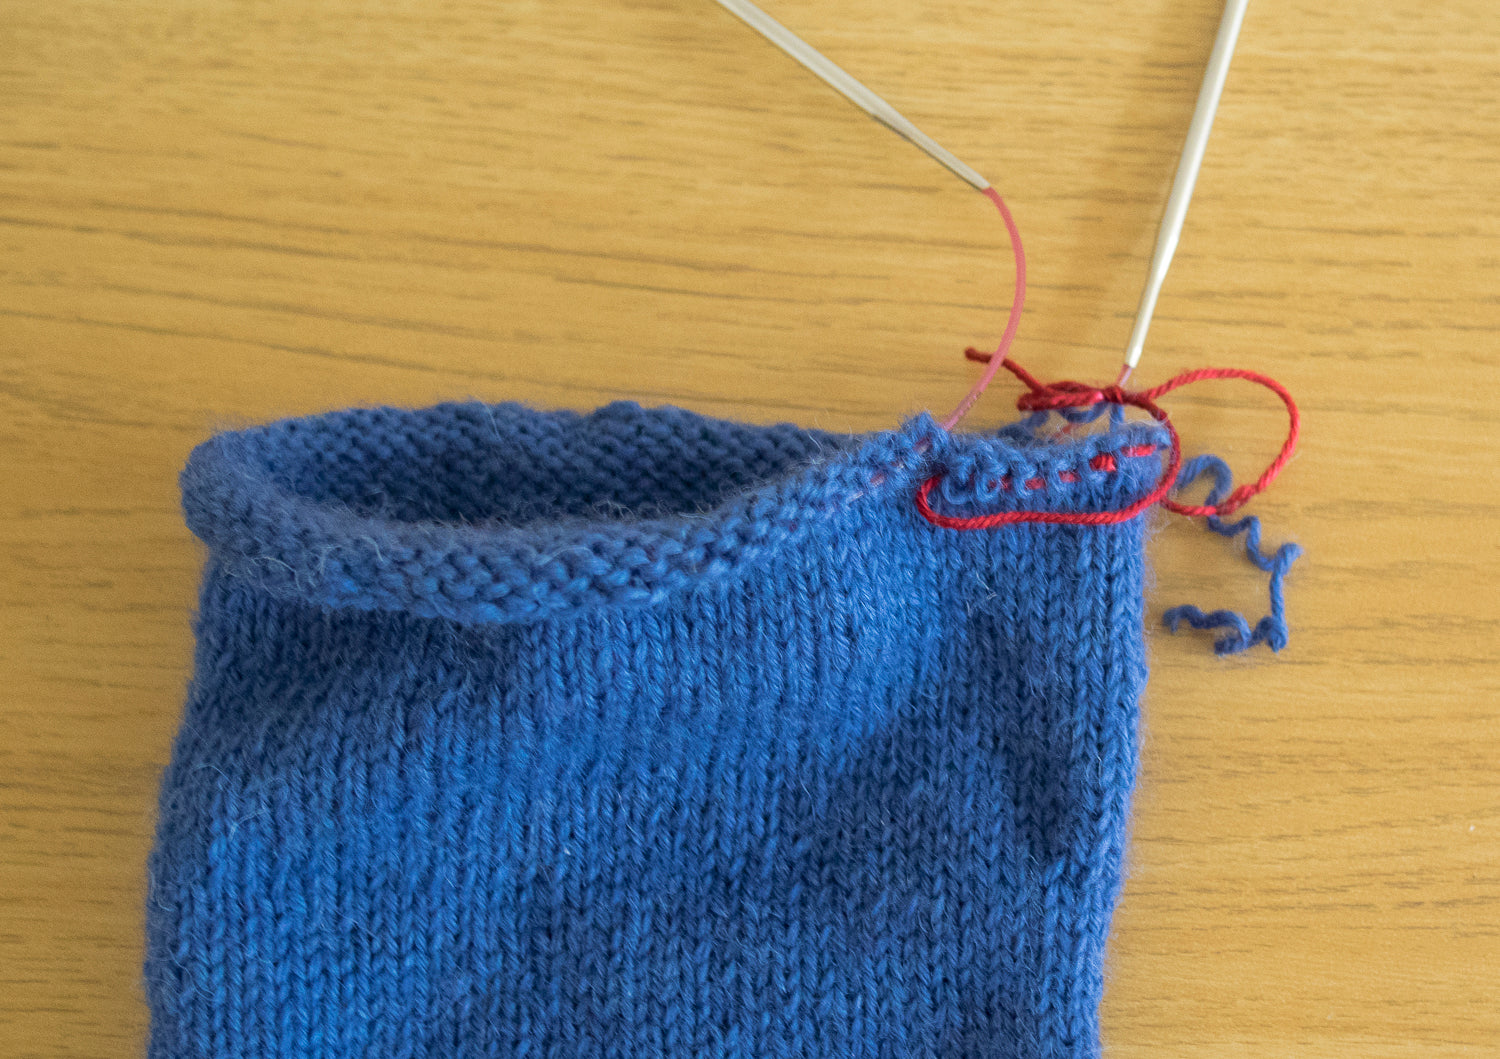
To put the stitches on hold use a smooth, strong scrap yarn threaded onto a darning needle and slip the underarm stitches off the working needle onto the darning needle. Use a separate length of yarn for each set of stitches, and tie the ends together in a knot to keep them secure.
On this sweater the EOR (end of round) is at the back left shoulder between the back and the sleeve. You start the round by adding in the sleeve, the underarm stitches are put on hold, and the working yarn has just finished the last stitch of the back. Sometimes you may be instructed to knit across the front of the body until x stitches before the underarm marker and then put the sleeve in.
To add in a sleeve get the two needles ready. You might need to return the sleeve and / or body to the needle. If you only have one circular in the necessary size use that for the needle you’ll be working on to (usually in the body) and a slightly smaller one for the other. Use the needle in the body as the right needle tip and the needle in the sleeve as the left.
Place a marker on the right needle tip and then knit the first stitch of the sleeve onto the right needle, and continue knitting the sleeve stitches.
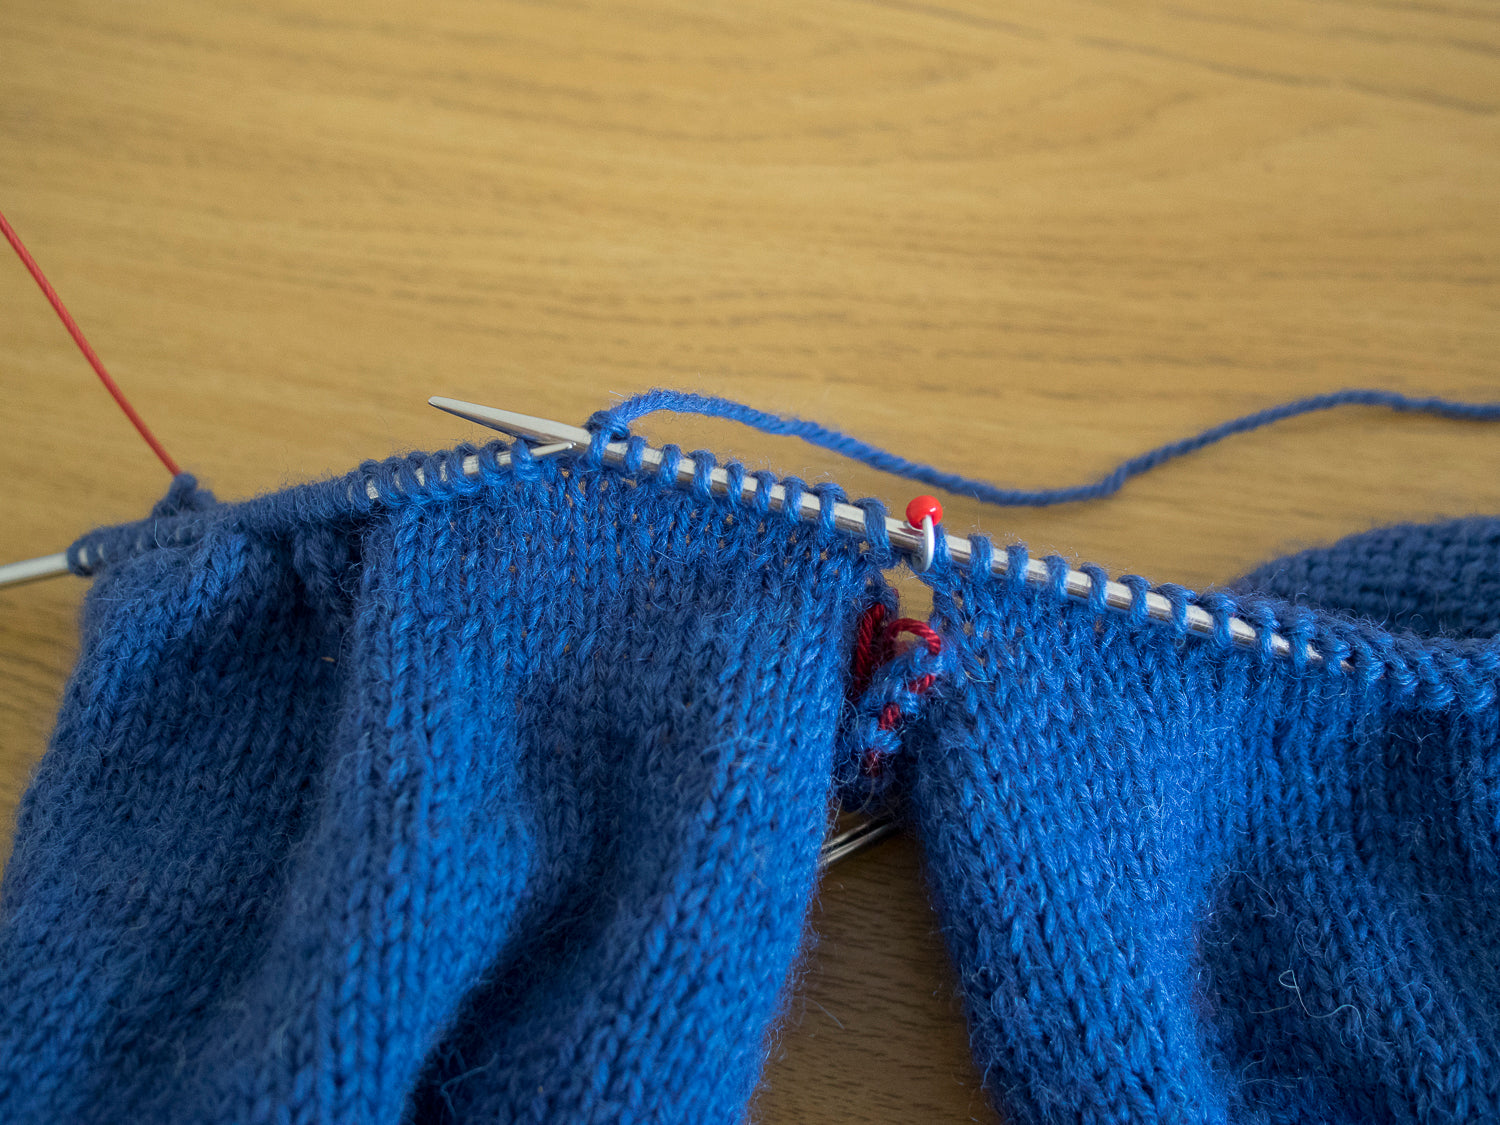
When you get to the last stitch of the sleeve, place another marker and then knit the first live stitch from the body. The released sleeve needle can be used for the second one.
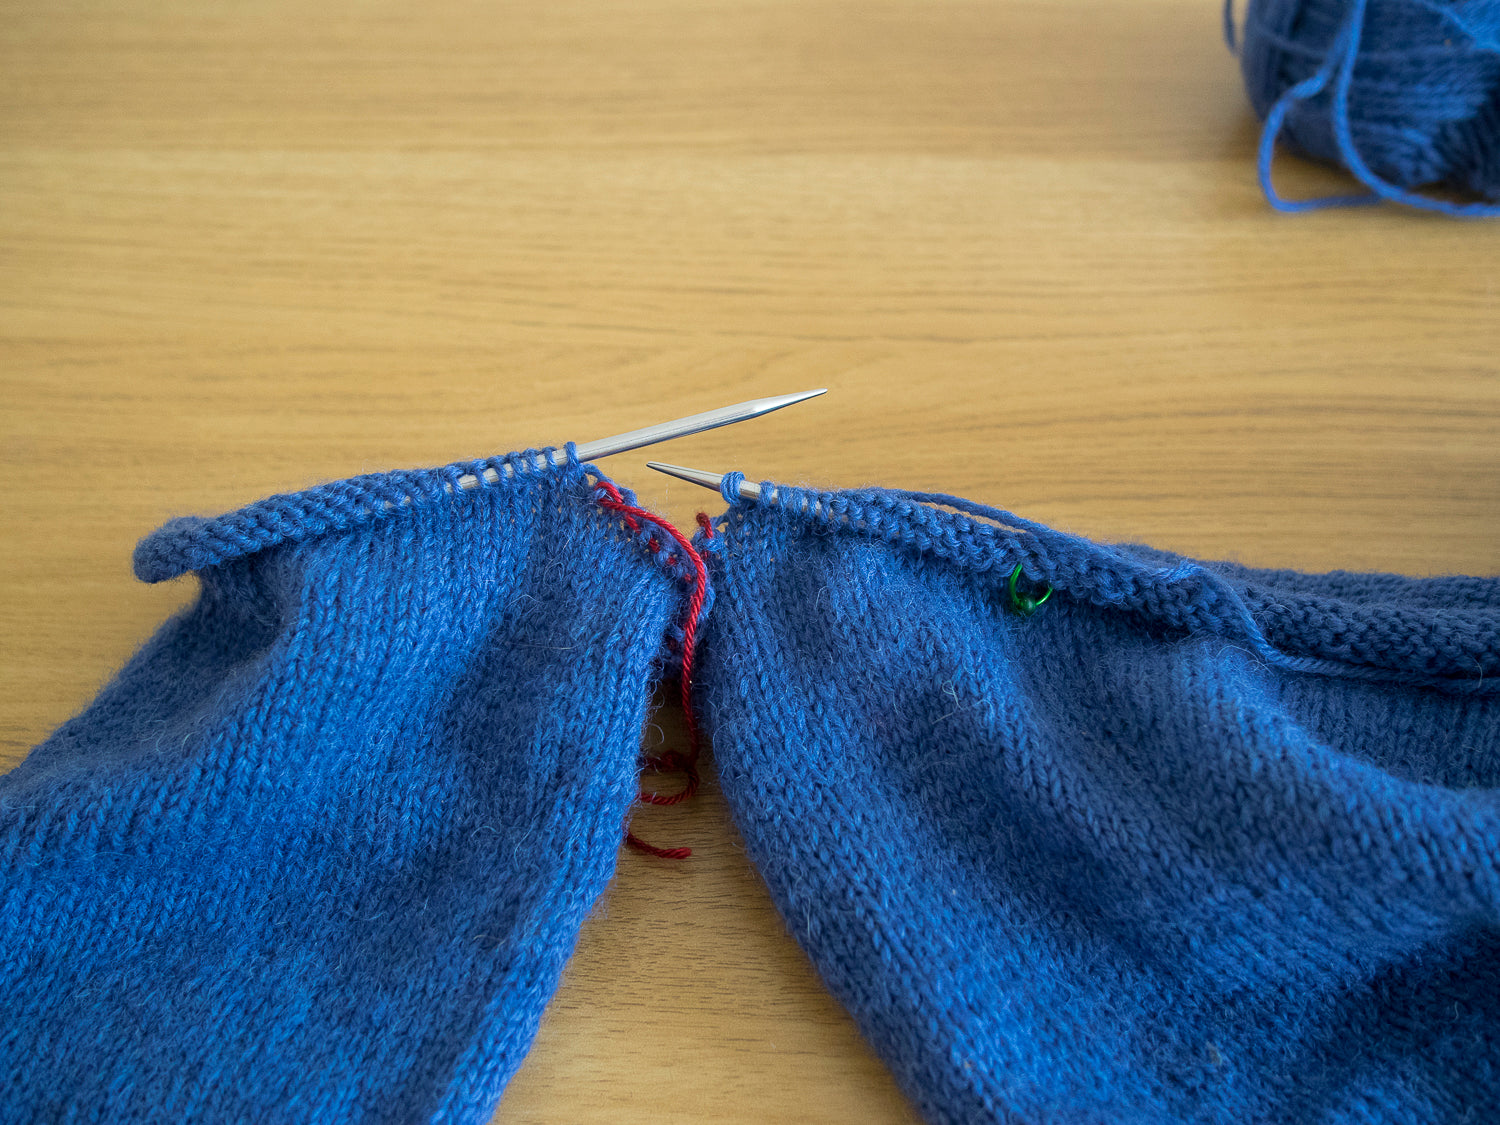
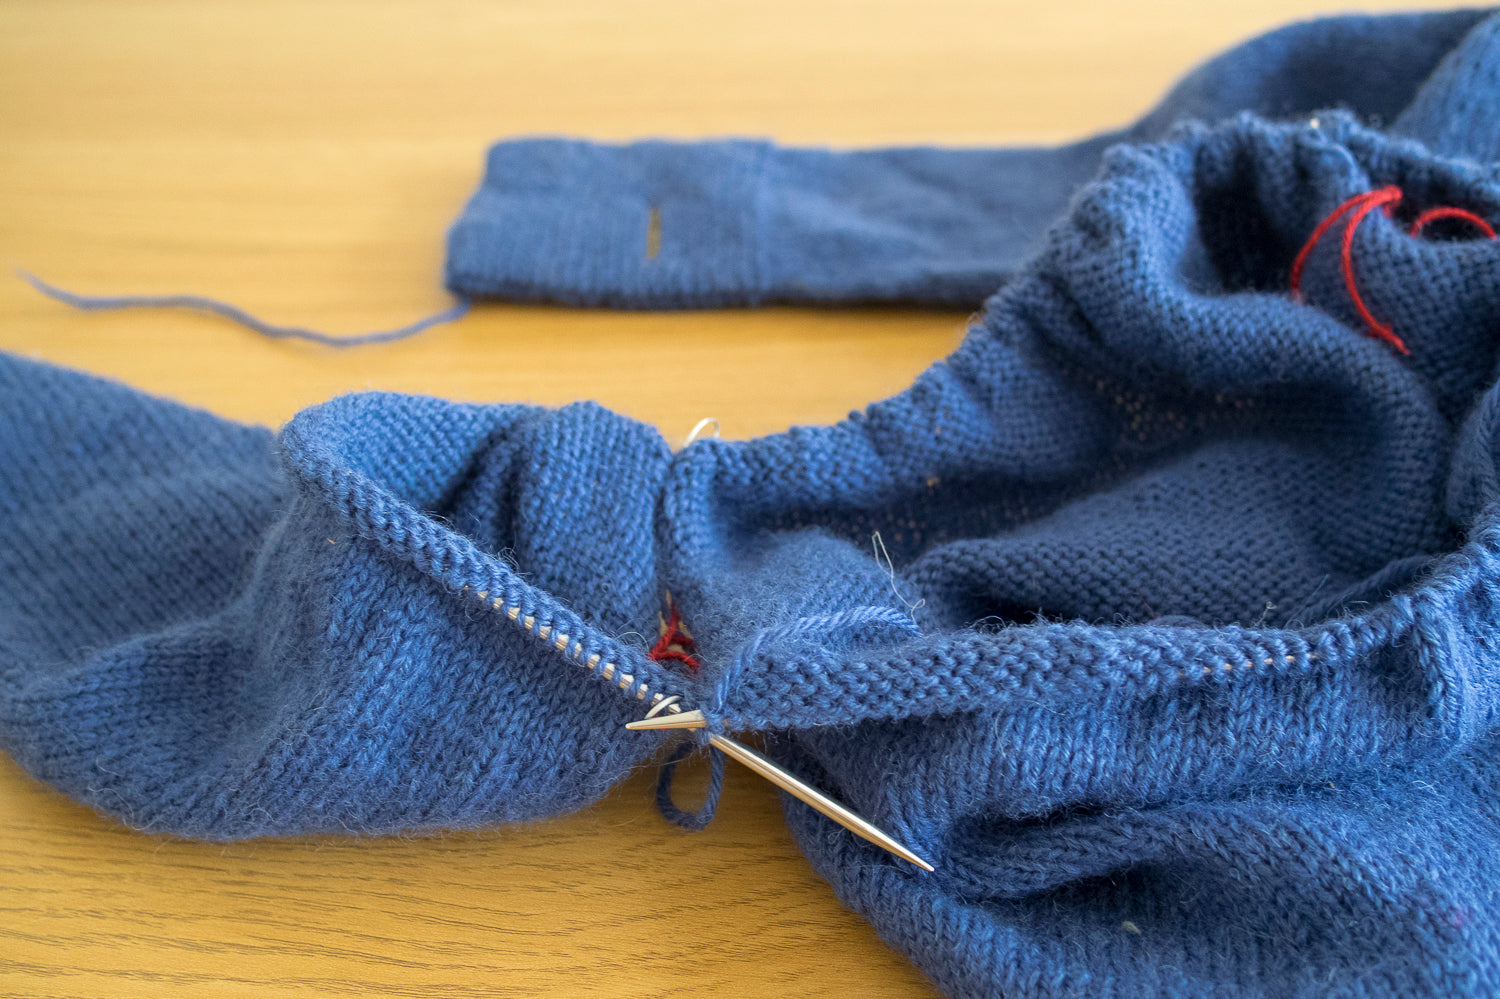
 Join in the second sleeve in the same manner as the first. Depending on your needle length the stitches could be quite cramped together, below the sweater is on a 32″ / 80cm needle.
Underarm stitches on hold
The held underarm stitches for the body and sleeve will now be next to each other. When you're done knitting they can either be joined with a 3 needle bind off or grafted together. Some patterns will instruct you to bind off the underarm stitches and sew them together at the end.

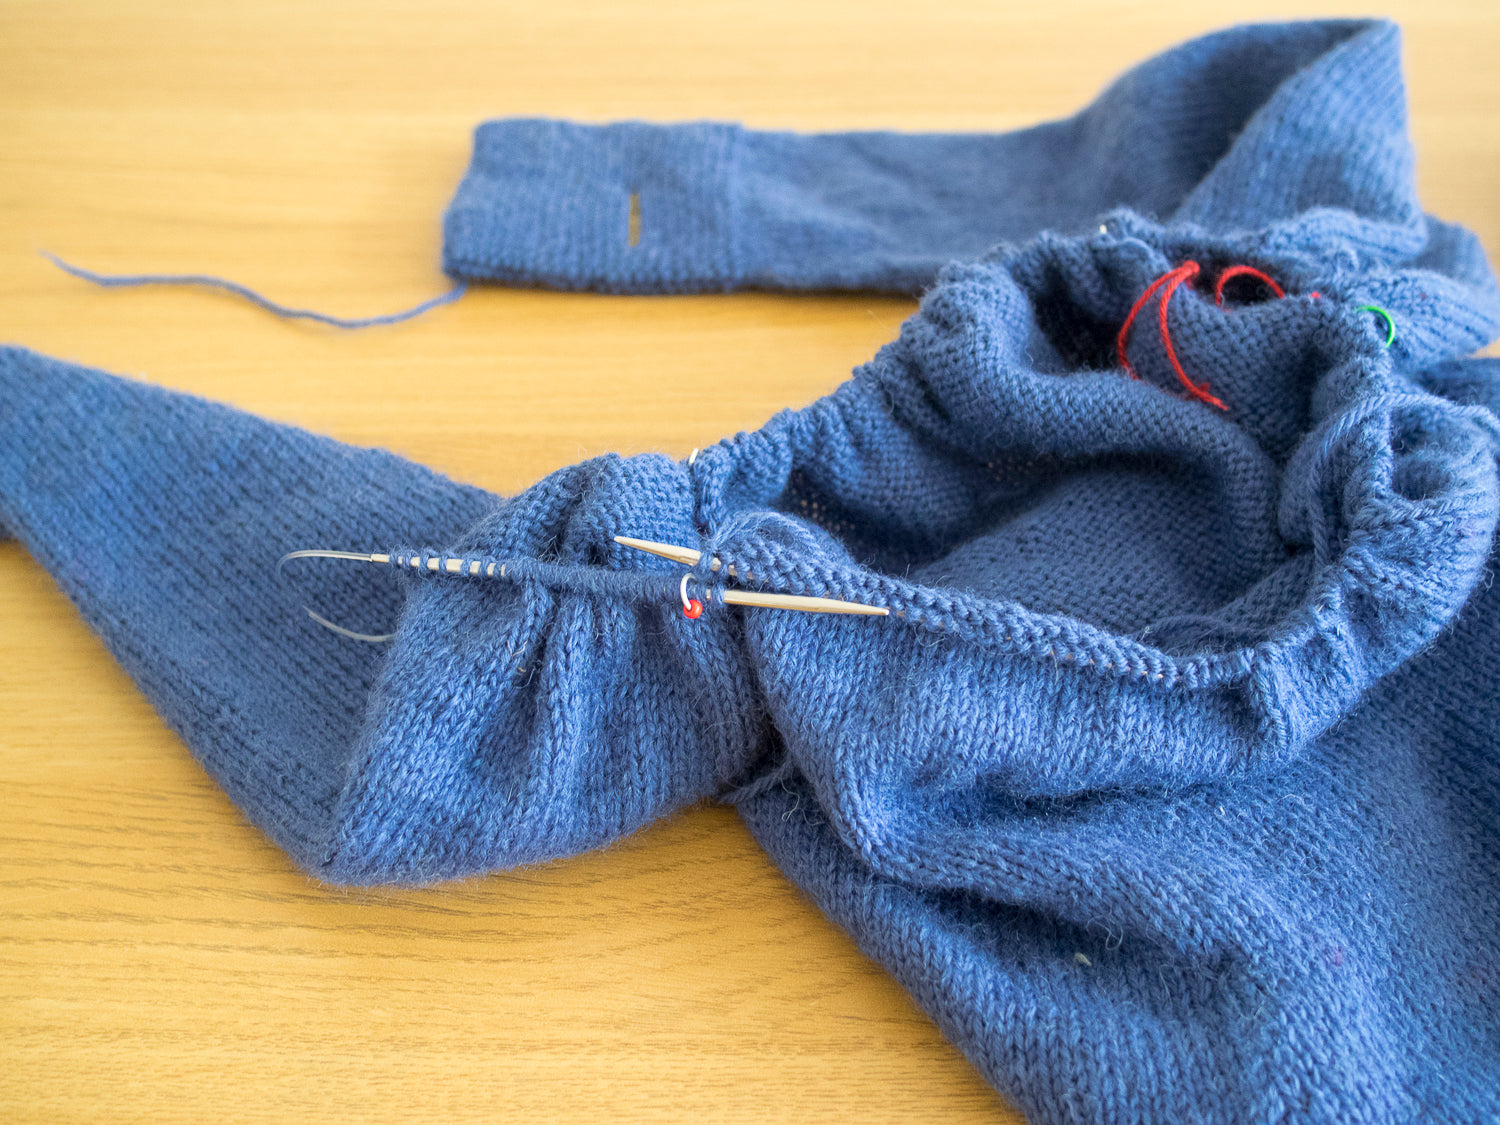
Modified magic loop
On the first few rounds it can be difficult to knit around the sleeve. To make it easier work a modified version of magic loop: when you get to the sleeve pull out a loop of the needle cable in the middle of the sleeve; work across the stitches on the needle until you get to the loop; then pull the right needle tip until enough cable is exposed to form a loop; slide the stitches on the left up onto the needle tip and continue knitting. Repeat this process at the second sleeve. After a few rounds, the knitting will be further from the join and easier to knit in the round as normal.
Don’t forget to count your stitches before going any further. It’s shockingly easy miscount when placing the underarm stitches on the body on hold and end up with one sleeve closer to the back or front!
Found this post helpful? Pin it for later
Also in Journal


Ysolda’s size chart for knitwear designers
Inclusive size charts for sizes xxs to 7xl, created by a knitwear designer and featuring measurements that can be difficult to find. Newly updated with an extended size range with measurements for cup sizing and broad shoulders.
Read More


Deep Shadow Heel Tutorial
The Deep Shadow sock heel is a beginner friendly short row sock heel that provides a more anatomical fit like a heel flap and gusset.
Read More


20 Years of Ysolda Knitting Patterns: Part 2
June 2025 marks twenty years of designing knitting patterns for Ysolda. In this blog post she picks her favourite from each year for 2015 to 2025,
Read More
