


Kits


New! Celebrate this chapter of Ysolda.com as it comes to an end with a special, personalised bundle of our best products, hand-picked by our team just for you.


gift 2019


Subscribe to our Colourwork Club for a gift that lasts well into the new year. Your recipient will receive a new colourwork kit in Janurary, February and March
Last minute shopping? Gift cards are delivered electronically - forward the email or print it for your recipient. A range of amounts are available and gift cards don't expire.

Learn to knit: How to knit in the round using the magic loop technique
Learn to knit: How to knit in the round using the magic loop technique

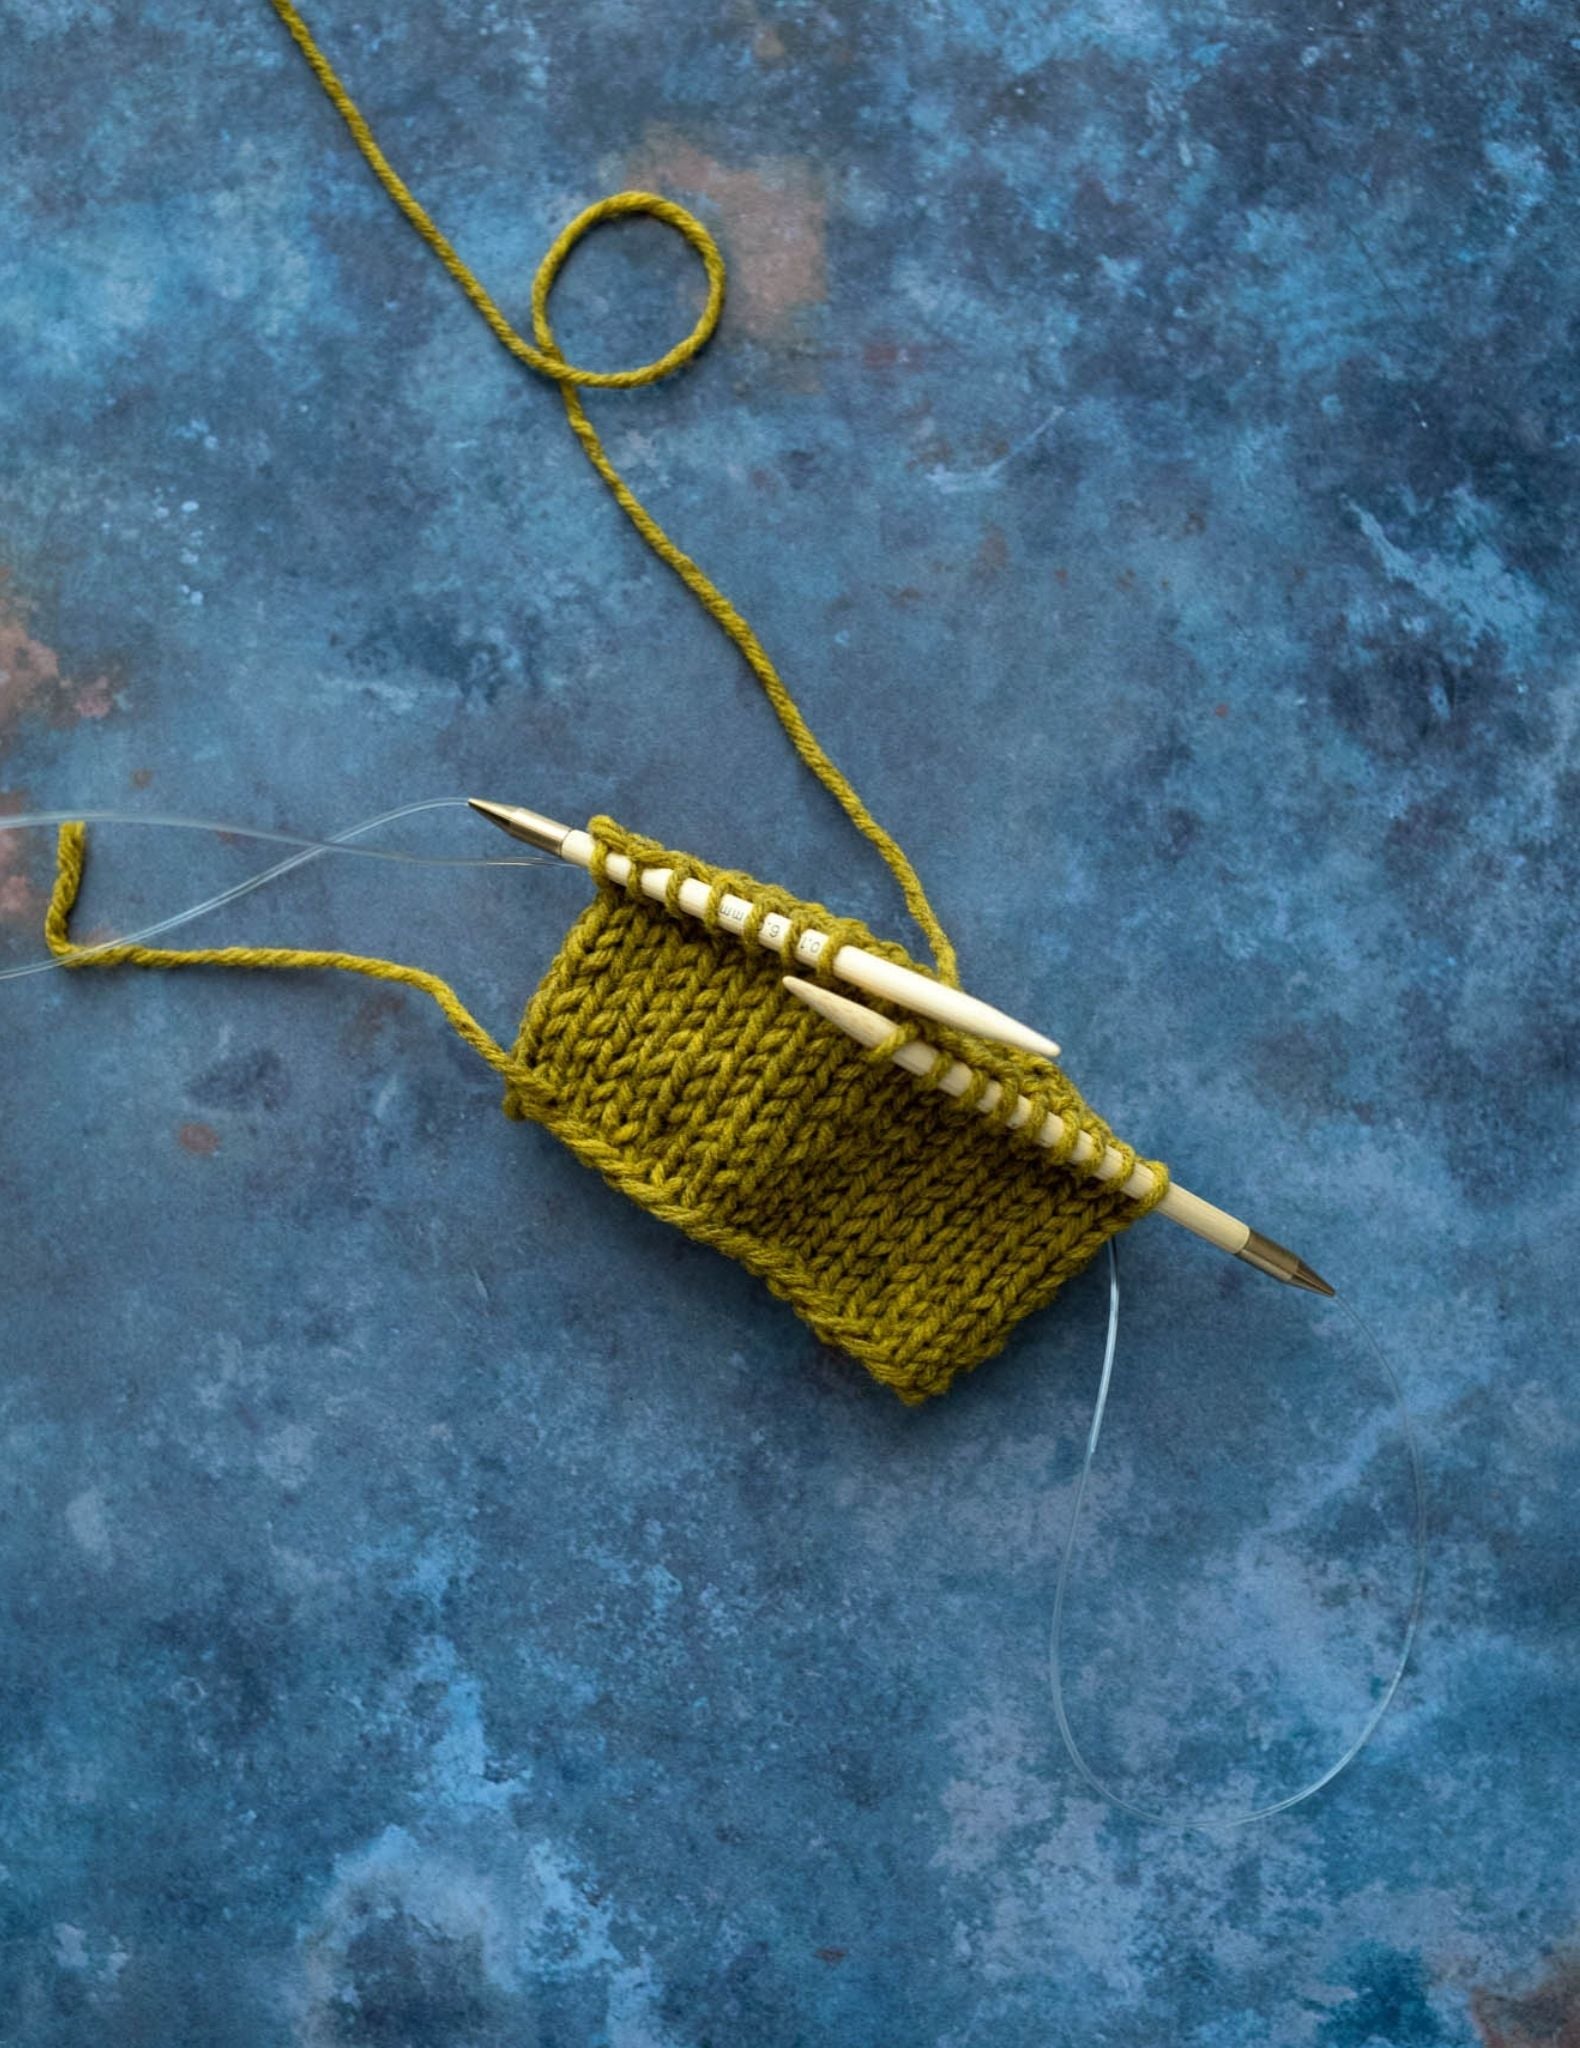
The Magic Loop is a technique, not a needle! Using one long circular needle, you can knit different circumferences of project using the Magic Loop technique. It’s a great alternative to double pointed needles for working small circumferences in the round, such as socks, mitts, hats, and sleeves. You can use magic loop for any project that doesn't have enough stitches to fit comfortably around a circular needle.

Compared with DPNs, there’s much lower risk of dropping stitches, and since it’s just one circular, you can’t misplace or lose a needle. Learning Magic Loop is also a good way to purchase fewer needles, since a long circular can be used for both magic loop and larger projects.
Needles for Magic Loop
A circular needle for Magic Loop should have a very flexible cable - it will be very frustrating to use one that twists on itself or refuses to bend. You can use any needle material, but when starting out with Magic Loop you may want to choose a less slippery material such as wood.

The length of the needle will depend on how large your project is. For socks and mitts a 32” (80cm) needle is likely long enough, but for sweater sleeves you may want a longer one such as 40” (100cm). These two lengths will cover most of your Magic Loop needs. Keep in mind that circular needle length is measured from needle tip to needle tip, not the length of the cable itself.
How to Magic Loop: Cast on and Set up

Cast on all the stitches onto your needle using your favourite method, or the one called for by your pattern.
Once you’ve cast on, push all the stitches down onto the cable.

Fold the cable in half, with the (approximate) centre of the stitches at the fold. Between the stitches, grab hold of the needle’s cable and pull it out, dividing the stitches into two sections.
Slide the two halves of the stitches up onto the needle tips. Depending on how large your project is, the stitches might be all on the needle, or some on the cable.

Before you join to work in the round, ensure that the cast on isn’t twisted - the bottom edge of the cast on should be continuous across all the stitches.
Join in the round

Hold the needles parallel and pointing to the right, with the working yarn coming off the back needle. Holding the stitches in place with your fingers, pull the back needle (the one with the working yarn attached) to the right, so that the stitches slide back onto the cable. This now-empty needle is your right needle.

Insert the right needle tip into the first stitch on the front needle, and knit it (or purl if that’s the pattern). Your work is now joined! Mark the beginning of the round between the needles with a locking stitch marker.
Knit in the round with Magic Loop

Now continue working across the first half of the stitches on this needle. When you reach the end of the stitches on this half, the right needle will have stitches on it and the left needle will be empty.


Flip the work so the second half of the round is facing you.

Slide the second-half stitches up to the empty needle tip, ready to be worked.

Pull the back needle (with the working yarn attached) to the right so the worked stitches are on the cable, and use this needle to work across the second half of the stitches.

You should always have two loops in the needle’s cable: one attached to your right working needle, and one halfway through the round.

Continue in this manner, working each half of the round by sliding the stitches up the working needle, pulling the back needle out to create a loop, then knitting across the front needle.
The Magic Loop technique is a useful and versatile skill to have in your circular knitting toolkit! What will you knit with the Magic Loop?

Also in Journal


Ysolda’s size chart for knitwear designers
Inclusive size charts for sizes xxs to 7xl, created by a knitwear designer and featuring measurements that can be difficult to find. Newly updated with an extended size range with measurements for cup sizing and broad shoulders.
Read More


Deep Shadow Heel Tutorial
The Deep Shadow sock heel is a beginner friendly short row sock heel that provides a more anatomical fit like a heel flap and gusset.
Read More


20 Years of Ysolda Knitting Patterns: Part 2
June 2025 marks twenty years of designing knitting patterns for Ysolda. In this blog post she picks her favourite from each year for 2015 to 2025,
Read More
