Patterns
Kits
sundries
knitting tools, buttons and notions, project bags and other pleasing little things
knitting tools, buttons and notions, project bags and other pleasing little things

Exclusive Scotland needle gauge by Katrinkles

Zippered pouches in two sizes by our studio neighbour Anna Wright

keep small tools accessible with the Maker's Keep
gift 2019
Subscribe to our Colourwork Club for a gift that lasts well into the new year. Your recipient will receive a new colourwork kit in Janurary, February and March

Subscribe to our Colourwork Club for a gift that lasts well into the new year. Your recipient will receive a new colourwork kit in Janurary, February and March


Last minute shopping? Gift cards are delivered electronically - forward the email or print it for your recipient. A range of amounts are available and gift cards don't expire.


How to finish a cross stitch project in an embroidery hoop
May 18, 2020
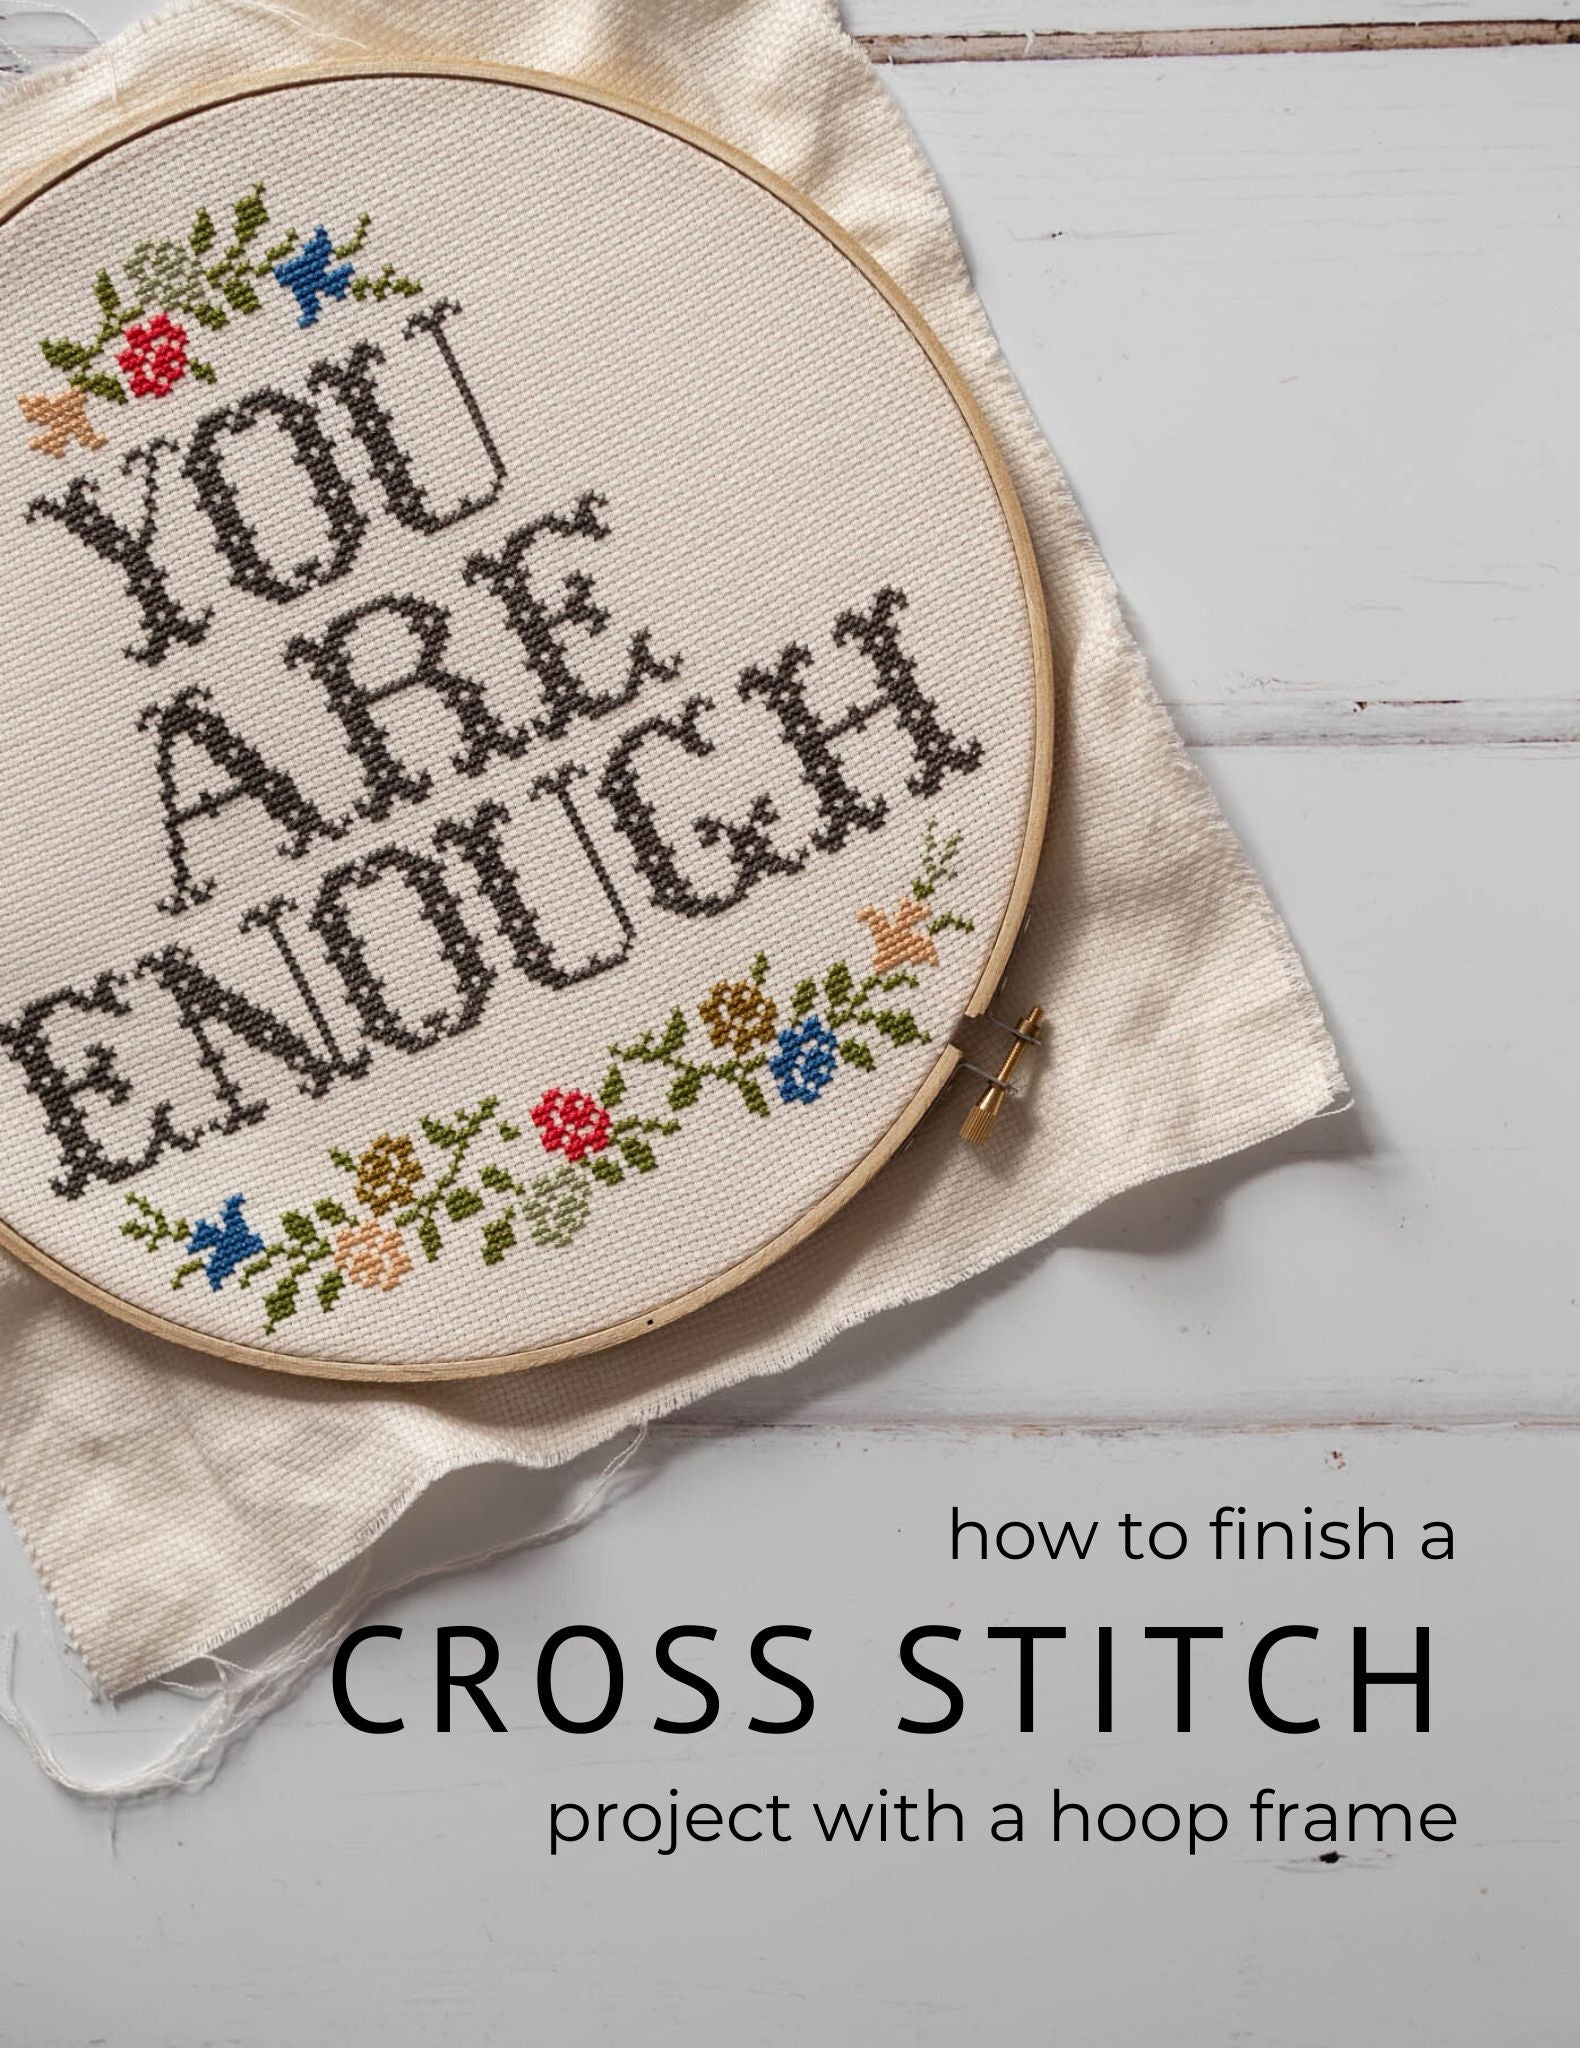
 Our Junebug and Darlin' cross stitch kits include an embroidery hoop, which you can use while stitching your project, and everything you need to use the hoop to frame your finished piece. If you aren't using a kit you will need, in addition to the hoop and your completed cross stitch: strong thread or dental floss, a needle, a piece of felt at least as big as the hoop, a piece of quilt batting about 2 inches / 5cm larger than the hoop, scissors and thread for stitching the back on (you can use embroidery floss, sewing thread or the same strong thread).

Rachel recently stitched the gorgeous "You are Enough" design, a message I know I need to be reminded of regularly, and we documented the finishing process.

Prepare your finished piece for backing:
Cross stitch looks best after washing (if you're a knitter or crocheter you'll know what a difference blocking can make!) Wash the finished piece in lukewarm water with mild soap. Roll in a dry towel and squeeze out the excess water. Then centre the wet fabric in the hoop, making sure it's positioned as you want the finished piece to be. Pull the fabric taut and tighten the hoop. Allow to dry.
Adding the backing
When your piece is totally dry remove it from the hoop.
1. Use tailor's chalk, a fabric marker, or a biro to draw around the inside of the outer hoop on the felt piece. Cut out the felt circle and set it aside.


2. Layer the batting behind the cross stitch and position both of them in the hoop.

Carefully pull the fabric taut so that it's centred and wrinkle free. Tighten the hoop.

Roughly trim the batting and aida into a circle about 1" / 2.5cm larger than the hoop.
3.Gather the raw edge in:

Cut a long piece of strong thread and knot the end.

Sew around the edge, through both layers, using a basting stitch. Pull both ends of the thread to gather the fabric and tie securely.

4. Sew the felt circle to the back:
Take the felt piece and cover the gathered fabric. If you wish, before sewing the felt to the cross stitch piece you can embroider a message to your recipient or your initials. You could also hide a secret message inside.


Cut a long length of the same thread or spare embroidery floss and knot the end.

Use an overcasting stitch to stitch the felt backing on.

Finish with a knot.
Your finished piece is ready to be hung, or to gift.

Also in Journal

Deep Shadow Heel Tutorial
September 25, 2025

20 Years of Ysolda Knitting Patterns: Part 2
June 23, 2025

20 Years of Ysolda Knitting Patterns: Part 1
June 19, 2025
Recent Articles
-
Deep Shadow Heel Tutorial
September 25, 2025
-
20 Years of Ysolda Knitting Patterns: Part 2
June 23, 2025
-
20 Years of Ysolda Knitting Patterns: Part 1
June 19, 2025
-
Learn to Knit: Mattress Stitch
March 29, 2023
-
How to Knit a Scarf: A Beginners Guide to Scarf Knitting
March 23, 2023
-
Learn to knit: the long tail cast-on
February 03, 2022
-
How to Graft Your Knitting
December 09, 2021
-
Crochet Provisional Cast-on
December 02, 2021
-
Learn to knit: How to knit in the round with double pointed needles
November 25, 2021
-
Learn to knit: How to knit in the round using the magic loop technique
November 25, 2021
Free resources
-
KALS, step-by-step pattern guides and free patterns
Learn brioche with the free Daniel's Hat pattern
Tombreck - a free chevron beanie pattern
Working the brioche neck detail on the Polwarth sweater
Installing a zipper and ribbon, finishing wee Carson
Yarn colour ideas for Threipmuir sweater
Additional colourways for the Joy mitts (choose your pride flag)
How to join the shoulders on Wardie
How to join the pockets on Granton and Wardie
Finishing Resources for Granton
Broughton mittens tutorial part 1
Broughton mittens tutorial part 2
Broughton mittens tutorial part 3
Basics
Casting on
Decorative Channel Island Cast-on
Binding off
3 Easy Stretchy Bind-offs (p2tog bind-off; k2togtbl, k1 bind-off; Jeny's surprisingly stretchy bind-off)
Tubular Bind-off for brioche stitch
Increasing
Paired increase methods compared
How to continue in pattern while increasing and decreasing
Decreasing
Brioche stitch double decreases
Knitting in the round
How to Knit in the round using Magic Loop
How to Knit in the round using DPNs
Short rows
Swatching and gauge
Tips and tricks
Avoiding ears when binding off
Tighter purl stitches for neater cables and ribbing
Cabling without a cable needle
How to knit more symmetrical yarn overs
Bust darts in sweaters with all over stitch patterns
A magic formula for evenly distributing shaping
Superwash v Non-Superwash Wool
Picking up sts from the middle of the fabric
Reading knitting patterns
Understanding "continue in pattern"
Help! Where am I in my knitting project?
Using charts, even if you hate them
Finishing
Garment knitting
Joining the body and sleeves on a seamless bottom up sweater
Sizing
Ysolda’s sizing chart for knitwear designers
Inclusive garment knitting
How to pick a garment without a model for you (specifically addresses finding garment patterns when your gender identity isn't represented and the styles you want to knit might not be sized to fit your body)
How does ease affect inclusive size ranges?
Specific stitch patterns
Lace
Identifying and fixing mistakes in lace knitting
Colourwork
Getting started with stranded colourwork
Understanding colour dominance
Working stranded colourwork over small circumferences
Decreases in stranded colourwork
Holding the yarn for stranded colourwork
Ladderback Jacquard (a neat way to deal with long floats)
Cables
Cabling without a cable needle
Cabling without a cable needle on the wrong side
How to knit cabled decreases
Closed ring cable increases and decreasesBrioche
How to work brioche stitch in the round
Other crafts
Cross stitch
How to begin your first large cross stitch project
How to finish a cross stitch project with an embroidery hoop frame
Mending

Sign up today
Find out the latest news from the studio such as sales, pattern releases, and new workshops or KALs our learning community, The Knitwork. We also share helpful tips and exclusive subscriber discounts...


