Your Cart is Empty


Twisted rib is a beautiful stitch to add to your knitting repertoire! This easy variation on 1x1 rib produces a wonderfully tidy, reversible fabric that does not curl. Although it has “rib” in the name, twisted rib generally lays flat and doesn’t contract the way standard ribbing does when relaxed. Twisted rib is perfect for decorative edges where you don’t need or want the elasticity of standard rib, such as sweater hems and accessories.
To knit twisted rib, all of the knit and purl stitches are worked through the back loop on every row or round, twisting the stitches each time and creating crisp, defined columns.
Half-twisted rib is very similar to twisted rib, but only half the stitches are worked through the back loop on each row. Generally, the knit stitches that show on the outside (right side) of the work are twisted and the purls are worked in the standard manner. It’s a bit faster than twisted rib and appears the same from the outside, but half-twisted rib isn’t as reversible. Instead, one side will show columns of twisted knit stitches, while the other side will look like standard ribbing. Half-twisted rib is often worked in the round, as in the Poza cowl.


Learn how to knit through the back loop, purl through the back loop, and create twisted rib with our step by step tutorial below!

Insert the right needle tip into the BACK of the stitch (the side of the stitch that is further away from you) from right to left - the right needle should be behind the left needle.

Wrap yarn counter-clockwise around the right needle as usual.

Draw the new stitch through the back loop, towards you, and remove the completed stitch from the left needle.

Insert the right needle tip into the BACK of the stitch (the side of the stitch that is further away from you) from left to right, then bring the tip of the needle towards you.

The right needle should cross below the left needle and be in front.

Wrap yarn counter-clockwise around the right needle tip.

Draw the new stitch through the back loop, away from you.

Remove the completed stitch from the left needle.

1. Knit the first stitch through the back loop.

2. Bring the yarn to the front between the needles.

3. Purl the next stitch through the back loop. 4. Bring the yarn to the back between the needles.
Repeat steps 1-4 to the end of the row or round.
Twisted rib is worked the same flat and in the round. Maintain the rib pattern by alternating between knit and purl, working every stitch through the back loop.
Half-twisted rib is most often worked in the round, where all knit stitches are worked through the back loop and all purl stitches are worked through the front loop.
1. Knit the first stitch through the back loop.
2. Bring the yarn to the front between the needles.

3. Purl the next stitch normally, through the front loop.

4. Bring the yarn to the back between the needles.
Repeat steps 1-4 for Half-twisted rib in the round.
When working flat, the knit stitches are twisted on the RS rows and the purl stitches are twisted on the WS rows.

Work RS rows as above, knitting through the back loop and working purl stitches through the front loop.

On wrong side rows, work the knit stitches through the front loop…

…and the purl stitches through the back loop.

Repeat these two rows for Half-twisted rib worked flat.
Since it doesn’t contract, twisted rib will be wider than a standard 1x1 rib on the same number of stitches.
Although we show a 1x1 twisted rib example, you can apply the same techniques to any size of rib!
Give your twisted rib projects the perfect finish with a tubular cast on or alternating rib cast on, paired with a sewn tubular bind off.
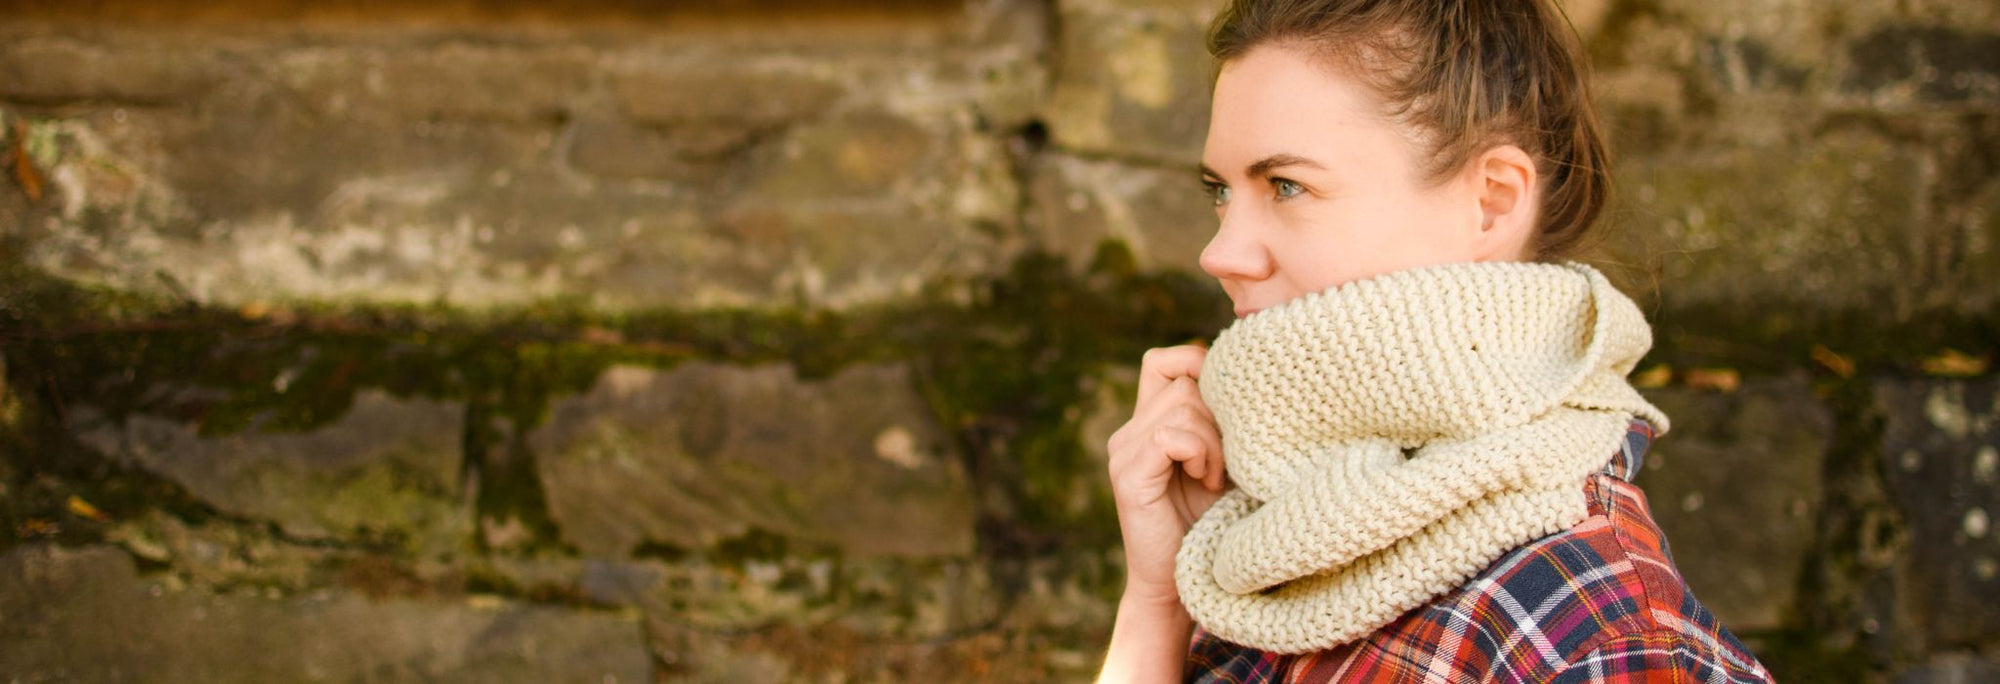
Ready to try twisted rib on a project? The Poza cowlbeautifully incorporates crisp half-twisted rib into the lace patterned border.