


Kits


New! Celebrate this chapter of Ysolda.com as it comes to an end with a special, personalised bundle of our best products, hand-picked by our team just for you.


gift 2019


Subscribe to our Colourwork Club for a gift that lasts well into the new year. Your recipient will receive a new colourwork kit in Janurary, February and March
Last minute shopping? Gift cards are delivered electronically - forward the email or print it for your recipient. A range of amounts are available and gift cards don't expire.
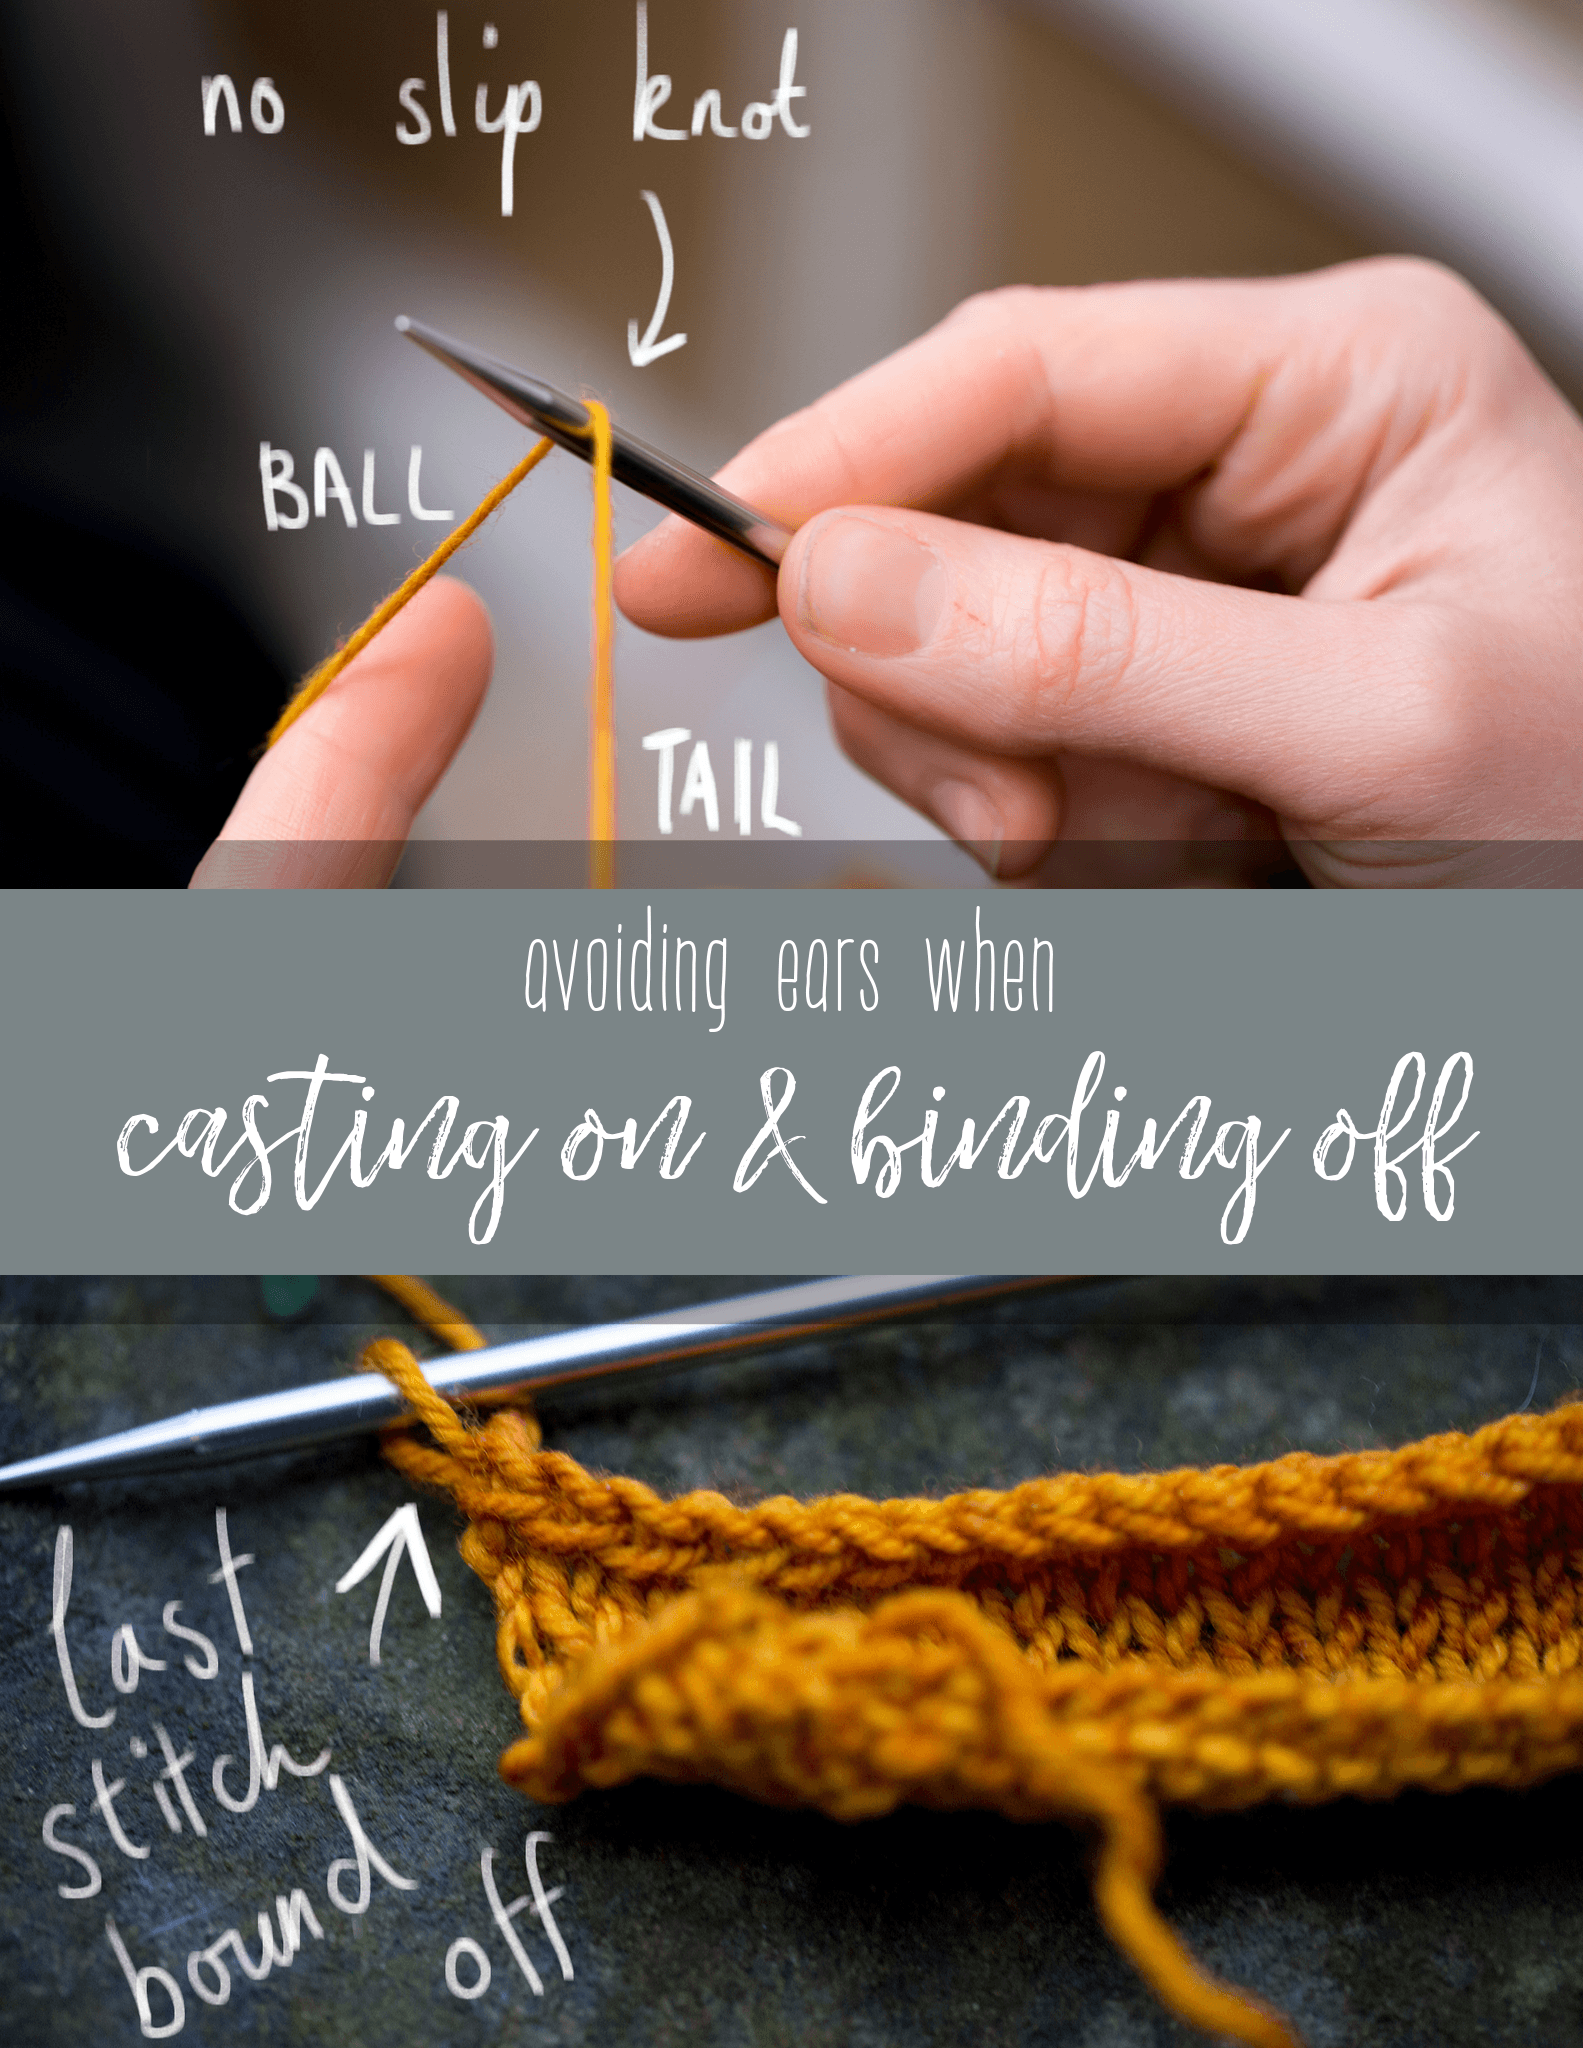
Technique Thursday – Avoiding ears when casting on and off

Just a couple of little tricks this week. They might be familiar, but I get the impression that the other ways of doing these are more common, so perhaps this way will be new to you. If so, they’re both little details that can give your projects a neater finish.
Skip the slip-knot when doing a long tail cast on (or almost any cast on that begins with one)
Beginning with a slip-knot gives you something stable to put on the needle, which may help beginners, but otherwise it’s completely unnecessary. The resulting knot can stick out of your work, leaving a bump, an ‘ear’, at the corner.
Instead of starting with a slip-knot, just pull out enough yarn for your tail end and lay the yarn over the needle at that point. Grab the ends and cast on normally.

That first loop makes your first stitch. To avoid it being loose and as unsightly as a knot make sure to snug the first cast on stitch up against it.

Knittinghelp.com has a decent video if you are new to the long tail cast on. It can also be worked with one strand in each hand which seems to be the more traditional method here in the UK. It can also be worked backwards, and by alternating forwards and backwards stitches as you cast on you can make an excellent, sturdy cast on for ribbing. I’ll never forget the reaction on my first visit to Iceland when Ragga told her class to just do long tail, but backwards. It was clearly something she’d never realised would require explanation if you weren’t familiar with it!

When doing a regular bind off / cast off, don’t pull the yarn through the stitch left on the needle, pull the stitch

If you break the yarn and pull the end through the last stitch left on the needle, you’re essentially adding an extra stitch that sticks out at the end of your bind off.


The resulting bind off is exactly the length of the knitted piece with no overhang. When binding off in the round I add an extra step to create a smooth join at the beginning and end. When only one stitch is left to be bound off insert the needle into that stitch and under the two legs of very first link in the bind off chain from the beginning of the round and knit them together. Complete the bind off.
Also in Journal


Ysolda’s size chart for knitwear designers
Inclusive size charts for sizes xxs to 7xl, created by a knitwear designer and featuring measurements that can be difficult to find. Newly updated with an extended size range with measurements for cup sizing and broad shoulders.
Read More


Deep Shadow Heel Tutorial
The Deep Shadow sock heel is a beginner friendly short row sock heel that provides a more anatomical fit like a heel flap and gusset.
Read More


20 Years of Ysolda Knitting Patterns: Part 2
June 2025 marks twenty years of designing knitting patterns for Ysolda. In this blog post she picks her favourite from each year for 2015 to 2025,
Read More
