Your Cart is Empty


Does that phrase put you off a pattern completely? Make you nervous about whether you’re really doing it right? If it does, you’re not alone! When writing patterns I try to give specific directions for every detail, but sometimes the cleanest, most legible option is to establish a stitch pattern and leave it up to the knitter to keep it going.
I find it helpful to think of allover patterns as a piece of decorated fabric or paper that I’m cutting into with my shaping. Everything should line up vertically with the fabric in the middle, not necessarily with what the stitch below the increase or decrease used to be.
If I was working seed stitch and had a purl at the beginning of the row if I decreased right at the beginning my first stitch would then be a knit to maintain the pattern. Decrease again and that first stitch would switch back a knit. It doesn’t matter what the first stitch has been before, it matters what is next to it in the pattern.
Let’s look at a fairly simple allover diamond pattern. We can tell from this chart that the pattern has the same number of stitches on every row (see this post if you’re unfamiliar with charts), which means that every yarn over is compensated for by a decreased stitch.
When shaping that is the crucial thing to remember — unless you want to decrease a stitch for your shaping, every yarn over must be compensated for. If there aren’t enough stitches for both the yarn over and the decrease don’t work either of them. Work those stitches in your ground pattern (usually stockinette but possible reverse stockinette, garter, seed etc).

How would we maintain this pattern while shaping something like an armhole?

These are the stitches that might be affected by the bite taken out of the fabric.

Rule 1: every yarn over must be compensated for.
Rule 2: no yarn overs or decreases right on the edge (another way to say this would be that I want a selvedge stitch to make seaming easier — your pattern might specify that this should be two stitches wide).
Rule 3: all shaping decreases should be worked 1 stitch in from the edge and should lean in the same direction.
After going through each potential trouble spot identified above the chart looks like this.

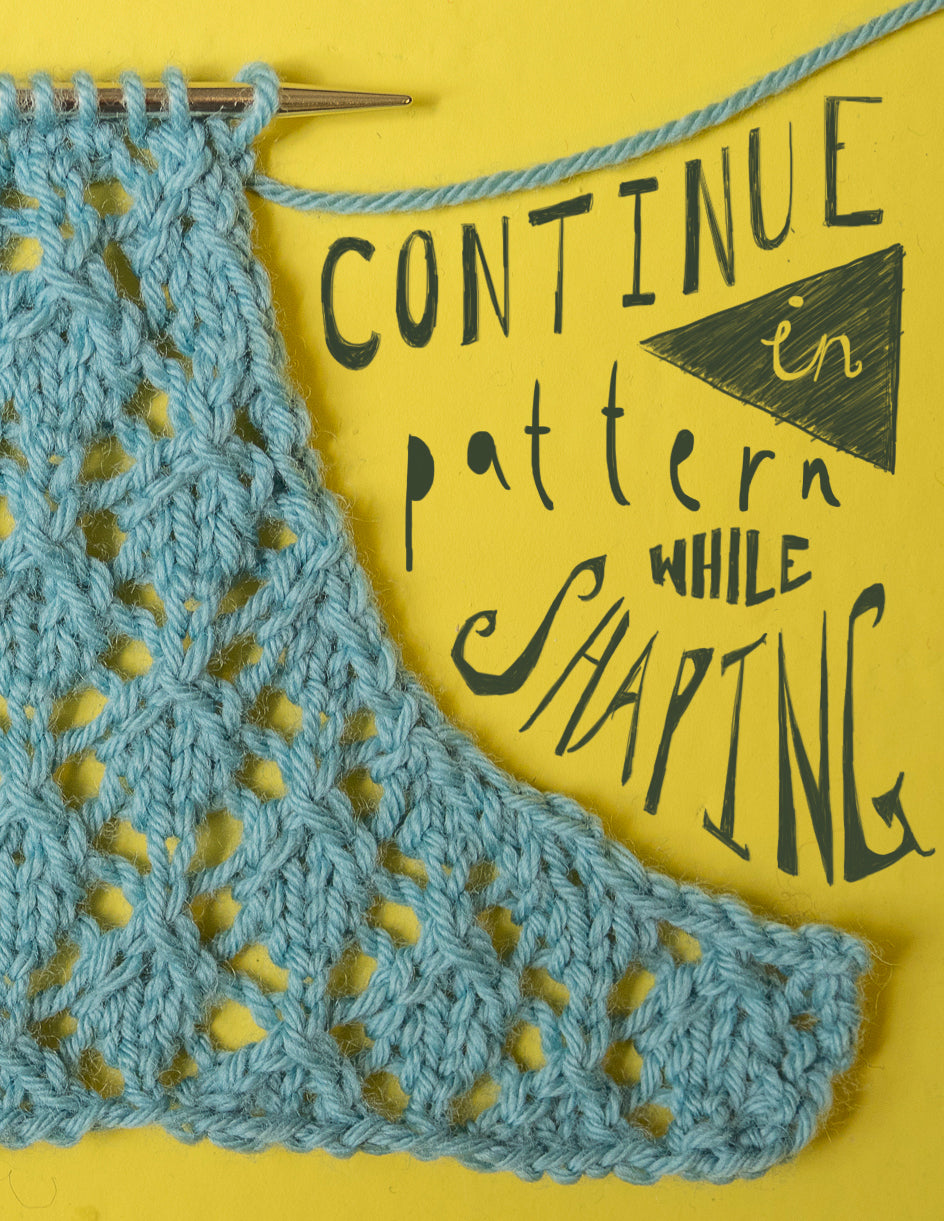
And in real life it looks like this:

It certainly isn’t necessary to chart out a pattern like this, but if you’re struggling to visualise how to shape your pattern it can be very helpful to plan ahead. You may find that especially useful when increasing since you’ll have less of the established pattern on the needles to guide you.

In most stitch patterns whether to lean increases and decreases towards or away from the edge being shaped is simply an aesthetic choice. See this earlier Technique Thursday post for examples.
In stranded colourwork leaning decreases towards the edge being shaped and making sure to work them in the colour that matches the established pattern for that stitch will make them blend in almost imperceptibly. Sweet.