Your Cart is Empty


 Our Junebug and Darlin' cross stitch kits include an embroidery hoop, which you can use while stitching your project, and everything you need to use the hoop to frame your finished piece. If you aren't using a kit you will need, in addition to the hoop and your completed cross stitch: strong thread or dental floss, a needle, a piece of felt at least as big as the hoop, a piece of quilt batting about 2 inches / 5cm larger than the hoop, scissors and thread for stitching the back on (you can use embroidery floss, sewing thread or the same strong thread).

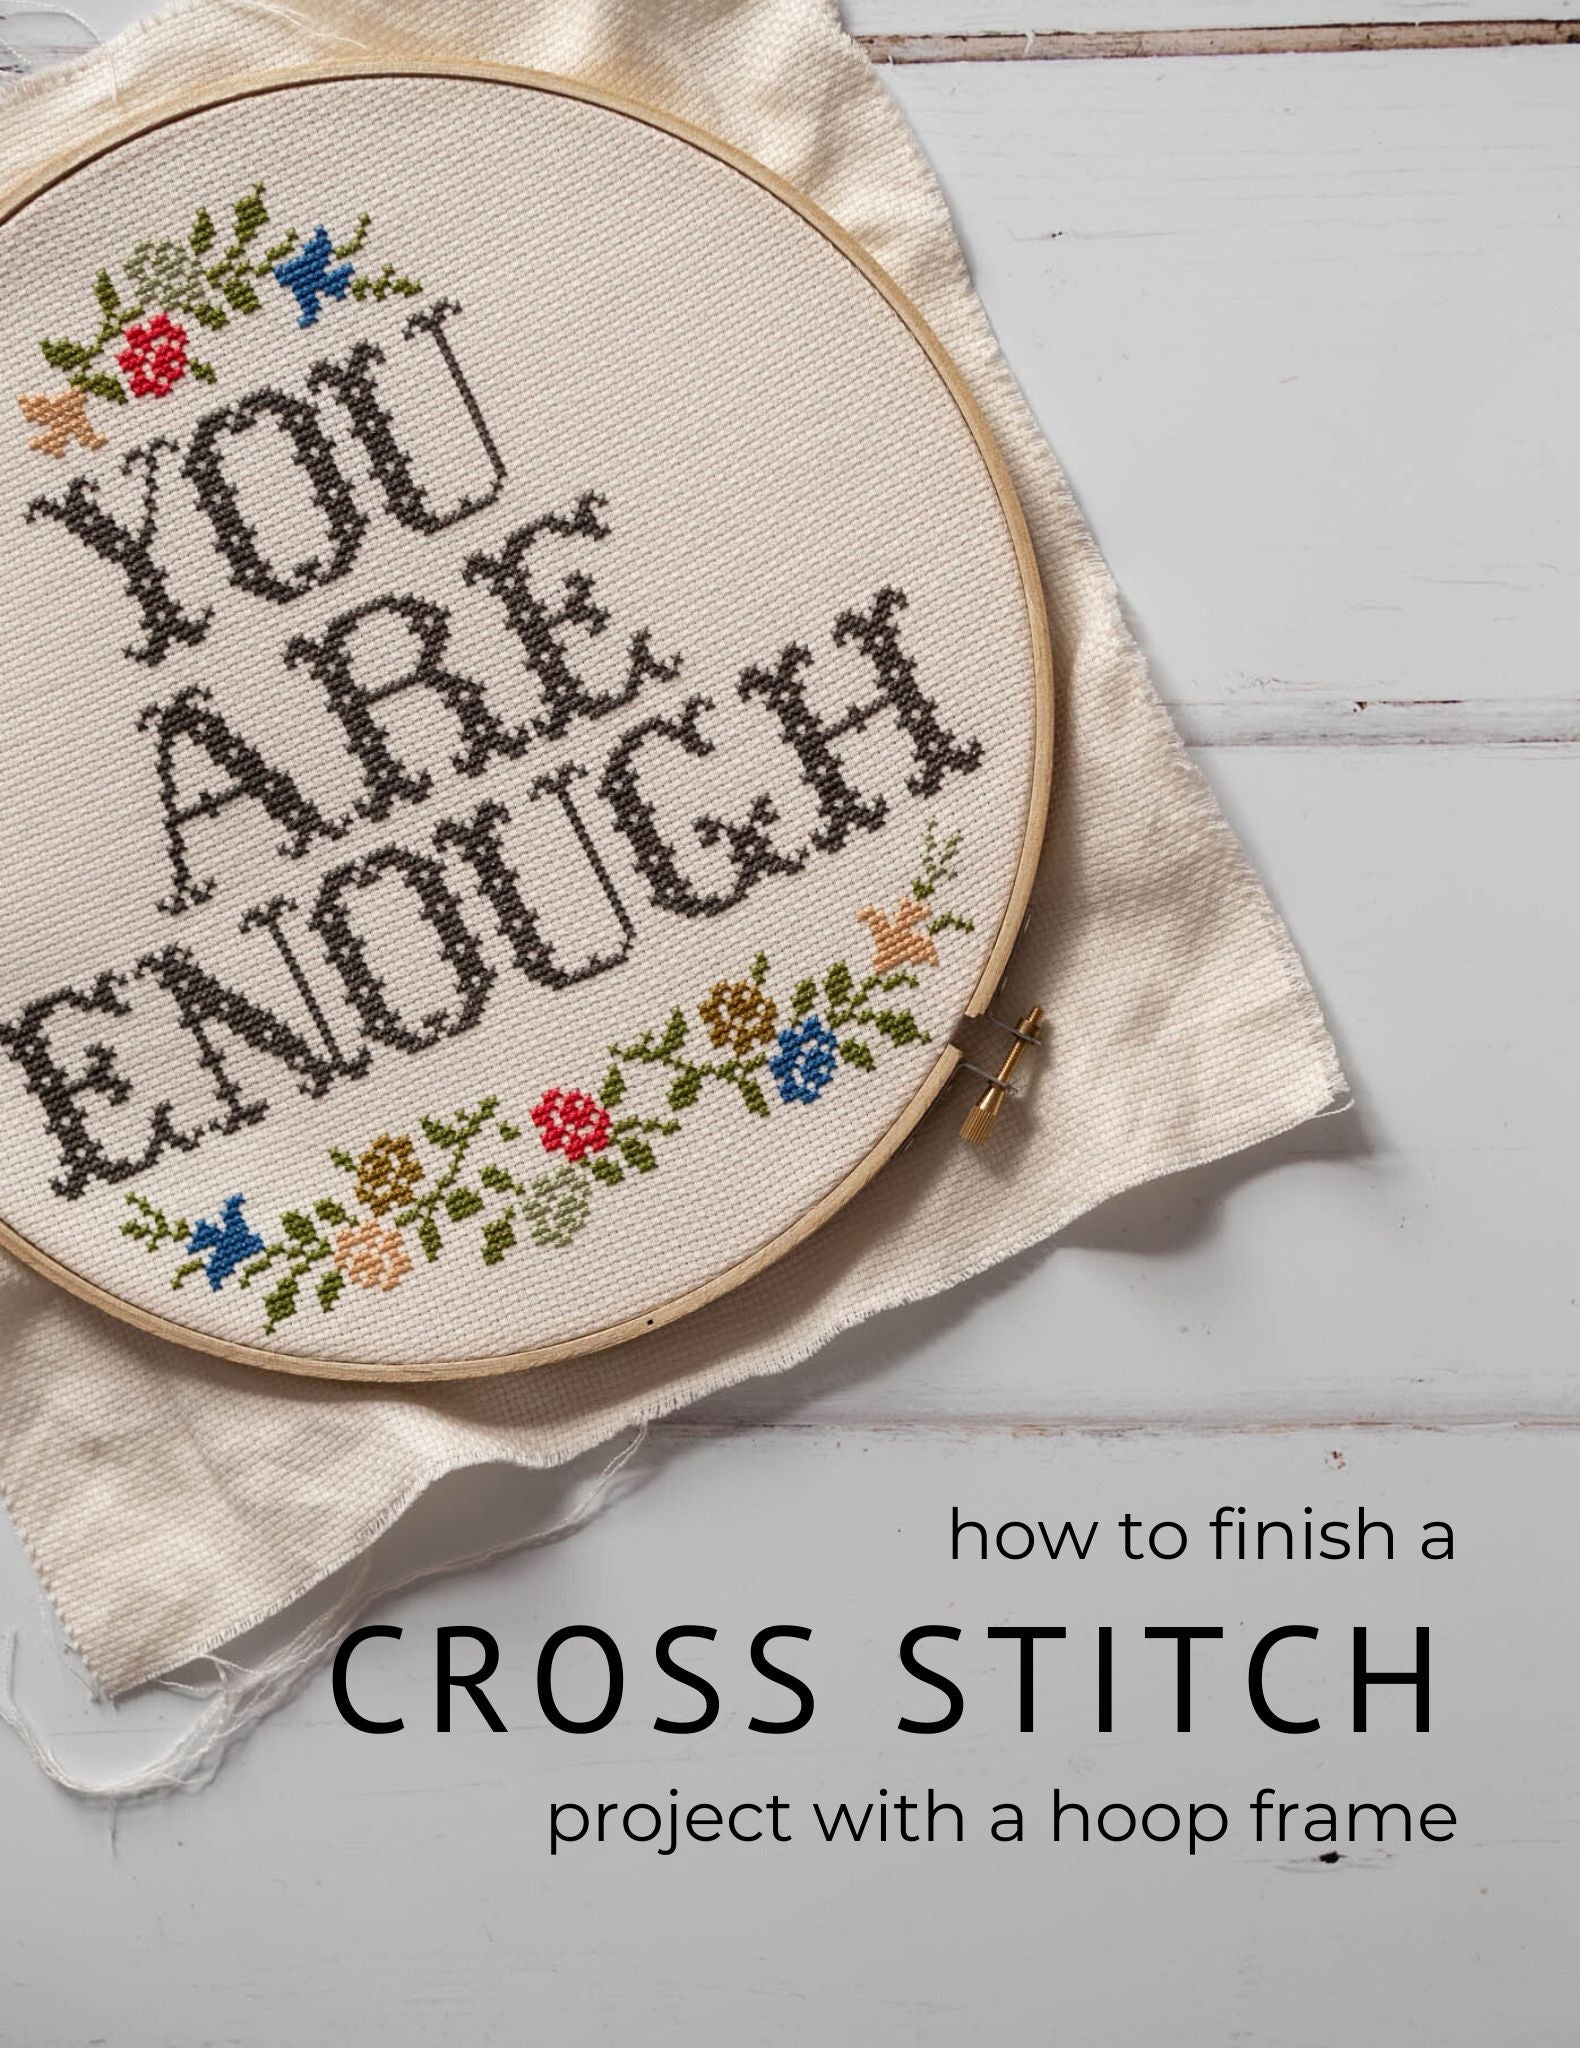
Rachel recently stitched the gorgeous "You are Enough" design, a message I know I need to be reminded of regularly, and we documented the finishing process.

Cross stitch looks best after washing (if you're a knitter or crocheter you'll know what a difference blocking can make!) Wash the finished piece in lukewarm water with mild soap. Roll in a dry towel and squeeze out the excess water. Then centre the wet fabric in the hoop, making sure it's positioned as you want the finished piece to be. Pull the fabric taut and tighten the hoop. Allow to dry.
When your piece is totally dry remove it from the hoop.
1. Use tailor's chalk, a fabric marker, or a biro to draw around the inside of the outer hoop on the felt piece. Cut out the felt circle and set it aside.


2. Layer the batting behind the cross stitch and position both of them in the hoop.

Carefully pull the fabric taut so that it's centred and wrinkle free. Tighten the hoop.

Roughly trim the batting and aida into a circle about 1" / 2.5cm larger than the hoop.
3.Gather the raw edge in:

Cut a long piece of strong thread and knot the end.

Sew around the edge, through both layers, using a basting stitch. Pull both ends of the thread to gather the fabric and tie securely.

4. Sew the felt circle to the back:
Take the felt piece and cover the gathered fabric. If you wish, before sewing the felt to the cross stitch piece you can embroider a message to your recipient or your initials. You could also hide a secret message inside.


Cut a long length of the same thread or spare embroidery floss and knot the end.

Use an overcasting stitch to stitch the felt backing on.

Finish with a knot.
Your finished piece is ready to be hung, or to gift.