


Kits


New! Celebrate this chapter of Ysolda.com as it comes to an end with a special, personalised bundle of our best products, hand-picked by our team just for you.


gift 2019


Subscribe to our Colourwork Club for a gift that lasts well into the new year. Your recipient will receive a new colourwork kit in Janurary, February and March
Last minute shopping? Gift cards are delivered electronically - forward the email or print it for your recipient. A range of amounts are available and gift cards don't expire.

Inverleith KAL - Neck and Sleeve Finishing
Inverleith KAL - Neck and Sleeve Finishing

Welcome to the Inverleith KAL! We're knitting Inverleith, a boxy tee with beautiful drape and a novel construction, between July 15 and September 16, 2019. Jump in anytime and join us on the Ravelry forums for discussion, questions, and chat. Tag your Ravelry project with #inverleithkal to be entered for prize drawing in September!
Ready to cross the finish line? Today we’ll be taking a closer look at Inverleith’s unique sleeve cuff detail, as well as finishing off the neckline.
Working the Neck band

Inverleith has a very simple neck treatment. Pick up and knit around the neck using a smaller needle, picking up 1 stitch for each cast on stitch and 3 stitches for every 4 rows along vertical edges. For the A-C sizes, knit 1 round and then bind off (see below).

The front neck cast on of D+ sizes is a little bigger than the A-C sizes, so we’ll need to work some decreases across the front neck. The blue markers indicate the front neck increases.
I have 62 stitches between the markers and need to decrease 10 stitches. 60 is the closest multiple of 10, leaving 2 stitches left over. Since 60/10 is 6, we need to work a k2tog for every 6 stitches. K2tog takes up 2 stitches, so this translates to a decrease of (k4, k2tog) 10 times between the markers, then just knit the last 2. If you have more than a couple of stitches left over, you can split them between the 2 ends between the markers.
K2tog Through Back Loop Bind Off
The k2tog tbl bind off is worked similarly to the p2tog bind off on the sleeves.

Knit the first 2 stitches through the back loop.

Slip this stitch from the right needle to the left and work another k2tog tbl.

Continue all the way around. When you reach the end of the round, pick up the first bound off stitch with the left needle.

Bring the yarn to the front, slip the stitch from the right needle to the left, and p2tog. Cut yarn and pull through stitch.
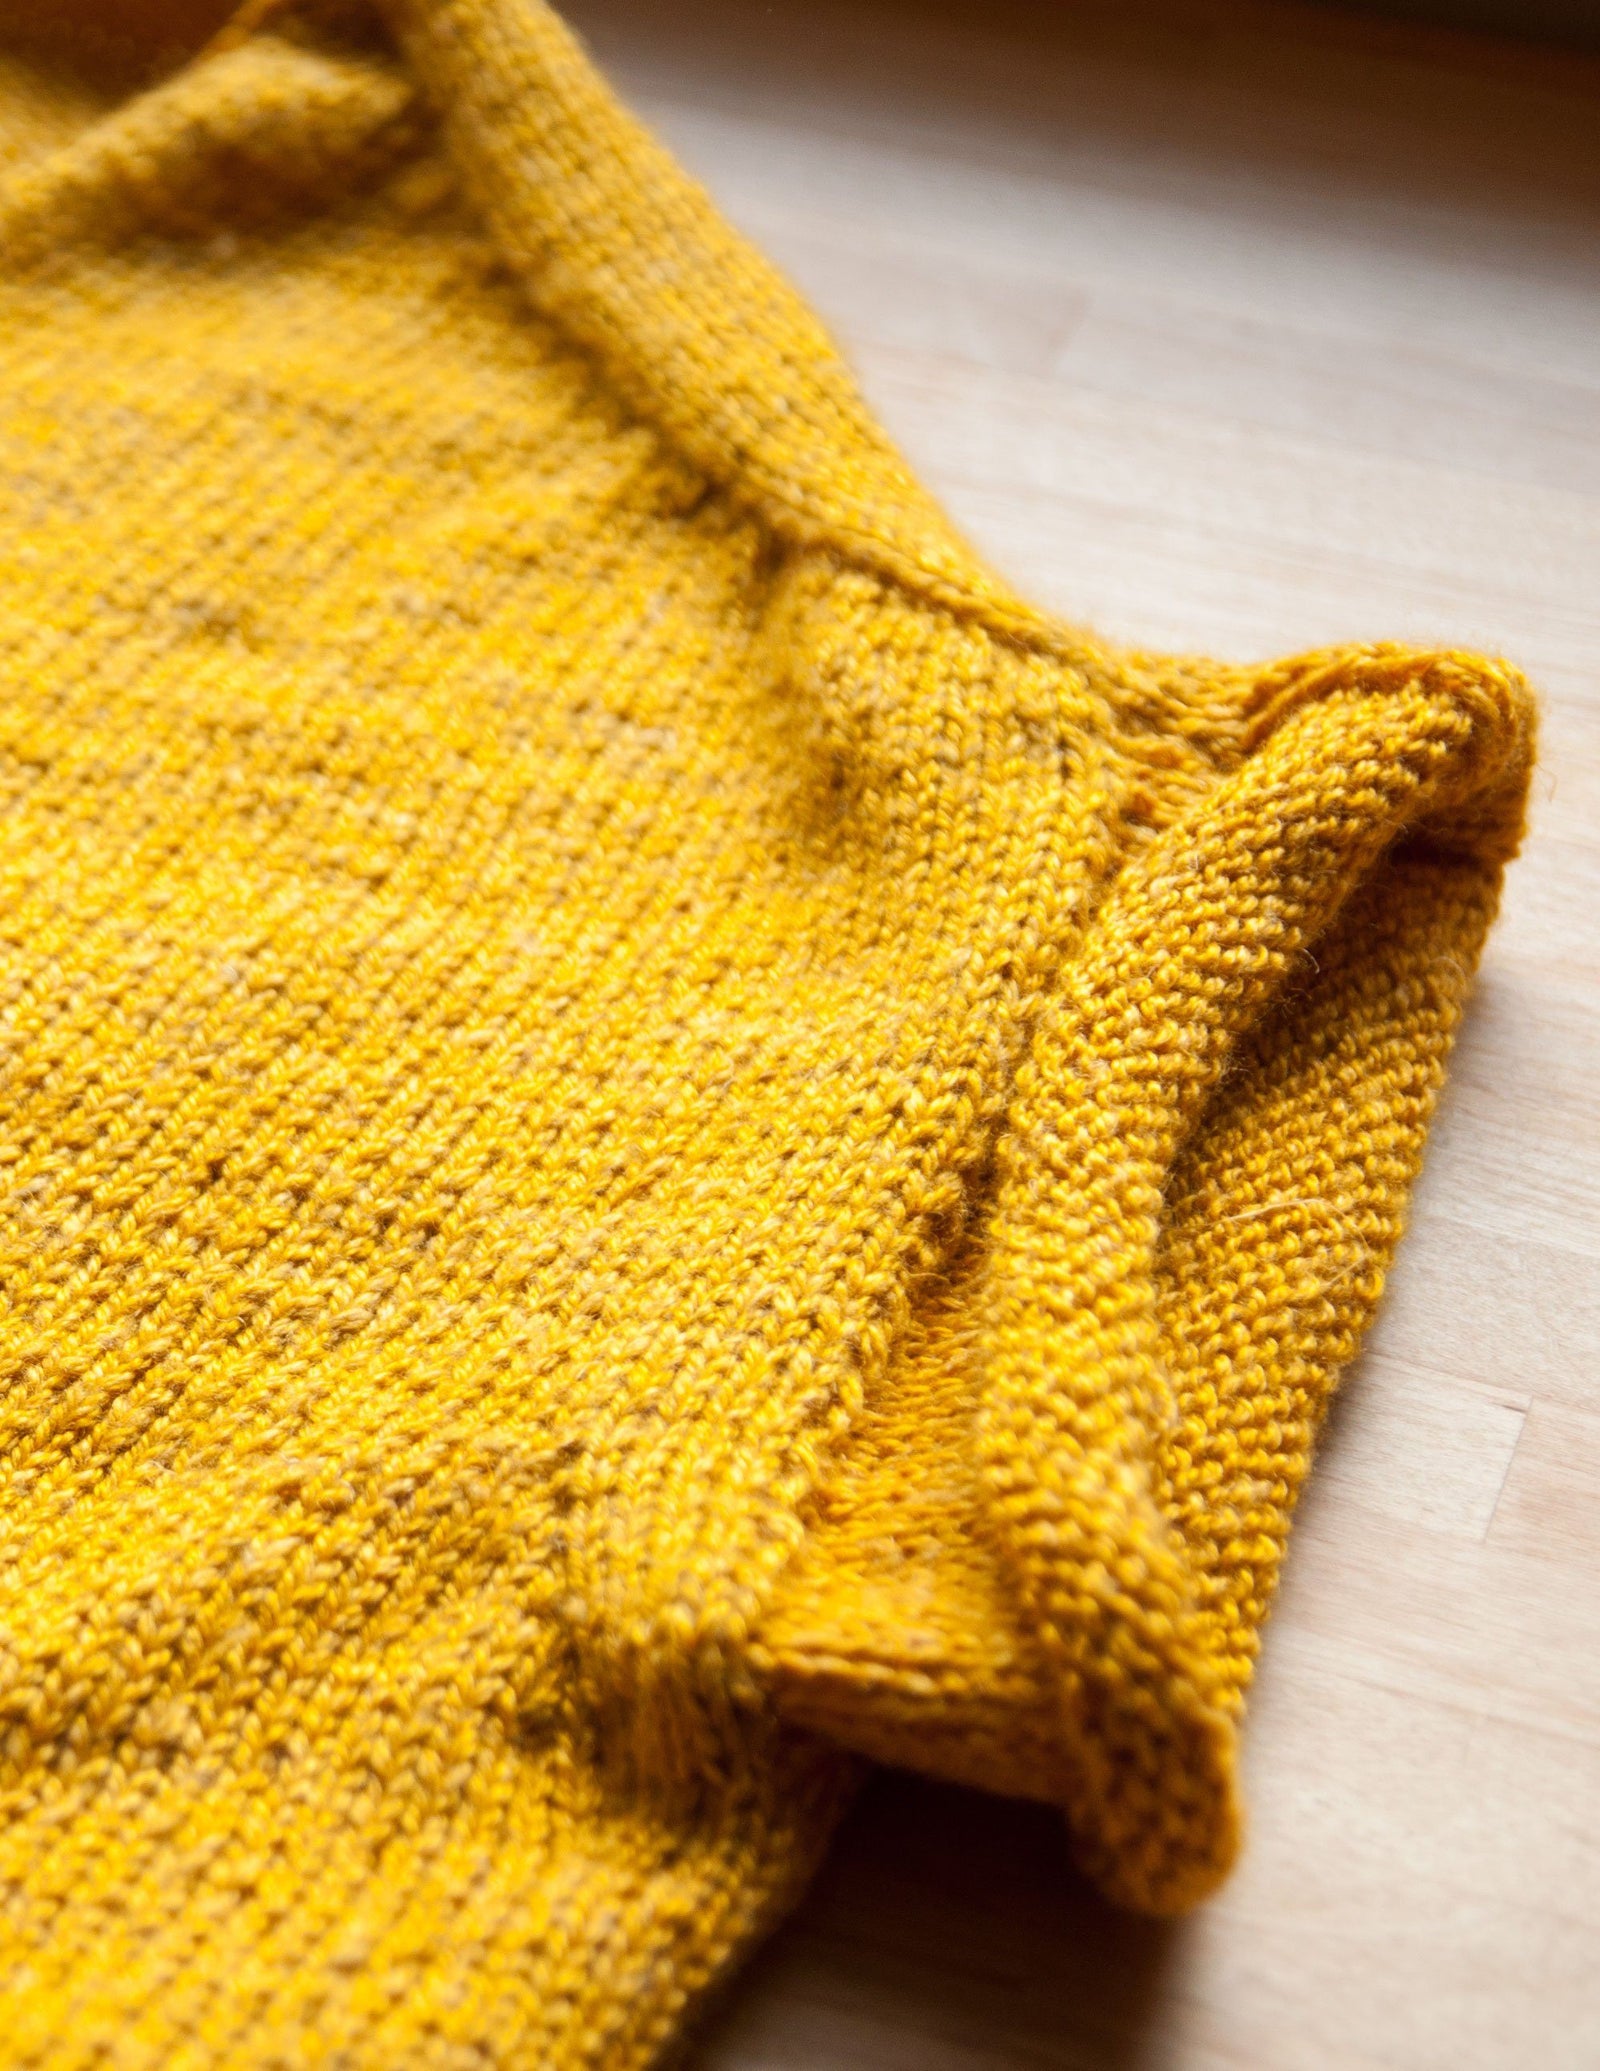
Faux Grafting the Sleeve Cuff

Here’s the completed sleeve cuff.

Fold the cuff up so that the reverse stockinette portion shows, with a narrow strip of stockinette in the center. We’re going to secure the bind off edge of the sleeve cuff to the end of the shoulder, using faux grafting/Kitchener stitch. It’s “faux” because it’s a seam that looks like a row of knitting, but doesn’t use any live stitches as grafting generally does.

Cut a length of yarn (both strands held together) and thread onto a tapestry needle. Come up through the center V of the first stitch on the right of the sleeve cuff, leaving a tail to weave in.

Step 1. Bring the needle behind both legs of the corresponding V on the shoulder side.

Step 2. To complete the stitch, insert the needle back into the center of the first stitch, then out through the center of the next stitch.

Repeat 1 and 2 to the end of the stockinette stitches, ending with the yarn in the center of the last stitch.

Now all that's left is weaving in the ends and a good blocking! See you back soon for a finished project roundup and prizes!
Also in Journal


Ysolda’s size chart for knitwear designers
Inclusive size charts for sizes xxs to 7xl, created by a knitwear designer and featuring measurements that can be difficult to find. Newly updated with an extended size range with measurements for cup sizing and broad shoulders.
Read More


Deep Shadow Heel Tutorial
The Deep Shadow sock heel is a beginner friendly short row sock heel that provides a more anatomical fit like a heel flap and gusset.
Read More


20 Years of Ysolda Knitting Patterns: Part 2
June 2025 marks twenty years of designing knitting patterns for Ysolda. In this blog post she picks her favourite from each year for 2015 to 2025,
Read More
