


Kits


New! Celebrate this chapter of Ysolda.com as it comes to an end with a special, personalised bundle of our best products, hand-picked by our team just for you.


gift 2019


Subscribe to our Colourwork Club for a gift that lasts well into the new year. Your recipient will receive a new colourwork kit in Janurary, February and March
Last minute shopping? Gift cards are delivered electronically - forward the email or print it for your recipient. A range of amounts are available and gift cards don't expire.

Inverleith KAL - Casting On Mid-Row and Joining the Body
Inverleith KAL - Casting On Mid-Row and Joining the Body

Welcome to the Inverleith KAL! We're knitting Inverleith, a boxy tee with beautiful drape and a novel construction, between July 15 and September 16, 2019. Jump in anytime and join us on the Ravelry forums for discussion, questions, and chat. Tag your Ravelry project with #inverleithkal to be entered for prize drawing in September!

With the back armhole complete, it’s time to move onto the fronts. The right and left fronts are worked similarly to the back, but with stitches cast on at the centre front for the neck. Today we’ll take a look at 2 different methods for casting on in the middle of the row, and joining the body to be worked in the round.
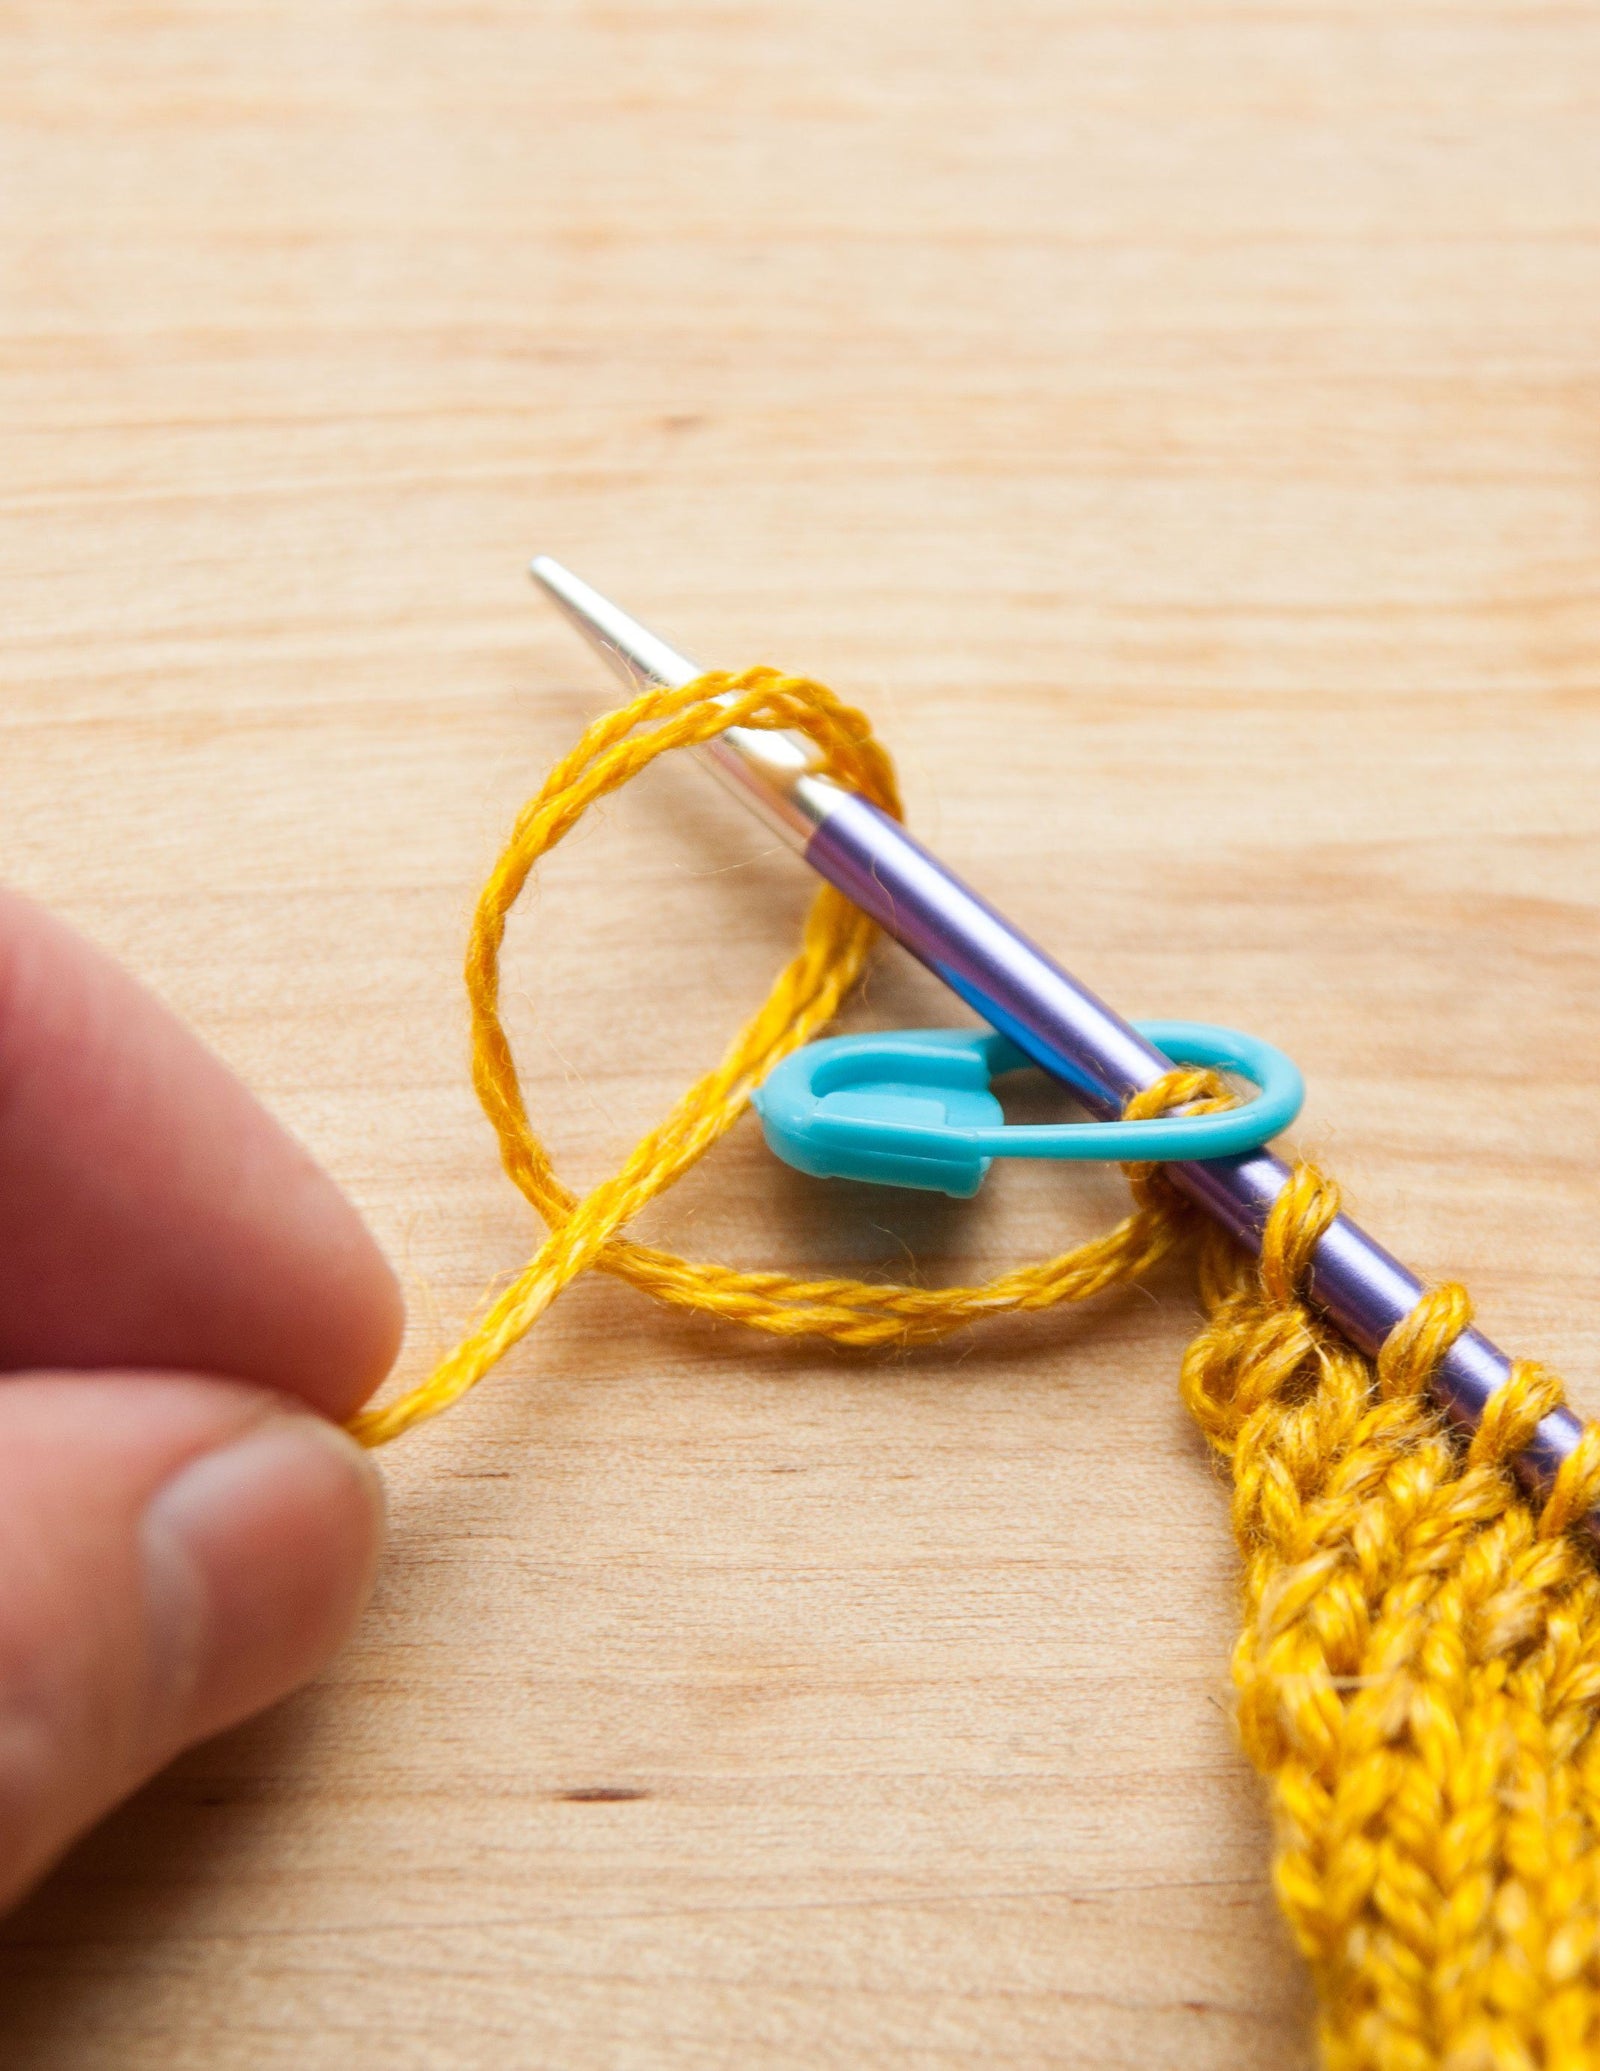
Mid-row Cable Cast-on

Here’s the beginning of the right front completed, with the cut yarn tail at the center front neck. To replace the left front stitches onto the needles, pull out the right needle tip so that the right front stitches are on the cable. Working from right to left (neck edge to armhole), slip the left front stitches onto the right needle and remove the waste yarn. With the wrong side facing, rejoin the yarn and work the left front stitches only.

When you’re ready to join the left and right fronts, purl across the left front.

Turn the work so the RS is facing, and begin working a cable cast-on onto the left needle: *Insert the right needle tip between the first two stitches on the left needle.

Wrap the yarn as if to knit.

Bring this new stitch down and to the front between the two stitches.

Pull out the stitch towards you a little to elongate it.

place it on the left needle.


Turn the work so the wrong side is facing, and purl across the right front stitches.

The front has been joined! Work even and/or armhole increase rows as given for your size. All D+ sizes have some additional increase rows towards the bottom of the front armhole.
Note: Modifying the Armhole Depth
Inverleith is basically a drop-shoulder construction without much of a sleeve, so it’s easy to modify the depth of the armhole for a larger or smaller sleeve opening. This also applies if your row gauge is different than the given row gauge of 7.5 rows per inch.

To modify the armhole depth, work fewer or additional rows in the “work even” portions of the back and front armhole before joining to work the body in the round. Since we can’t knit half a row of height, let’s round the row gauge to 8 - that means that for every 8 additional/fewer rows, the armhole will be 1” longer or shorter.
Keep in mind that this applies to the front and back, so an additional 1” armhole depth will add 2” to the sleeve circumference.
Make sure to write down how many rows you’ve added to the back so you’ll remember for the fronts!
Joining the Front and Back
To join the front and back below the underarm, we will knit across the front stitches, cast on for the right underarm if necessary, knit across the back stitches, and cast on for the left underarm if necessary.

I prefer to place the held back stitches onto the needle before working the joining round. To do this, slip the stitches from the back onto the working needle, at the opposite end to the working yarn.
Now we’re ready to work around the body. Here we will use a different method for casting on in the middle of the round - the backwards loop. The backwards loop cast on is worked onto the right needle, and is the easiest way to cast on mid-row.

Make a loop over your thumb and place it backwards on the right needle. You’ll know you’ve got it right when it doesn’t just fall off! Repeat for the required number of stitches.

Place a marker for the right side, and cast on after it if necessary for your size.

If your size says to cast on 0 sts, just place a marker for the side and continue onto the back stitches.

Repeat for the other armhole with a unique marker - this marker will also indicate the beginning of round. After you've finished casting on for the second underarm, knit around back to the beginning of round.

Ready to work the body in the round! Sizes 1-4 have a few decreases below the join, while the remaining sizes are worked straight down to the hem.
I’ll be back in two weeks to go through splitting the front and back hem and setting up for the sleeves. Don't forget to join us on the Ravelry forums and tag your Ravelry project with #inverleithkal to be entered for prize drawing in September!
Also in Journal


Ysolda’s size chart for knitwear designers
Inclusive size charts for sizes xxs to 7xl, created by a knitwear designer and featuring measurements that can be difficult to find. Newly updated with an extended size range with measurements for cup sizing and broad shoulders.
Read More


Deep Shadow Heel Tutorial
The Deep Shadow sock heel is a beginner friendly short row sock heel that provides a more anatomical fit like a heel flap and gusset.
Read More


20 Years of Ysolda Knitting Patterns: Part 2
June 2025 marks twenty years of designing knitting patterns for Ysolda. In this blog post she picks her favourite from each year for 2015 to 2025,
Read More
