Your Cart is Empty


Ladderback jacquard is a technique commonly used in machine knitting, that can also be adapted for hand knitting. It’s a way to handle longer floats of non-working yarn across the back of the work that avoids catching the float with the working yarn, which can sometimes show through on the right side. The strands of non-working yarn are connected with vertical columns of stitches, or ladders, which create a sort of web that floats behind the work. A single “ladder” can be used to create a bridge between stitches in stranded colourwork, or many can be used to effectively work intarsia in the round. The example in this tutorial is for the former but the techniques are the same.

The first step is to add the extra ladder stitches. These need to float behind the work, so are added by increasing in the contrast colour, rather than created from an existing stitch.
The ladders can be added at the beginning of your colourwork section, or part way through. If you are working a stranded colourwork pattern that begins with short floats between colours then it’s only necessary to begin the ladderback jacquard when the stretch of a single colour in the pattern becomes too large for a standard float.
The Threipmuir pattern shown in this swatch uses ladderback jacquard for the last few rounds of the yoke, when the number of background stitches between the feathers is larger.

The extra stitches can be added in a couple of different ways: with a lifted increase, or with a backwards loop increase. Lifted increases will anchor the ladderback mesh to the work at the bottom, which is ideal if you’re using the technique for intarsia in the round – you don’t want the mesh to be pushed up when you pull your cute new snowflake motif hat over your head! The backwards loop option is more suited to stranded colourwork, where the ladderback mesh is regularly anchored to the work by the stitches worked in that colour.
For both increase methods, bring both colours to the front of the work before increasing. This is very important: it’s the thing that prevents the ladders from showing through on the right side.
Work to the approximately halfway point between stitches worked in the contrast colour (for intarsia add a ladder approx every 5th or 6th stitch between the motif).

Bring both yarns to the front between the needles.

Drop the backround colour and, with your fingers place a twisted loop of the contrast colour on the right needle. It doesn’t matter which direction the loop is twisted in.

Bring the background colour back to the wrong side and continue with the colourwork pattern until you need to add another ladder. Repeat the process for each ladder on this round, taking care to keep the floats between the ladders nice and loose by spreading out the background stitches on the right needle tip.

Adding the ladder stitches using the two handed colourwork method without dropping the yarn.
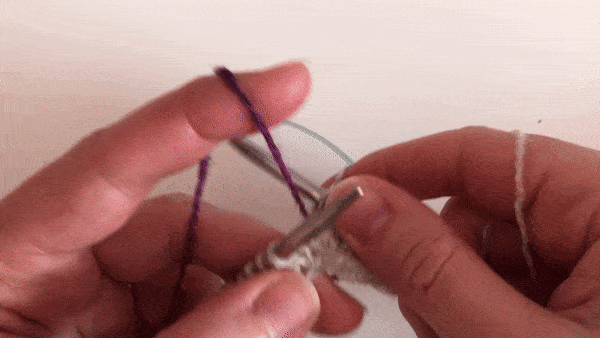
If you’re a more experienced colourwork knitter who holds one colour in each hand it’s possible to add the ladders without dropping the yarns.
Begin with the contrast colour in the left hand and the background colour in the right hand and flick the background colour to the front.

Use the right needle tip to go over and behind the strand of yarn on you left index finger, scoop up the strand of yarn behind your left index finger, and release your index finger from this loop.

Bring the background colour back to the wrong side and continue with the colourwork pattern until you need to add another ladder. Repeat the process for each ladder on this round, taking care to keep the floats between the ladders nice and loose by spreading out the background stitches on the right needle tip.

To add the ladder stitches with a lifted increase work to the point where you want to add a ladder, bring both yarns to the front, and work a right leaning purled lifted increase into the next stitch. Check out our lifted increases tutorial if you’re not sure how to do this. After working the increase take both yarns to the back and continue with the colourwork pattern until you need to add another ladder. Repeat the process for each ladder on this round.
The ladders can be knit or purled. Knitting them is slightly easier to do when you’re working a stranded colourwork pattern without interrupting your flow, purling gives a neater appearance on the inside where you’ll have columns of knit stitches on the inside of the work.
The ladders can be identified as the contrast colour stitches set back from the work. If you’re working a pattern that features ladderback jacquard, they’ll also be shown on the chart. Of course you could also use stitch markers to clearly identify them.

Before working the ladder stitch bring both yarns to the front.

Drop the background colour and knit or purl the ladder stitch with the contrast colour.


Bring both yarns to the back of the work and continue in pattern to the next ladder stitch. Repeat this process for every ladder stitch, and on following rounds.
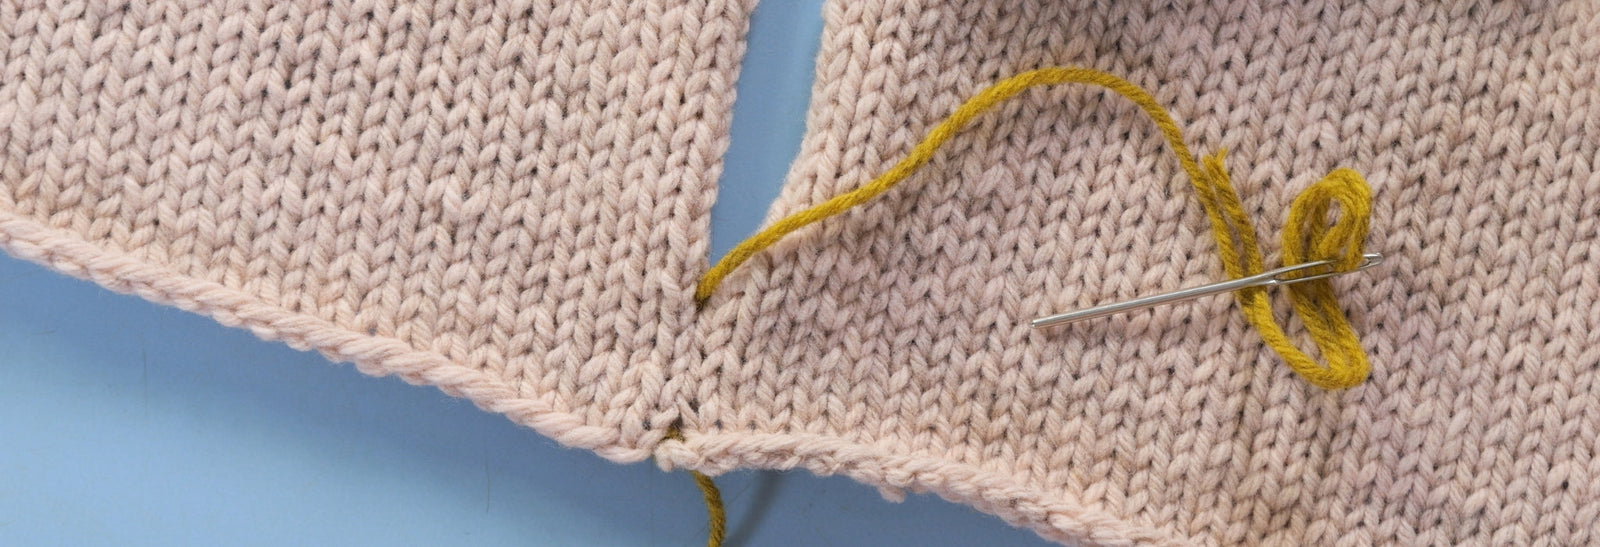
After a few rows or rounds the ladderback mesh can be seen clearly on the wrong side.

It’s completely invisible on the right side other than the ladder stitch which can be seen on the current row.

When the ladders are no longer necessary anchor the ladders at the top of the work by knitting each ladder stitch together with the next stitch, using the yarn colour that stitch should be worked in in the pattern.

Ready to try ladderback jacquard? The technique is used on the Threipmuir sweater pattern and Gleði hat pattern.
Are you new to colourwork knitting but keen to give it a try? We've put together a guide to stranded colourwork here, where you can also find some other patten suggestions and tutorials to get you started.