


Kits


New! Celebrate this chapter of Ysolda.com as it comes to an end with a special, personalised bundle of our best products, hand-picked by our team just for you.


gift 2019


Subscribe to our Colourwork Club for a gift that lasts well into the new year. Your recipient will receive a new colourwork kit in Janurary, February and March
Last minute shopping? Gift cards are delivered electronically - forward the email or print it for your recipient. A range of amounts are available and gift cards don't expire.

How to block a shawl
How to block a shawl

After putting hours of work into a shawl, it can be tempting to start wearing it immediately! But learning how to block a shawl will take your project to the next level. Although it might sound involved, blocking boils down to just washing your project and laying it out to air dry in the shape you want it to be.
Blocking is to knitting what ironing is to sewing - it flattens and smooths tight crinkly fabric and sets the stitches. In the case of lace shawls, blocking allows the yarn overs to relax and open, and shaping lines become more prominent, allowing the stitch pattern to truly shine. Gently stretching the fabric open while damp and holding it with pins can make a huge difference to how your finished shawl looks and drapes. Blocking is magic!
Before Blocking
You can see that straight off the needles, the stitches aren’t very well defined and the edge curls in. You can’t really see the lines of the lace patterns, and the shawl might also seem a bit small! Blocking will stretch out the stitches so you can really see the pattern, and the finished shawl will be bigger than it appears right after you bind off.

One important note: if the bind-off edge of your shawl feels tight and inelastic on the shawl, it won’t be able to stretch out more when blocked. Make sure you use a stretchy bind-off method and don’t worry too much if your bind-off appears loose before blocking.
Weave in your ends before blocking, making sure you don’t pull them in too tightly, and don’t trim the end of the yarn too closely - it will need to stretch during blocking. Leave a couple inches of tail to be trimmed off after it’s dry.
How to block a shawl
Gather your supplies:
- You’ll need something to soak your shawl in (a big bowl, basin, or clean sink)
- some wool wash
- T-pins and blocking wires
- something to block on (we used blocking mats, but the floor or a table is fine too!)
- a couple of towels.

Fill your basin with lukewarm water - not too hot or cold to the touch. Swish in some wool wash. Then submerge your shawl in the water, holding it down until bubbles stop coming up and the piece is completely wet.
Let it soak for 10-30 minutes (it’s okay if you forget about it for awhile!).

Gather the knitting into a ball and use both hands to lift it, squeezing out as much water as you can with your hands without wringing.

To take out more of the water, lay out the shawl on a towel and roll it up. Then press or step on the roll to squeeze it out.


Can I use the washing machine?
Yes! A top-loading machine can act as your basin - fill it with water, add wool wash, let soak, and then use the machine’s spin cycle to spin out the water.
You can also use front-loading washing machines, with caution - use a delicate or speed cycle with cold water, and set the spin to medium or low.
Laying the shawl out to block
Once you’ve spun most of the water out of your shawl, it’s time to lay it out. Prepare your blocking surface - here we’re using Cocoknits blocking mats, which interlock to create a perfect shape to block on. You can also use a spare bed, carpet, or just dry towels on the floor - it should be somewhere that the shawl can dry undisturbed for a few hours or a day.

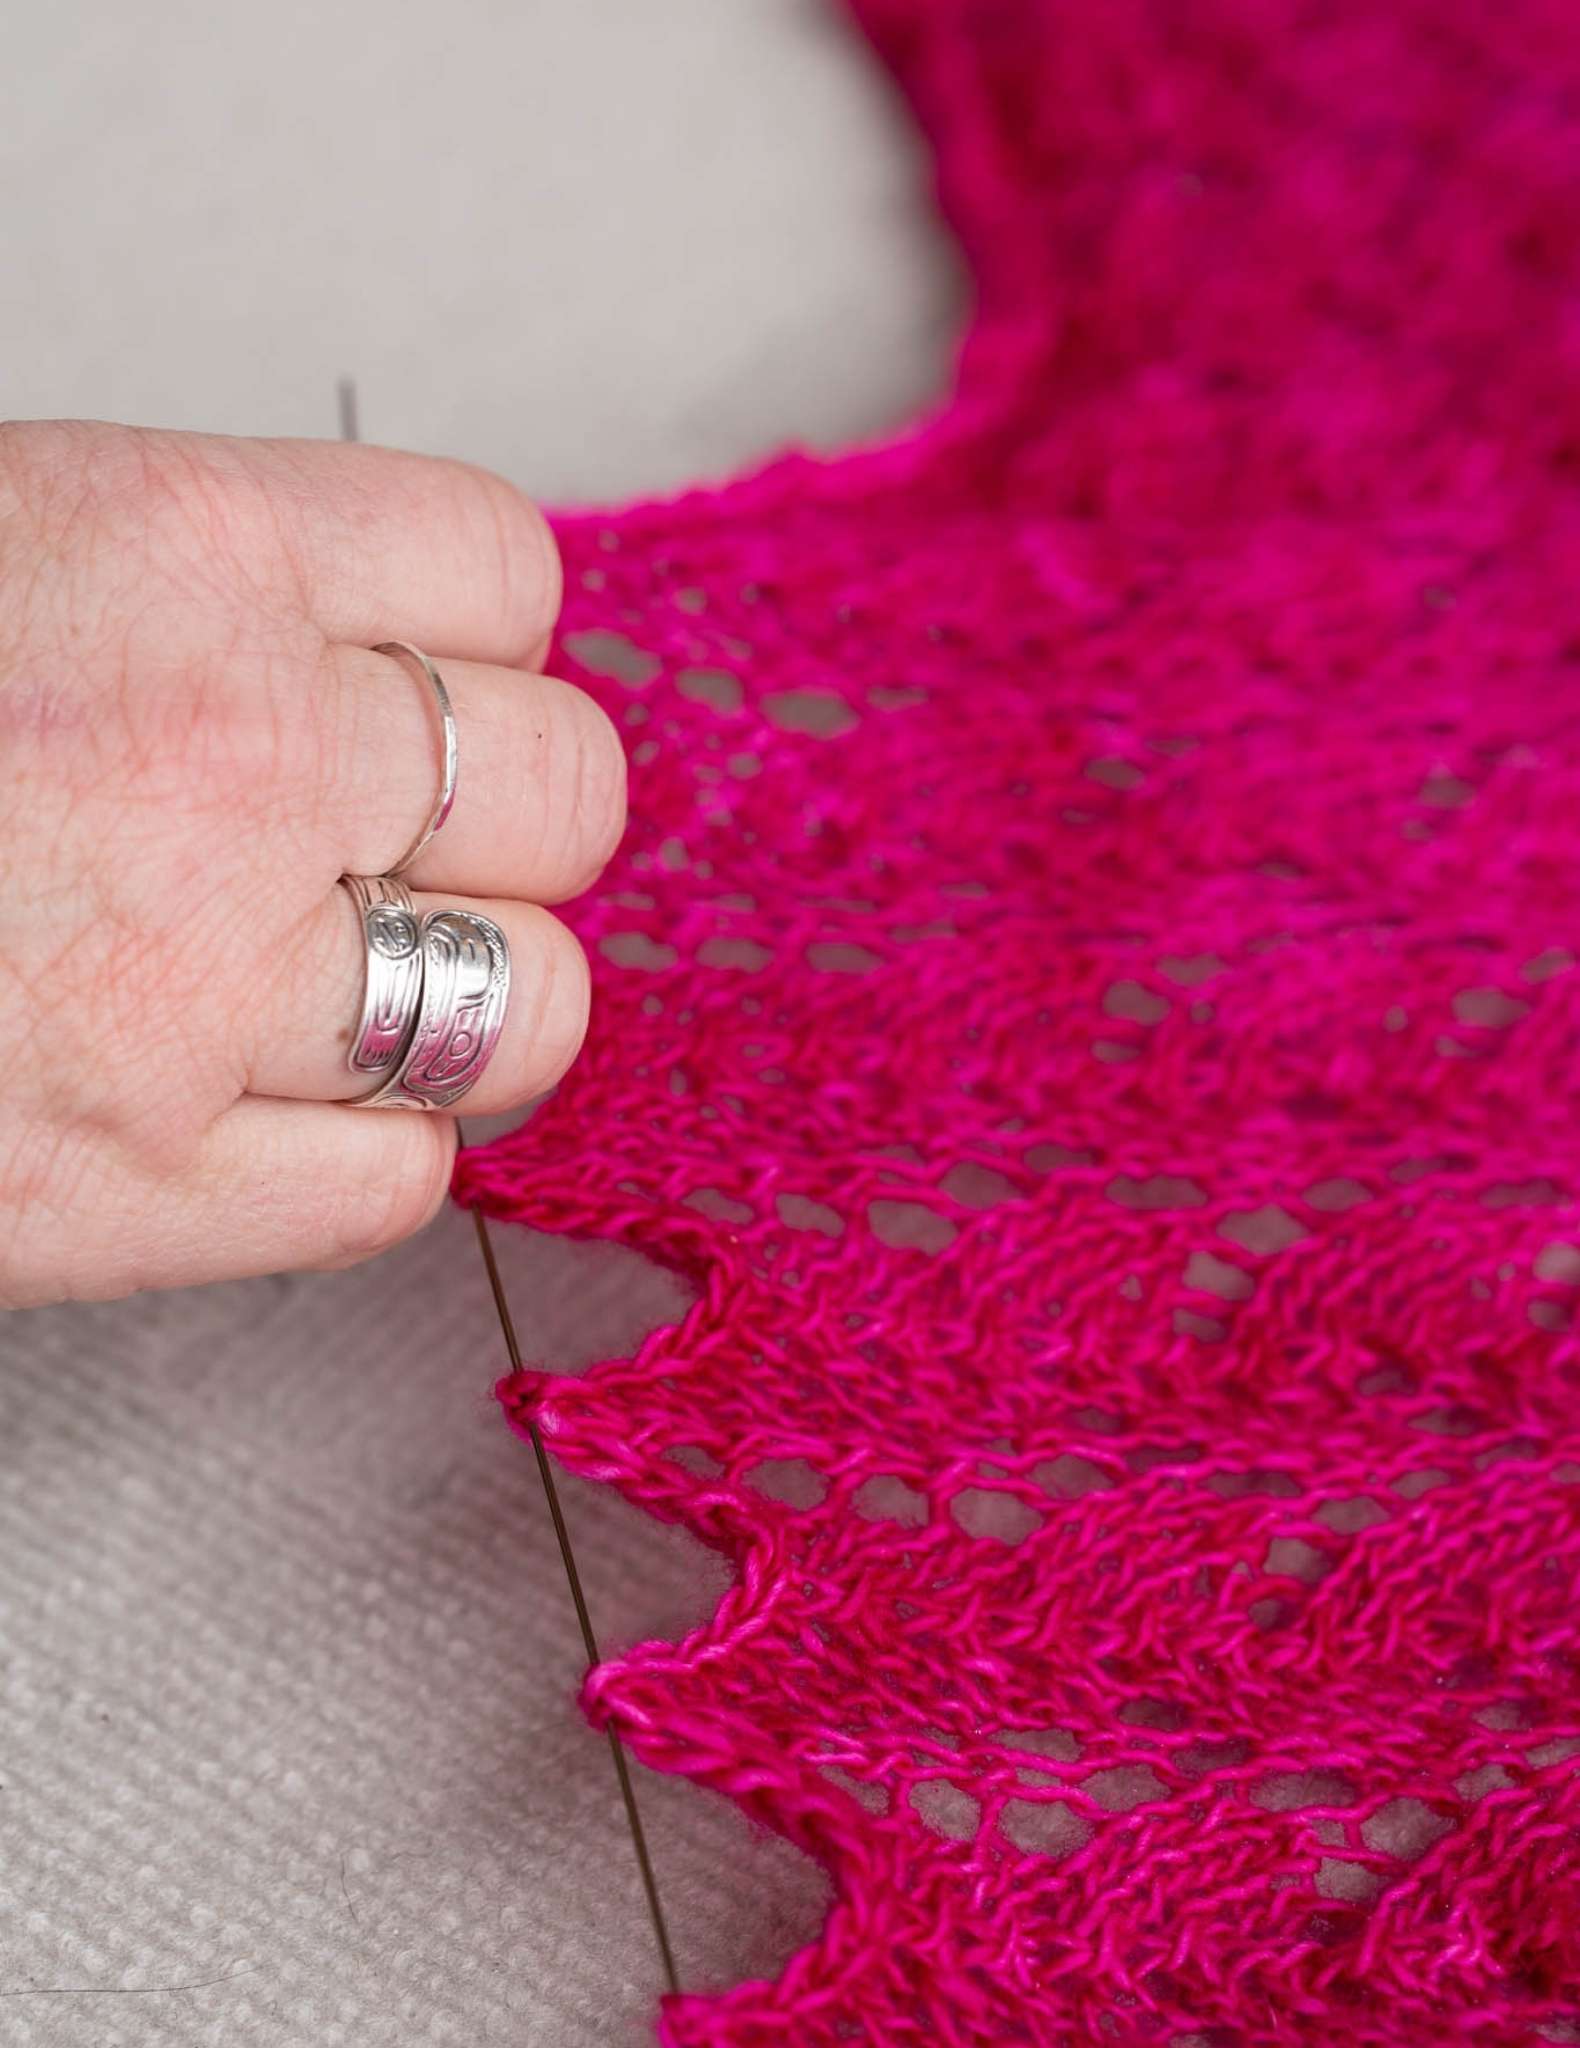
Blocking wires
Blocking wires are thin, flexible metal rods that are amazing for helping you block straight lines without using a million pins. The wires are threaded in and out of the fabric along an edge, and then the whole side can be stretched and pinned as one.
Here we’re using wires along all three edges: the top straight edge, and the pointed lower edges. The wires are threaded into the very tip of each point, and they’ll be straight and even.


Pin it out
Whether you’re using blocking wires or not, follow the major design lines as a guide for blocking.
Anchor the centre of the top edge with T-pins, and then working out from here, stretch and pin the top edge straight.


Then begin working downwards - here we want the centre spine to run straight down the middle of the shawl, so smooth that out and pin it down.

Finally, gently stretch the remainder of the fabric out evenly between the top edge and the centre point and pin in place.
Make sure you take a step back for a look, and adjust and re-position until you’re happy with the final shape! If you’re using blocking wires, you can anchor just the wire with pins. If you’re not using blocking wires, you’ll need to pin out each point separately.

After blocking a shawl
Once your shawl is completely dry (it won’t take as long as a sweater would!), carefully remove the pins and wires. Check that your woven-in ends are still where you left them, and trim any remaining ends.
Ta-da! Stand back and admire those beautiful stitches! Your lace shawl is now perfectly defined, with crisp stitches and a lovely openness. It truly is amazing what blocking can do to make your knitting look complete!

Also in Journal


Ysolda’s size chart for knitwear designers
Inclusive size charts for sizes xxs to 7xl, created by a knitwear designer and featuring measurements that can be difficult to find. Newly updated with an extended size range with measurements for cup sizing and broad shoulders.
Read More


Deep Shadow Heel Tutorial
The Deep Shadow sock heel is a beginner friendly short row sock heel that provides a more anatomical fit like a heel flap and gusset.
Read More


20 Years of Ysolda Knitting Patterns: Part 2
June 2025 marks twenty years of designing knitting patterns for Ysolda. In this blog post she picks her favourite from each year for 2015 to 2025,
Read More
