


Kits


New! Celebrate this chapter of Ysolda.com as it comes to an end with a special, personalised bundle of our best products, hand-picked by our team just for you.


gift 2019


Subscribe to our Colourwork Club for a gift that lasts well into the new year. Your recipient will receive a new colourwork kit in Janurary, February and March
Last minute shopping? Gift cards are delivered electronically - forward the email or print it for your recipient. A range of amounts are available and gift cards don't expire.

Learn to Knit: Yarn Over
Learn to Knit: Yarn Over

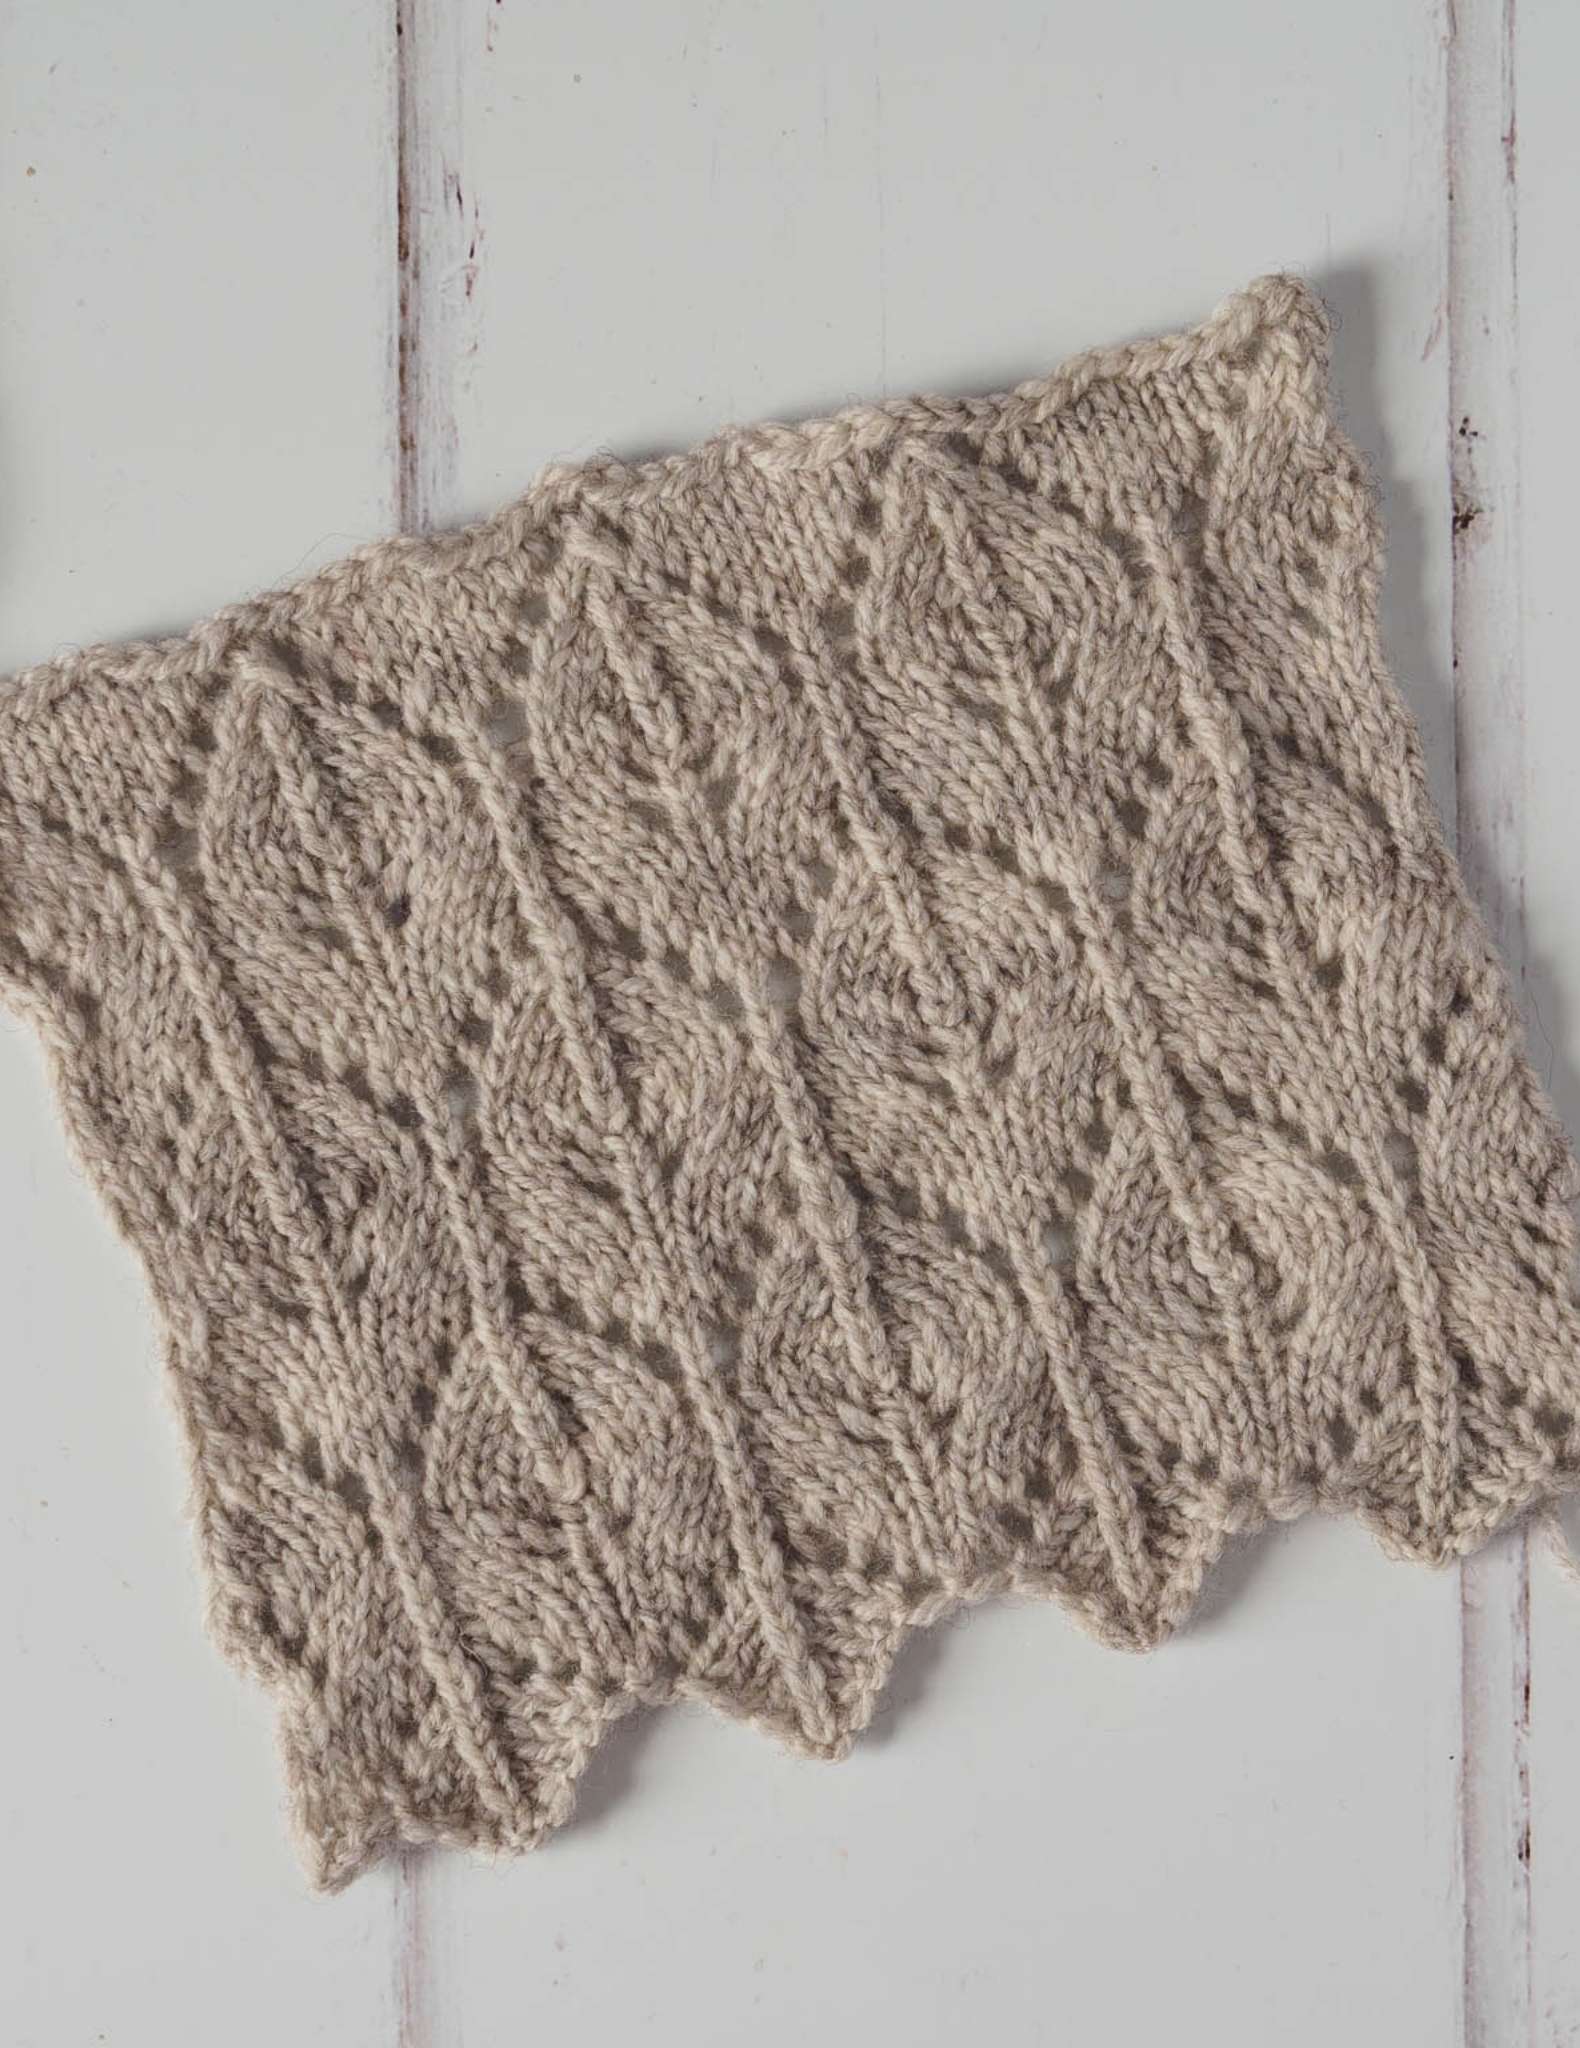

Do you want to learn how to knit pretty lace patterns, brioche stitch, and other fun knitting stitches? You’ll need to learn how to knit a yarn over! A yarn over is a simple increase stitch creates an eyelet in your knit fabric, but it can be so much more. Paired with other increases and decreases, learning how to yarn over can vastly expand your knitting repertoire.
What is a Yarn Over?

A yarn over (yo) is a type of increase in which the working yarn is wrapped over the right needle between two stitches, creating a new stitch on the needle. They can be used for shaping, such as on a top-down shawl, or for working decorative stitches.

Since yarn overs create stitches, they are usually paired with decreases to maintain a constant stitch count. The combination of yarn overs and decreases are the basis of the vast majority of knitted lace patterns, as well as brioche stitches.

Unlike many other increases which incorporate previously worked stitches (like knit front and back, or lifted increases), yarn overs are created with the working yarn independently of the stitches on your needle.
Knitting patterns, especially vintage patterns, may use any of the following terms to refer to a yarn over - make sure to read any abbreviation lists included with your pattern.
yo: yarn over
yf (yfwd): yarn forward
yfon: yarn forward and over needle
yfrn: yarn forward and round needle
yon: yarn over needle
yrn: yarn round needle
For charts, a yarn over is usually shown as an open circle symbol.

How to Yarn Over


Working a yarn over is very simple. Generally, you will bring the yarn to the front between the needles, then over the right needle to the back.

Work the next stitch. This creates a new, open stitch on your right needle. Working the following stitch is NOT included as part of a yarn over.


To make a yarn over between a knit and purl stitch, bring the yarn to the front between your needles. Wrap it over the right needle towards the back, and then bring it back between your needles towards the front, ready to purl the next stitch.


If your yarn is already in the front because you are purling, simply bring the yarn over the right needle. If the next stitch will be purled, the yarn should wrap completely around the right needle and back to the front of the work.

You can then purl the next stitch on the left needle. If the next stitch is a knit stitch the working yarn should stay in the back of the work.

This is a standard yarn over, where the leading leg of the stitch on the right. Reverse yarn overs, in which the leading leg of the stitch is on the left, are also used in some circumstances (see Deep Dive below).


When you work into the yarn over on the next row, simply knit or purl the yarn over in the standard manner. Working into the stitch stabilizes it, creating an eyelet.
Multiple yarn overs


Double yarn overs (yo2, yo twice) are used to create a larger eyelet or elongated strands of yarn for patterns. Wrap the yarn around the right needle in the same direction as above, as many times as needed. Double yarn overs are usually worked as (k1, p1) or (p1, k1) on the following row to maintain the stitch count, or one wrap may be dropped off the needle to create an elongated stitch.
Deep Dive: Closed and Reversed Yarn Overs


We’ve mostly been discussing open yarn overs, which create eyelets, but yarn overs can also be worked so that they are closed, and do not create as much of an eyelet. The yarn over is worked in the same manner as above, but when working the following row, you work into the BACK of the yarn over, as for a twisted stitch. This twists the yarn over, closing the hole.

This closed yarn over is a good alternative for knitters who knit tightly and find make 1 increases (picking up the strand between stitches) difficult, and creates a similar look.

When working brioche stitch, yarn overs are used to introduce more yarn to the fabric, creating its signature fluffy, squishy quality. These yarn overs don’t create eyelets, but are instead knit or purled together with the following stitch. Shown here is our free brioche beanie pattern Daniel's hat - a perfect project for new knitters looking to try out brioche stitches for the first time.
Different Yarn Overs
There are subtle differences in how yarn overs can be worked between knit and purl stitches. Since the yarn is already in the front of the work when purling, the yarn over created between two purl stitches is generally shorter and less open than between two knit stitches. This can be tweaked by working yarn overs in the opposite direction, depending on the circumstances. Check out our post on troubleshooting asymmetrically sized yarn overs to learn more.
Also in Journal


Ysolda’s size chart for knitwear designers
Inclusive size charts for sizes xxs to 7xl, created by a knitwear designer and featuring measurements that can be difficult to find. Newly updated with an extended size range with measurements for cup sizing and broad shoulders.
Read More


Deep Shadow Heel Tutorial
The Deep Shadow sock heel is a beginner friendly short row sock heel that provides a more anatomical fit like a heel flap and gusset.
Read More


20 Years of Ysolda Knitting Patterns: Part 2
June 2025 marks twenty years of designing knitting patterns for Ysolda. In this blog post she picks her favourite from each year for 2015 to 2025,
Read More
