


Kits


New! Celebrate this chapter of Ysolda.com as it comes to an end with a special, personalised bundle of our best products, hand-picked by our team just for you.


gift 2019


Subscribe to our Colourwork Club for a gift that lasts well into the new year. Your recipient will receive a new colourwork kit in Janurary, February and March
Last minute shopping? Gift cards are delivered electronically - forward the email or print it for your recipient. A range of amounts are available and gift cards don't expire.
Learn to knit: the long tail cast-on
The Long Tail Cast-on method is a classic knitting technique that’s known for its speed and stretchiness. It's one of the most popular ways to teach new knitter's to cast on, and for good reason!
This method uses a long tail of yarn along with one needle and your hand to establish the stitches that you’ll knit from. The Long Tail Cast-on is structurally identical to a backwards loop cast on plus a row of knitting, making it sturdier and less prone to stretch out as you knit than a simple loop cast on. You can use the Long Tail Cast-on for just about any knitting project. If you’re just learning how to cast on and knit, the Long-tail cast on is an indispensable skill for your toolkit!
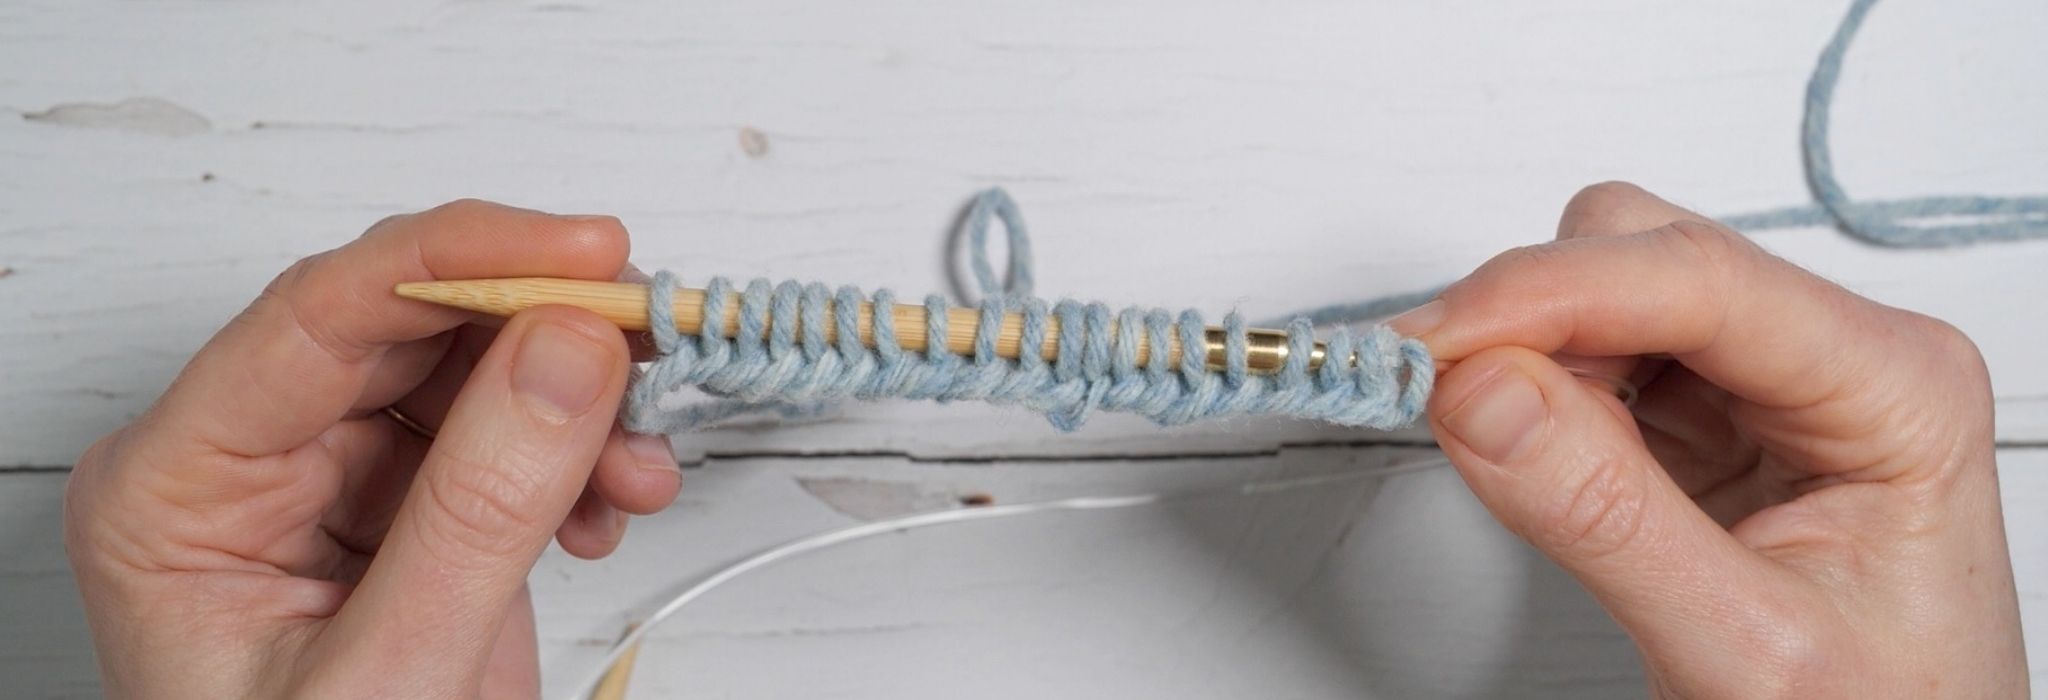
The long tail cast-on is worked onto one needle. If you're using circular needles hold one tip in the right hand and let the other dangle.
Video
Step-by-step tutorial
Set up for Long Tail Cast-on
Pull a length of yarn from the ball.

Getting just the right length of tail can be tricky, but it’s better to have more yarn than not enough! To estimate the yarn tail length, measure out about 1" / 2.5cm per cast-on stitch in worsted weight yarn. You’ll need a little less in thinner yarns, a little more in chunkier yarns. An alternative rule of thumb is to use 3 times the width of the project you're casting on for, plus about 6" / 15cm extra.

Make a slipknot and place it on the right-hand needle (easier for beginners) OR lay the yarn over the right needle without a slipknot.

The ball end of the yarn should be away from you and the tail end closer to you.
Holding the needle in your right hand, use your left hand to grasp the two tails hanging from the needle. Insert your left index finger and thumb between the tails.


Open your index finger and thumb, letting the yarn slide down onto your thumb and finger to create the “slingshot” or a V shape. You’ll return to this hand and yarn position after each cast-on stitch.

Cast on with Long Tail Cast-on method
Step 1. Bring the right needle tip slightly towards you, then insert it into the left thumb loop from below.


Step 2. Grab the strand from your index finger with the right needle, from right to left.


Step 3. Draw the index finger strand down through the loop on your left thumb.

Step 4. Release the yarn from your left thumb.

Step 5. Use your thumb to tighten up the stitch and return to the slingshot position.

Repeat steps 1–6 to continue the Long Tail Cast-on until all of your stitches have been cast on.

Learning how to cast on for knitting is one of the very first things you learn as a knitter, and the Long Tail Cast-on is a versatile and easy method that’s perfect for hats, shawls and sweaters.
Tips:
- Avoid pulling the yarn too tight when casting on so the bottom edge of your project doesn't pull in and pucker. Make sure your stitches can move smoothly and easily on the needle, and aim for about a needle's width of space between each cast-on stitch.
- For a very stretchy cast-on space the stitches further apart.
- For looser stitches that are easier to knit into on the next row, try casting on with a larger needle, or both of your needles held together.
Also in Journal


20 Years of Ysolda Knitting Patterns: Part 2
June 2025 marks twenty years of designing knitting patterns for Ysolda. In this blog post she picks her favourite from each year for 2015 to 2025,
Read More


20 Years of Ysolda Knitting Patterns: Part 1
June 2025 marks twenty years of designing knitting patterns for Ysolda. In this blog post she picks her favourite from each year for 2005 to 2014.
Read More
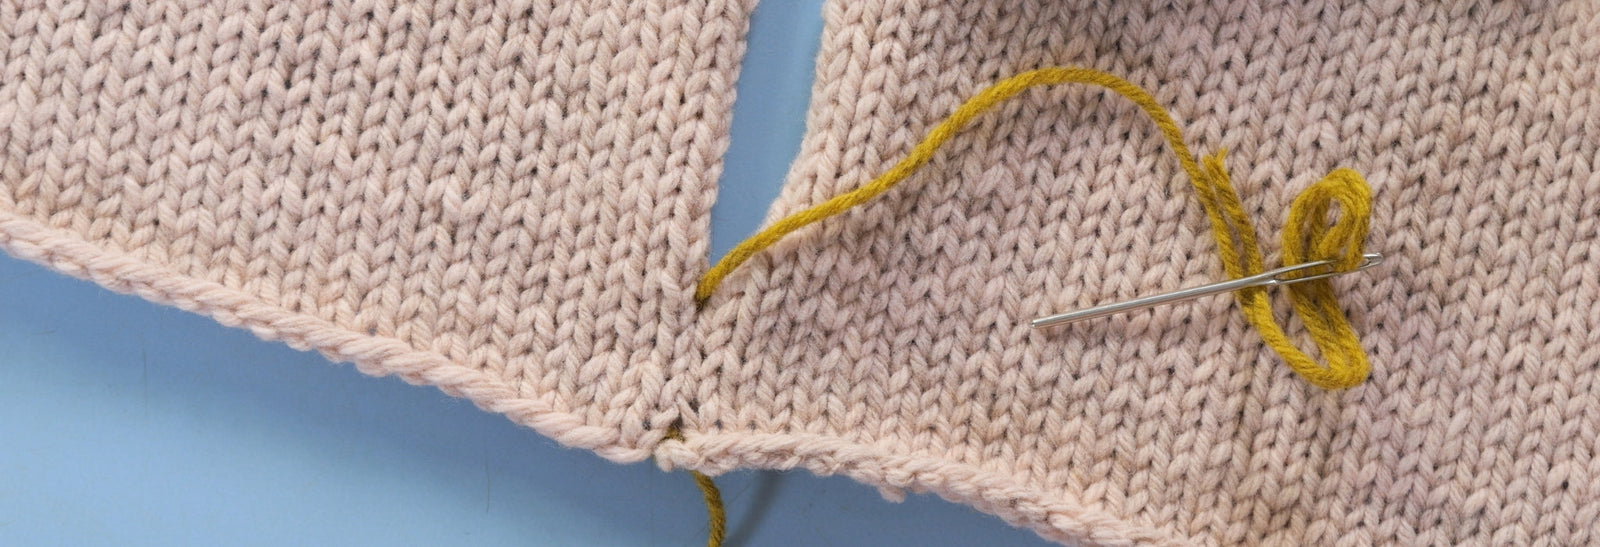

Learn to Knit: Mattress Stitch
By following our step-by-step mattress stitch knitting tutorial, you'll learn how to make your seams look beautiful and how best to prepare your knitting so that when you seam it with mattress stitch, it goes smoothly on the first try.
Read More
